When I started becoming computer literate in the early to mid-2000s, a thing I noticed quickly was how many clever and funny images existed on the Internet, created using what seemed to be Adobe Photoshop. Of course, my young enquiring mind needed to know how to replicate these images with my own personal touch, of course.
I wanted to be able to take images of my favorite video game characters and blend them with other characters to give an absurd but amusing effect. It was a chance to flex my creative muscles instead of doing math homework.
The only thing was that I quickly found out that Adobe Photoshop requires you to pay for it. I don’t know about you guys, but when I was in middle school, I barely had $20 to my name, (on account of spending it on candy and video games), so finding this out was heartbreaking.
But I soon found out from a close friend that I could do similar image manipulation and drawing in a different program. One that was FREE.
This was fantastic news. Free? Was there any better word to my 13-year-old ears? I could make funny images with NO financial investment whatsoever? Now we’re talking.
He directed me to GIMP, which I was extremely skeptical of. Why would anyone allow for a Photoshop-like program to exist without pay?
It’s an aim that the developers, along with a revolutionary computer activist, had with its creation. But either way, I was satisfied. I could finally put Mario’s head onto Master Chief’s body with stunning, realistic flair.
What Is GIMP?
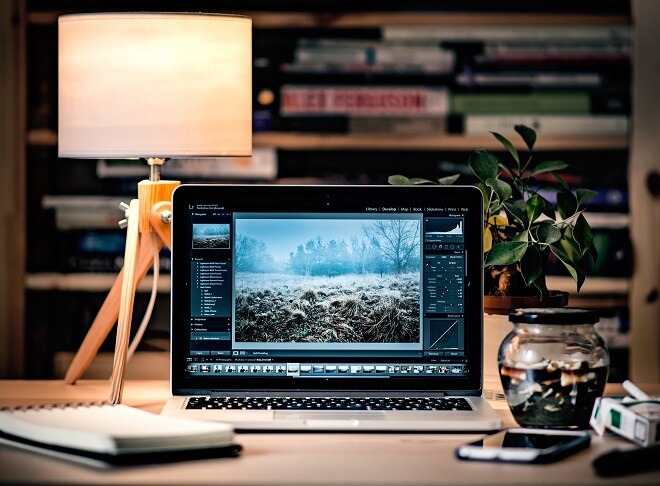
What can you do with GIMP?
GIMP is a free image retouching art software program in which users can edit photos, draw their own unique work, and basically get many of the same features from Adobe Photoshop for no cost.
GIMP stands for GNU Image Manipulation Program and deals in all of the different image formats that you’d be familiar with. These include XCF, JPG, PNG, GIF, and TIFF.
GIMP was released in February of 1996 by Peter Mattis and Spencer Kimball, making it a long-lasting, celebrated piece of software that artists and image manipulators have used for well over two decades.
Developers Kimball and Mattis had actually developed GIMP from what was a college project at UC Berkeley. Movie fans immediately will recognize the reference to the minor character in Pulp Fiction.
After meeting with free software visionary Richard Stallman, the two developers finally got GIMP to GNU, a movement for all developers and computer users to make, use, and distribute different pieces of software for free, creating an online sharing community.
After GIMP hit the online market, Kimball, and Mattis, now known as the GIMP Development Team, have been reliably cranking out major updates regularly since the mid-1990s. Since then, GIMP has been ported to many different systems, allowing nearly any computer user experience free image manipulation software. They’re into their GIMP 3.0 build now and are always updating.
Before You Start With GIMP
Okay, now that you know a little more behind the curtain, let’s get down to the important stuff. Is GIMP good for beginners? Yes, absolutely.
It can be a valuable first tool that budding artists use before moving onto more complicated programs, giving you an even better reason to get started with it. It can be intimidating for first-time users of Photoshop trying to navigate layers and more, so finding an alternative is much needed.
It’s a fantastic alternative for artists who are just beginning before they perhaps move onto Photoshop for their professional career.
Getting Started (Installing GIMP)
Once again, GIMP is completely free, so head on over to the downloads page on the GIMP website. On this page, you’ll be treated to the many different versions you can download GIMP in. You’ll then see a banner listing the different operating systems you can download the program into. These are GNU/Linux, OS X, Microsoft Windows, and All.
You can then download either through BitTorrent or download directly through your browser of choice. Let’s take a look at the Windows version for our install example.
- How do I use GIMP on Windows? To use GIMP on a Windows platform, all you need to do is go to the GIMP website, go to ‘download,’ and find which version fits your system the best, and simply go through with the download.
- GIMP is supported on Windows 7 and above.
- There are links to older versions of GIMP, (like 2.0), for those who felt more comfortable with older versions.
- You can install it in 18 different languages.
- After it’s done downloading through your client of choice, open the containing file and run the installer; it will automatically appear on your system after it is done installing.
Using GIMP
Okay, now that we have it downloaded to your system, let’s get a little familiar with the user interface and basics.
Image Scaling/Resizing
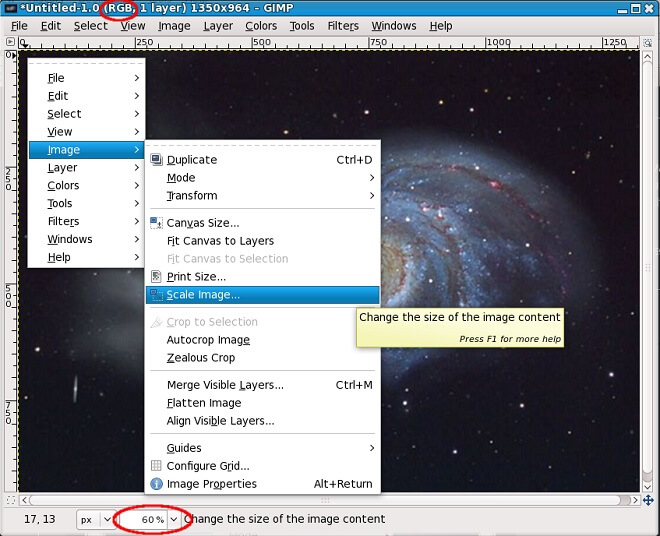
Luckily, image rescaling and resizing is a pretty straightforward kind of deal with nearly all computer software. With image manipulation, resizing and scaling is merely the way that you change the different dimensions of the picture to your desired measurements. It aims to keep the image ‘intact’ so to speak no matter what size you change it to. You want the quality to be the same, whether it’s 900 x 600 vs. 800 x 533.
File Size Reduction
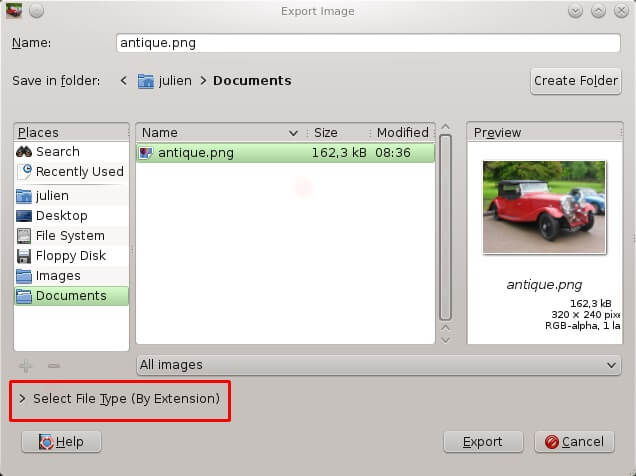
File size reduction is used primarily to save disk space when saving your work. If your project takes up a lot of space, it could potentially slow your system down, making working a slog. You can find this option as ‘Export As’ in the File menu. When saving, you are given a choice to reduce the quality to save disk space. Use the slider to your desired file size and export.
Image Cropping
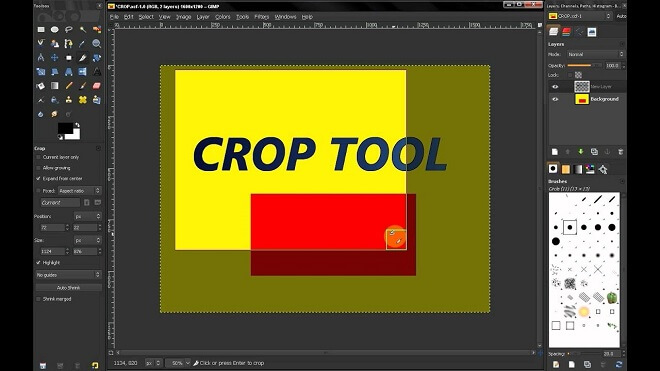
Image cropping is a universally loved and used tool in photo editing. It allows you to cut out certain parts of a photo for a better perspective, gives you a chance to get rid of unseemly or unattractive parts of your edits. You can find the image cropping tool under the aptly named ‘tools’ bar at the top. Scroll down to ‘transform tools,’ and select ‘crop,’ which should be the third one down.
Image Rotation
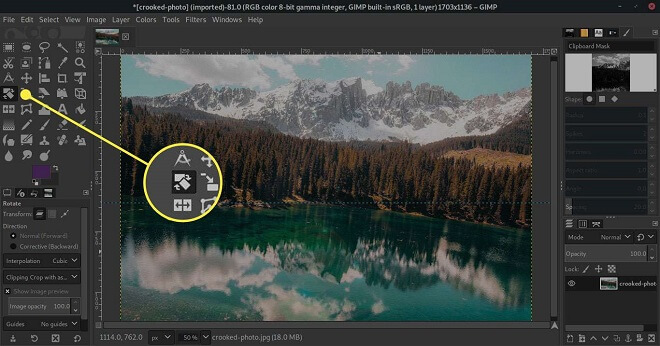
Rotating your image allows you to edit it in a new way, make sure all the dimensions are to your liking, or you could use it for fun. You can find the image rotation tool under the ‘image’ option on the toolbar at the top. Scroll down to ‘transform,’ and you’ll have multiple options to rotate the image in question. You have options like flip vertically and horizontally, rotate 90 degrees clockwise, and rotate 180 degrees.
GIMP Tips
After you get more familiar with using the essential tools and icons in the user interface, you should most definitely scour some tutorials to get a better hang of the program and its capabilities. But overall, let’s go down the list and see some important things to look out for in the GIMP user interface to make your artistic journey a little smoother.
Read the Tutorials
Luckily for you, there are tons of sites and documentation for new and old users of the program. The GIMP official site offers extensive documentation for those just starting out that are invaluable. This is one example where I feel incredibly confident that the official website might be the best tutorial available.
Of course, you will have YouTube videos with excellent advice and visual examples, but the GIMP Development Team has put together tons of different aspects together in one location.
I also recommend checking out videos like that of TechGumbo’s How to Use GIMP (Beginners Guide), in which he goes over a basic beginner’s guide to GIMP. He is an avid fan of the program, adding extra enthusiasm and know-how to using the free program.
Regardless, there is a treasure trove of free tutorials and resources for any artist looking to break into GIMP.
Use the Shortcut Keys!
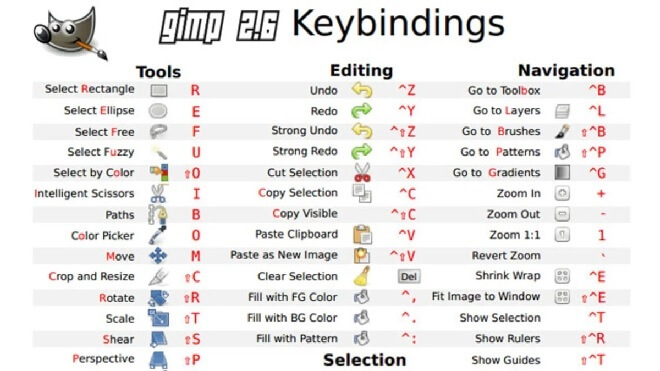
For gamers out there, you know how important reassigning the shortcut keys are for any RPG. Assigning your most powerful spell to your ‘3’ key is infinitely more comfortable than going into a menu, scrolling down, and clicking in manually.
It is the same case with image manipulation software. Why go through all the trouble of performing necessary actions by accessing the toolbar and scrolling down each time, especially if you have to keep cross-referencing something. Not impossible, but there’s always a more natural way.
Work smarter, not harder! If you reassign the shortcut keys, you’ll be making your life a whole lot more comfortable with the stroke of a few keys, instead of multiple clicks and drags.
Here are some shortcut key examples:
- Select All – Ctrl + A
- Color Picker – O
- Move – M
- Crop and Resize – Shift+C
- Scale + Shift+T
- New image – Ctrl+N
- Save image – Ctrl+S
- Save under a new name – Shift+Ctrl+S
Selection Tools
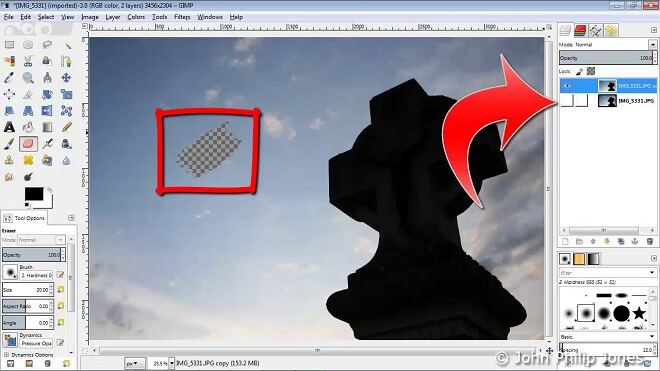
This is a tool that makes everything work. You select objects and everything else with it. It’s basically the universal layer editing tool in GIMP. They can be found in the drop-down menu ‘tools.’ You’ll see various options like ‘free-select,’ ‘rectangle select,’ ‘fuzzy select,’ and ‘intelligent scissors.’
These allow you to edit and manipulate different layers to your images in GIMP.
Transform Tools
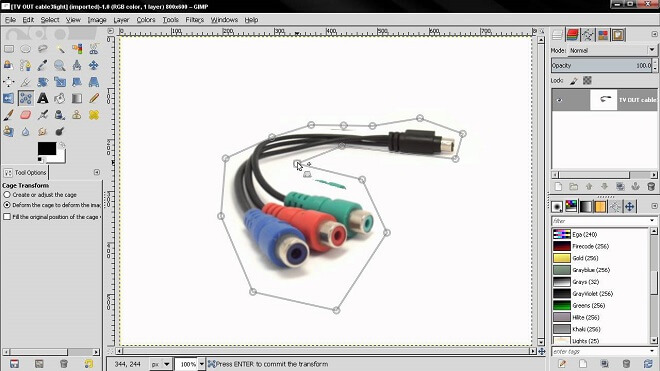
The transformation tools in GIMP are various. They allow you to, you guessed it, transform your projects in different ways. You can find these crucial tools on the bar at the top, under ‘tools.’ They vary from ‘move,’ ‘align,’ ‘crop,’ ‘rotate,’ ‘scale,’ and ‘flip.’
There are more, and they will most likely be extremely significant aspects of any projects you make in GIMP.
Resizing Images Without Losing Quality
This is crucial. Ever tried to resize an image, and it turns into a blurry mess, all pixelated and looking like it came out of the early days of the Internet?
In GIMP, all you have to do is open the image you’re working on or want to resize. Then you go to Image, then ‘Scale Image.’ This is where you enter the specified dimensions and resolution. Then, under the ‘quality’ section, choose Sinc (Lanczos3) as Interpolation. Then simply click ‘scale image.’
Viola, your image will now be immune to turning into a pixelated, blurry mess!
How to Resize Images in GIMP
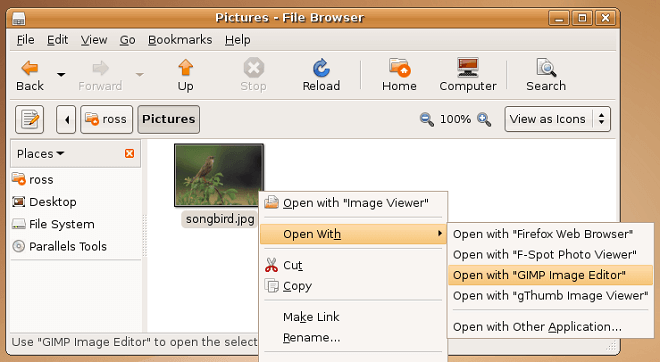
Resizing images in GIMP is very simple. Just like the option of resizing images without losing quality, you go into the drop-down menu, select ‘scale image,’ then choose what your personal preference is, select the Interpolation method, and click okay to implement your resize.
How To Tweak Photo Colors in GIMP
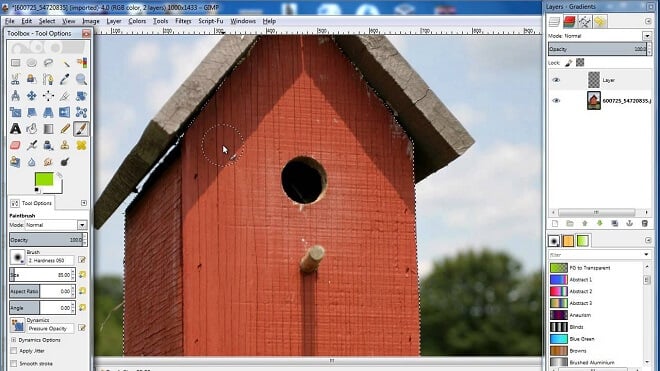
Sometimes you need to make those pictures have the right feel to them, and GIMP can do that. To tweak photo colors in GIMP, go to ‘colors,’ then ‘hue saturation.’ In this section, you will have selection over the saturation of the image. Make sure not to oversaturate your image, as it can look a bit ridiculous.
Part of being a good image manipulator is having the right ‘eye’ for saturation and colors.
Is There More Beyond Photo Manipulation?
Yes! GIMP is a fantastic image retoucher, but you can also create more advanced projects like animation, graphic design, and video implementation. This is just a testament to GIMP’s exceptional staying power and versatility.
Wrapping Up
Hopefully, that gives you a better feel for what you can do for free! Although Photoshop is a fantastic program and the go-to for all companies, both large and small, GIMP is a reliable option to choose if you are beginning a hobby or career in image and graphic design.
The possibility of an image program being free as opposed to Photoshop’s price tag can be daunting for many new artists. They want the best software (and who doesn’t?), but they need guidance, and maybe they aren’t sure that this is their path.
With GIMP and this beginner’s guide, we hope you can get a better idea about how image manipulation and retouching work. Get creating!
