History
The Blender game engine was released in 2000, developed by Erwin Coumans and Gino van den Bergen, part of the Dutch company, Blender Foundation. It was designed to bring a more natural way of developing games and animation to people who otherwise wouldn’t have learned how to.
After 18 years, in April of 2018, the Blender 2.8 Game Engine was officially discontinued by Blender Foundation. But luckily, Blender animation, Blender modeling, and more are still available in the Blender Suite of products.
What Games Are Made With Blender?
- GraveLife
- The Forbidden Relic
- Tesseract
- Pipe Pipe
- Terra Asteroid Express
- Nuke
- The Queens Workers
- Crazy Bomb Ninja
Blender is a completely free, open-source 3D creation suite. The official website says Blender is perfect for individuals and small teams alike. Part of the reason is that Blender supports the 3D pipeline throughout the entire creation process.
What does that mean? It means it supports all of this:
- Modeling
- Rigging
- Animation
- Simulation
- Rendering
- Compositing
- Motion Tracking
- Video Editing
- Game Creation
The fact that you can do all of this using Blender makes it valuable creation software. And since it’s free and open-source… the pot really can’t get any sweeter.
In case you’re unfamiliar with open-source, we’ll break it down for you. Open-source means you are completely free to change the code. When you download the Blender creation kit, you’ll get access to 100% of the code that is making Blender run. And Blender encourages you to manipulate it however you’d like!
If you’re a beginner, open-source code manipulation might not be on your radar yet, and that’s OK. Hundreds of other people around the world are constantly tweaking and developing Blender. Since there’s such large community involvement, the changes being made constantly lead to new features released to the masses.
Not to mention bugs are fixed faster and the usability is always getting better. So even if you don’t have any interest in tweaking the source code, you benefit from others doing it.
Blender is a cross-platform 3D development tool, so you’ll be good to go regardless of whether you use Linux, Windows, or Mac. If for some reason you have more specific computing concerns, check the supported platform database for a complete list of developer-tested computers.
5 Ways to Learn Blender
BornCG
YouTube fans, unite! Here’s a tutorial series put together by YouTuber BornCg. It covers the basics of the Blender game engine. The series starts with the bare-bone basics of using Blender, so you don’t need to have any experience with Blender prior to diving in.
You also don’t need any programming experience, as BornCG doesn’t use Python programming to teach you in his tutorials. This series has 22 videos in it, some are short, like under 20 minutes, others break the 50 minute mark. IT bounces around depending on the complexity of the topic he’s covering.
He also has a Blender 2.7 Tutorial playlist. This playlist contains 79 videos covering all kinds of Blender elements, not just game creation. So if you want to do more than just create a game, if you want to really learn the ins and outs of Blender and what the 3D creation engine can really do, give this tutorial playlist a watch.
This YouTuber has spent the last eight years teaching all kinds of people how to use creative technology. Sometimes he talks really fast through a string of 2 to 5 words and it’s hard to catch what he said. But his video is very clear so your brain will retroactively fill in what he says based on what he’s gesturing to in his video.
The majority of the time he speaks clearly, so don’t get turned off in the first episode. If you adapt your hearing for his speaking style and stick with the tutorials, you’ll be using Blender on your own in no time.
Blender Tutorials
What kind of free-to-use, open-source 3D creation engine wouldn’t offer a compilation of tutorials? Not the Blender kind!
In the support section of the Blender website you can find an FAQ tab, a User Communities tab, and a Tutorials tab. These three resources alone will provide you ample guided material and assistance to get started using the creation software.
The page has an Introduction for Beginners tutorial which links to a tutorial perfect for you if you want help even starting at the downloading stage.
Then there’s the link to Beginner Tutorials which has a hearty amount of tutorial lessons to get you up to speed and doesn’t coddle you quite as much as the “introduction for Beginners” tutorial. Also, all of the lessons from this tutorial are available for iPhone and iPad download.
It’s provided via Tufts University in the iTunesU store. Could be helpful if you want to learn on the go, or for the dual-screen interface opportunities.
There are many, many more tutorials in the collection the Blender community put together, so if you’re struggling with something specific be sure to check here. Modeling, shading and textures, rigging, compositing, lighting and rendering, dynamics and simulation, and more — it’s all covered pretty extensively.
Game From Scratch
Sometimes developers will use Blender to create a 2D or 3D asset for use in a separate game engine, like Unity.
If you have no experience with Blender and want to build a “low polygon full textured game model” then this is the tutorial for you. If you just want to use Blender to make game art right now, then you can start with this tutorial.
The only knowledge it assumes you have is knowledge from the prior section of the tutorial. You can confidently start with zero knowledge of this game art tutorial.
KatsBits
In addition to a fun name, KatsBits offers game design and content creation tutorials for Blender (and more!). There are tutorials that cover making a simple sword, creating double-sided meshes, simple map creation, and much, much more.
These are largely text-based tutorials with a healthy amount of images logically placed to help you navigate the tutorial.
In addition to helping you create content in Blender, these tutorials also teach the skills you need to create models and create levels in an optimized, efficient way.
The explanations are in-depth and cover unique, specific topics (Like “Make a Medieval Chair in 7 Steps). It’s worth checking out KatsBits as you gain more experience with Blender.
BlenderNation
This site is updated with fresh Blender news every day, and the site was founded over ten years ago. It’s no wonder, then, that the tutorials section has hundreds of pages worth of content for you to check out.
New tutorials are added almost daily.
It might seem like a lot to keep up with, but luckily for all of us, there’s a search function attached to the site. If you find a tutorial you like (there’s a cool speed-rendering of the WoW sword Frostmourne), you can search a keyword and have it pop up without navigating pages and pages to get there.
Or, if you’re looking for help on a specific topic, plug it in and see if any results are returned for you. Based on the scope of this database, it’s pretty likely that you’ll have some results returned.
The site is founded by the guy who ran the crowdfunding campaign to open-source Blender, so you know he’s coming from a passionate, dedicated place.
Tips To Use Blender (For Beginners)
Installing Blender
To install Blender, you first need to choose which system you’re downloading it for. It comes for Windows, macOS, and Linux. From the site, determine which system is yours, and click download to get the most stable release. Save the file and run the installer and voila!: you are now the owner of Blender.
The Interface
The Viewport
The viewport is the main window you’ll be seeing the Blender basics through. It’s the main control bar specifically for 3D actions and animation with the engine. From here, you can see nearly everything you need to get started.
The Properties Tab
The properties tab includes ‘item,’ which transforms active objects; ‘tool,’ which shows the active tool; and’ view,’ which allows for more customizable and more specific options when viewing your project from different perspectives, focal points, and more.
The Timeline
The Timeline is the editor which allows the user to manipulate keyframes and customize animation length. The Timeline comes with a ton of variety in terms of video customization and how the user can manage the videos and frames on their project.
The Outliner
The Outliner is your basic outline of all of the nitty-gritty going on in your animation. It’ll appear on the left-hand side, and have your assets, Timeline, and other scene aspects listed.
Modeling Basics
Edit Mode and Object Mode
These two options are found in most software of this type and allow for the selection and various editing of a particular object.
Vertices
The vertices options are many, and allow you to edit nearly every aspect of how vertices appear and act. You can do this by using extrude vertices, bevel, connecting vertex paths, blending from the shape, hooks, and smooth vertices.
This option allows for extreme customization of where points and curves intersect.
Edges
Like the vertices options, the edges options are many. The main options are to extrude, bevel, bridge edge loops, screw, subdivide, rotate edge, edge slide, and examine the edge data. With this tool, edges will look as clear and defined as you can make them.
Faces
The faces refer to the faces of the shape or object. This option list has even more ways to edit. You can insert, extrude, fill, grid fill, weld edges to face, shade, smooth, and even more. This allows seamless integration with the flat face of an object to the different vertices and edges.
Modeling Basics: Edge Loops, Beveling, Extruding
These are the essential tools that allow you to manipulate the models in Blender.
Modifiers
Like many features, the modification of your creation is varied and has a ton of potential. Using a modifier does just that.
Materials and Textures
These are your necessary materials and textures that you can add to your creation. There’s a lot to choose from here, so make
HDRI Light
This is a High Dynamic Range (image). It allows for better and more impressive lighting to be added to your finished creation.
Camera
This is the perspective of your creation, and it matters a lot how your project is viewed through the symbolic lens of the camera. Perspective is everything, and you want to tap into your inner director and create the perfect camera angle at the right time.
Rendering and Saving Your Image
You’re all done! Rendering and saving your image is a process where you save your project, and it compresses the file format of your choice.
Modeling For Beginner Blender Artists
Model A Bicycle For Better Proportion Practice
By practicing proportions, the user can better realize the extreme of what they can do. An exciting way to do this is by modeling a bicycle in Blender.
Modeling a bike allows for the user to realize that all of the bits and pieces need to be proportional and in proper scale for them to look right. This goes further by illustrating how a human shape will look upon it, and you’ll know if you made it to proper size if everything looks normal. If it’s not in proportion with your human model, you know you’ve goofed up.
A Blender Kitchen
Now to build an environment, an interior to be more exact. A kitchen contains explicitly so many objects that require their own attention that the kitchen effectively turns into a testing ground of creating objects and solving problems to make them all proportional and correct. From forks to cabinets, each object is completely unique and requires a special touch to bring to life.
Character Base Mesh
This is especially important for the Blender character modeling beginner. Although characters seem simple, you’d be surprised how daunting creating one can be for the first time.
Building a mesh is one of the first steps to actually creating a modeled character. You start out with a cube. Think of art classes and how you’d draw a face; you start with an oval and add detail from vertices and lines. Same thing here!
You need to take advantage of all of the fantastic edging, face, and vertices tools to build up your character mesh. Do this by extruding arms and legs, and generally experiment around with it. Remember, it doesn’t need to be perfect!
5 Tips For Learning Blender
Watch Tons of Tutorials
I can’t emphasize this enough. Watching tutorials really illustrates in your mind what’s possible in Blender. Luckily for you and your curiosity, there are a ton of videos dealing solely in Blender 2.8 tutorials. Watching videos can show you the interface, the way the program responds, and more. Visual learning, for many, can be the key to success.
C’mon, Challenge Yourself!
Going outside of your comfort zone is really uncomfortable, but if you’re to grow as an artist and creator, you need to do it more often than not. Challenging yourself when using Blender can be a gratifying experience. I guarantee that you’ll be surprised at what you’ll accomplish if you push yourself just a little further than you’re familiar with. Try it!
Practice, Practice, Practice
I know it’s pretty cliche, but there’s a reason it’s a cliche! Practicing anything will familiarize it and make you more comfortable with it. That especially goes for something like how to make animation in Blender. This goes especially for total newbies, as Blender can have a steep learning curve, so practicing projects regularly is vital.
Please, Be Patient
I’m sorry to tell you this, but you’re not going to make the next big technological marvel overnight. To do a fantastic project that harnesses everything that Blender has will take time, effort, practice, and determination.
When pushing and challenging yourself, you may become frustrated and angry, but please be patient. It doesn’t happen overnight! Just keep practicing, keep watching videos, and keep plugging away.
Look for Feedback Outside of the Community
Although the community is a great place to bounce ideas off of and receive encouragement, it’s essential to diversify your viewing audience. Show other artists and designers in different communities to see what they think of your work.
Blender Tutorials To Improve Your 3D Skills
Free Assets
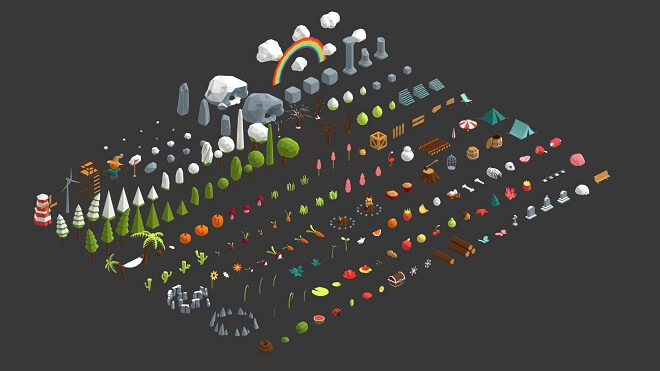
Here are some fantastic Blender free assets for you to enjoy and get started with.
- Blender Free 3D Models – .blend download
- Free Blender Models – Download blend Files
- Free Blender 3D Models
- Popular Blender 3D models
Animation
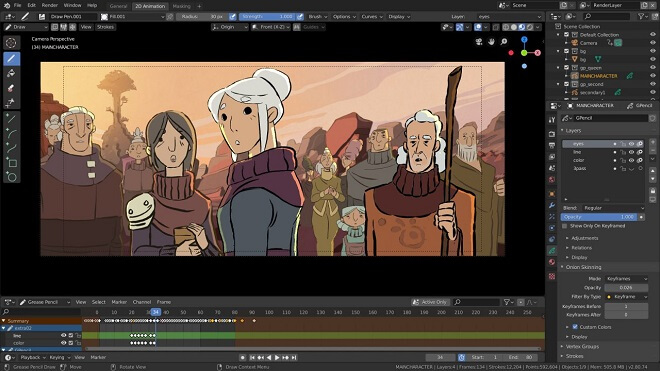
Drawing 2D Animation in Blender 2.8
Multi-frame
Multi-frame is a process of editing multiple frames at one time. Talk about useful! This saves a ton of time and energy that would typically take double the time and be an annoyance.
Modifiers
You have a ton of modifiers at your disposal, like hook and simplify. These modifiers allow for some intensive editing and tooling around, making your project more dynamic and comprehensive.
VFX Light
Lighting is arguably one of the most critical aspects, aside from the actual models and scenes. It proves to be challenging in certain circumstances; that’s why Blender made it easier and more accessible to add VFX lighting.
This allows for individual objects to enjoy their own lighting effects by affecting other objects or scenery. This is great for experimenting.
Build Modifier
This feature allows us to animate the drawing strokes’ implementation, much like the other 3D tools.
Simplify Modifier
This is essentially something that ‘cleans’ up the image. This simplifies more complex edges and faces, allowing for cleaner and more efficient looks.
Offset Modifier
This allows for amazing customization, as the offset modifier allows for specific modifying of certain parts of the drawing without affecting other areas, much like the VFX lighting.
Shader FX
Shaders and shading are essential in animation and drawing. This adds depth and variety to your creation.
Mixing 2D & 3D Animation in Blender
Multi-frame Editing Fall-off
Start of a Project
This might be the most challenging aspect, especially if you’re having a mental block of sorts. While very exciting, it can also be very intimidating. Don’t be scared! A good exercise is to imagine the final scene, then go backward. How did you get there? How did the scene transform into that last shot?
Advantages of Grease Pencil
Grease pencil is perhaps overlooked a bit. It allows you to seamlessly draw 2D aspects directly into the 3D world. This saves a ton of time and energy best left for creating the rest of your assets and scenes.
Color Palette
This is your choice of colors that you can use in your drawing and animations.
Composition
In art, especially photography, composition when it comes to positioning and lighting is paramount. The same goes for Blender animations and projects. Make sure you have your drawings and assets lined up and appropriately lighted for the best effects.
Transitions Between Frames
There are so many different transitions available to you. You have things like fade in, fade out, fade to black, and more. Experiment with everything to see what and what doesn’t work for you and your project.
Educational Materials
Keep in mind that there are many different youtube videos and documentation for you to peruse at your own pace. I highly recommend doing so.
Editing Videos in Blender
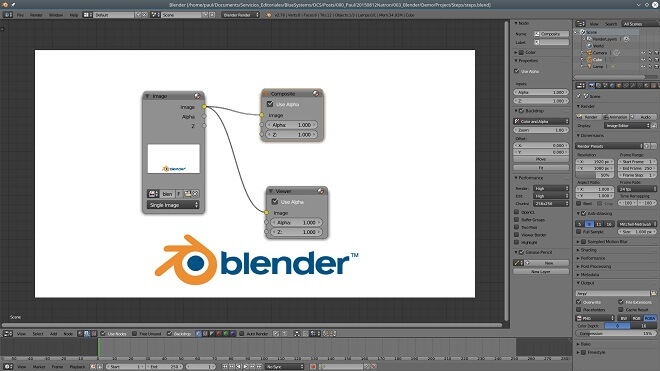
Before we go through the basics of editing videos, be sure to watch this fantastic Blender video editing tutorial.
Setup the Interface
After setting up Blender once installed, get familiar with the user interface, as it’s key that you know all of the bells and whistles of the engine.
You have multiple options to choose from.
Add a Video Strip
Drag and Drop – drag and drop is the bread and butter of Blender. You simply use the drag and drop-bar to drag and drop what you want to use and possibly get rid of.
Play
This plays your creation from beginning to end.
Move / Cut a Strip
Move – move a strip allows you to, you guessed it, move the selected piece to wherever you want to on the Timeline.
Cut
This allows you to cut and edit a piece of animation or video.
Save Your Movie
Save Your Project
Save, save, save! This helps you save your project for export and picking up later.
Set The Duration
Set the overall duration of your project.
Render Your Video
This puts your video through the renderer, allowing you to eventually export your project. This can take varying times to complete, entirely dependent on your video quality and length.
Reset the Sequencer
This resets the entire sequencer, allowing you to start over. Be sure to save beforehand to avoid losing work!
Keyboard Shortcuts
There are tons of keyboard shortcuts, and you’ll need to learn most of if not all of them to achieve master status in Blender. Some of these include:
- Split – K
- Separate Images – H
- Duplicate Strips – Shift+D
- Move/Extend from Frame – E
3D Character Modeling
Simple Character
Getting Started & Concept
You should have a concept down for whatever kind of character you want to create. If you recall our steps from beforehand to become better at using Blender, map out a simple, and even crude character mesh to get the character modeling process down to a science.
Scene Scale And Unit Size
For proper proportion, you need to set the scale and unit size. This defines a lot of what you’ll create later, so make sure that they are up to your personal specifications.
Scene View Controls
These controls let you see different aspects of the scene you’re creating.
Adding Objects To The Scene
Adding objects to the scene is a breeze with the drag and drop tool and the renderer.
Editing An Object’s Initial Properties
You can really go in-depth with property management and manipulation. It allows for more customizable options.
Object Duplication
This duplicates the selected object and creates a perfect copy.
Basic Object Manipulation
Use the many object manipulation tools to basically move and manipulate character and character models.
Joining Meshes Together
Joining the meshes allows for the character to come together and actually resemble a character you are designing.
Using Layers
If you’re familiar with programs like Maya and Photoshop, you’ll immediately be familiar with layers. These allow for comprehensive and cohesive video and artistic editing and rendering.
Female Character Modeling in Blender
Setting Up the Image Reference
Make sure you have a good hold on the reference for what you’re building, as it’ll help you more.
Starting to Model the Face
The face is arguably one of the most essential features of your character. Make sure your reference is lined up perfectly with what you want to accomplish, and use beveling, rendering, and edge tools to better create a face that you can be proud of.
Blocking the Nose and Lips
Although these seem simple, it’s easy to overlook how detailed these two features of a face can be. Like with the rest of the face, take some time to bevel and edge the objects that’ll eventually be the nose and lips.
Source Code
The blender source code is highly customizable. It’s based on different programming languages like Python and C-like languages, like C++ and C#. Blender even offers an IDE editing tool for multiple platforms and builds, depending on your operating system.
FAQ
Is Blender Good For Beginners?
Yes. The consensus is that, while having somewhat of a steeper learning curve, many have learned and used Blender with no background in coding or development whatsoever.
How Do I Start Learning Blender?
Learn Blender by watching a ton of YouTube videos to work alongside and visualize, and maybe take an online course in Blender basics.
How Long Does It Take To Learn Blender?
It depends on your personal aptitude with
Does Blender 2.8 Have A Game Engine?
No. The game engine portion of Blender has been discontinued by the developers.
How Do You Use The Game Engine In Blender?
Yes. As of right now, the game engine portion of the Blender Suite has been discontinued.
Is The Blender Game Engine Dead?
Unfortunately, yes. Blender Game Engine was discontinued in April 2018. Not only that, but the Blender team made short work of removing all applicable and important files within the engine.
Is Blender Good For Animation?
Absolutely. Blender has a fantastic and in-depth animation section that gives beginners a way to animate like the pros.
What Can Blender Be Used For?
Blender can be used for a ton of different projects and creative endeavors. Before 2018, you could use Blender for game design, but you can still create fantastic videos, animation, 2D, and 3D drawings.
How Do You Use A Blender For Beginners?
Tutorials are your best friend here. You can find excellent documentation and help from the community and watch a bunch of YouTube videos dedicated to learning Blender and its variations.
How Long Will It Take To Learn Blender?
It depends on your personal skill level. If you are familiar with animation and rendering, it might not take that long to learn Blender’s intricacies. However, if you’re a total beginner, the learning curve maybe a little more complicated. NOT impossible, but you’ll need to lean on some resources to thrive as much as you can with the engine.
What Can You Create With Blender?
You can create intricate animations, video edits, and 3D and 2D models.
Is Blender Animation Good?
Very good. This is a robust animation tool that any animator worth their salt should check out when they get the chance. Plus, it’s free of charge.
Is Blender Really Free?
Yes, Blender has been officially announced as being completely free, forever, by the developers.
What Major Companies Use Blender?
Blender has been used by Ubisoft and Netflix to make a film.
How Much Time Will It Take To Learn Blender?
Again, it depends on how familiar you are with animation and 3D software. Obviously, you’ll likely have no problems if you have a background in this stuff. However, you may want to brush up on some videos and tutorials if you’re going to learn it.
Is It Hard To Animate In Blender?
It depends on your personal skill level in animation. If you’re a veteran, you should be able to get through most of it with ease. Beginners will need some guidance, but it’s beginner-friendly.
What Is The Best Way To Learn Blender?
The best way to learn Blender is to basically do your homework. You can definitely do it on your own with some tutorials and documentation, but we recommend watching videos and practicing.
Is Blender Good For Video Editing?
Yes, it is. Blender offers a pretty in-depth video editing portion to its program. IT allows all of the basic necessities to create great video edits.
How Do I Edit Videos In Blender?
You need to access the video editor and use the tools provided. You first need to familiarize yourself with the user interface, then go from there.
How Do I Use Blender Video Editor For Beginners?
Check the tutorials! These are valuable resources that will show you step-by-step guides to starting your video editing journey.
How Do I Trim A Video In Blender?
You use the trim tool or drag and drop along with the video’s duration or Timeline.
How Do You Make A Video Using Blender?
You either upload an existing video of yours or create a project using Blender’s many tools.
Is Blender Video Editor Free?
Yep, totally free. It has been officially made free of charge by Blender.
How Do I Use Blender Video Editor For Beginners?
You can jump right in and experiment if you want to, but there are great resources and tutorials for you to check out.

