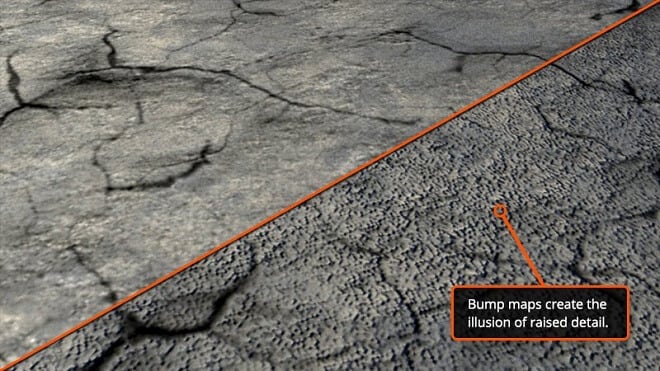
As games become more realistic, we are blurring the line between fantasy and reality. With each passing year, we see more and more impressive displays of graphical prowess. This is helped along in part by bump mapping.
This is the graphical technique of making objects appear to have their own distinctive features, (when they really don’t). For example, the raised ridges of a coin, or the gritty stonework of a castle wall all exhibit the telltale signs of impressive bump mapping.
Bump maps employ tricks of light, graphical processing, and more to bring realism to a game world.
Blinn’s Method: the Rise of Bump Mapping
In the late 1970s, James Blinn created what we now know as modern bump mapping. His invention gave the impression of a modified graphical surface without actually modifying the graphics at all.
Blinn’s method gave rise to realism and immersion in all of our favorite modern game titles.
Bump Mapping Basics

Bump Maps
These are the general tools to create raised textures in graphics.
What does a bump map look like?
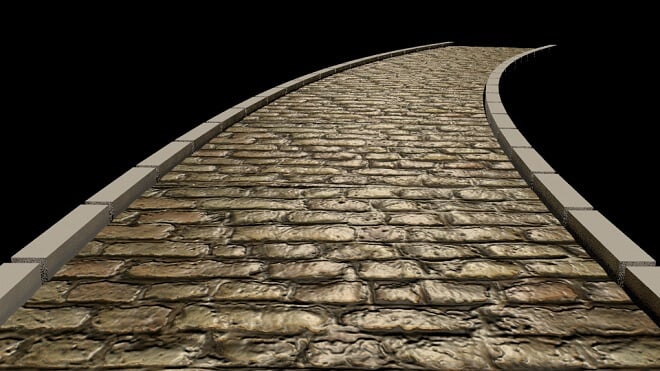
Bump maps eventually look like (ideally) a realistic surface. From brick walls to the surface of a moon, bump maps complete the feeling of realism and immersion.
How do you make a bump map?
Through Photoshop’s 3D filters, follow this process:
Filter > 3D > Generate Bump Map
This gives you a more detailed look at how to edit your future bump map.
Is a height map a bump map?
Not exactly. Where bump maps have angle information, height maps only have height information.
Normal Maps
Although this may sound like a graphical asset without texture, it is actually a more advanced bump map. It is a newer, more improved method of saving polygons while making an environment look fantastic.
How do you convert a bump map to a normal map?
First, you have to create/import your desired bump map as a paint layer in whatever program you’re using. Then, right-click and change it to a normal map through editing its coordinates and configuration.
What are normal maps used for?
They are used to enhance the look and feel of a certain texture in the game you’re designing or playing.
What is the difference between normal and bump maps?
They’re more or less the same. While bump maps only use greyscale, normal maps are more advanced and contain more information.
What is a normal map 3d?
A normal map is a more detailed version of bump maps, with more options and information than just a standard bump map.
Displacement Maps
Displacement maps are the counterpart to bump maps. They actually raise a geometric surface. It takes bump mapping a step further through its methods of taking the improved textures and actually adding detail to it.
This is extremely taxing on a computer’s hardware, so beware!
How to Make a Bump Map in Blender
Creating Bump Maps

Getting Down to Business
To start, know that creating bump maps on flat surfaces is ideal, and the easiest to do. You will be using the ‘Nor’ slider to refine our bump map. You will use this slider as an anchor to change the depth and the texture of the image.
Render Settings
Change the render settings to ‘End 40,’ followed by activating the ‘Do Composite’ options. Next, open EXR in the Format panel, followed by setting the x and y-axes of the size to 600.
Finally, you create a subdirectory by going to the output directory and renaming it to //BumpAnim/
Node Editor
Go to the Node Editor option, and select Composite Nodes. Next, simply click ‘Use Nodes.’
Make Realistic Water With a Water Bump Map
I always say you can determine the game’s quality by its water. That’s why you need to make it as realistic as possible!
You’re going to use three different principles: reflection, refraction, and depth. You render your map to these three aspects.
Then you perform the normal bump mapping options in the shaders, along with the inclusion of a dudv map. This dudv map gives us the reflection aspect of the water.
Once you complete these, your water is nearly complete. All you need to do is add realistic lighting.
Create a Brick Bump Map
Creating a brick bump map is pretty simple. Find an image of a brick wall. Save the file, then import it into the texture file in the program you’re using.
Create a Wood Bump Map
Creating wood is much the same process as the brick bump map. Find an image of wood grain, then apply it to the texture.
