Home Blog Page 15

How to Start Keyframing in Animation

0

Keyframing Techniques
Terminology in the world of animation and video editing can stop you in your tracks.

As you dip your toes in the industry, you will come across words like “keyframes,” which seemingly everyone talks about like they are immediately understandable.

Every video has a keyframe.

What exactly are they, and why are they so important to animators and video editors?

What Are Keyframes?

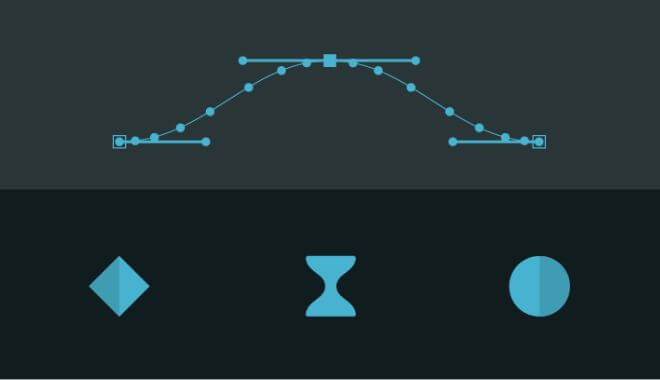
Every single shot in a video, whether live or animated, consists of individual frames. A keyframe is the most crucial part of each frame, as it defines the start and end points. It sets a precedent for all other transitional frames and indicates what the other frames would look like.

To put it simply, you can use keyframes to create dynamic videos and highlight essential elements. They make the production feel much more energized and look more polished and engaging.

The Origin of Keyframes

Keyframes were associated with animation long before digital video editing technology was developed.
For decades, animators used techniques like cel animation or stop-motion to create videos.

Hand-drawing cartoons are rather tedious and time-consuming. So, to save time, lead artists drew the “keyframes” or essential frames and left the transitional or less important frames for junior artists.

Keyframes in the Digital Age

Even with the most cutting-edge digital animation tools, lead artists still often just complete the keyframe and go back and forth to create the in-between shots.

And keyframes have become a critical element of video editing, as they define the shots to follow; it still dictate the start and endpoints. In the digital age, modern-day video editing is simpler than ever, and creating transitional frames is much different from what it used to be.

What Is Keyframe Animation?

Keyframe animation

Keyframe animation is the transition between two crucial frames. Think of it as the effect you apply between slides when creating a PowerPoint presentation.

This change in keyframes can be automated through presets in most editing software or applications, or they can be manually added to create a seamless transition.

Some of the common techniques include changes in magnification or scale, framing (moving the image within the frame), rotating the image, the color of the image, fading in or fading out, or a change to the audio.

What Are the Benefits of Keyframing?

As mentioned earlier, keyframing makes videos flow in a way that grabs the audience’s attention and makes the final product much more engaging.

Some of the biggest benefits of keyframing include:

Highlights Important Content

Zooming in on essential text, objects, or characters is a great way to highlight important information.

Creates Seamless Transitions

It ensures smooth transitions between frames, objects, and texts, creating a professional and cohesive final product.

Adds Zest

Keyframing polishes the animation, adds energy, and makes it look fresh and exciting. The dynamic transitions, motion effects, and overlays make the video much more fun to watch—something that is critical to a project’s success.

Moreover, the freedom to change effects every few seconds or for any duration you would like allows for a lot of creative flexibility.

Types of Keyframes


Keyframe interpolations or rate of change determine how an object will move or change in between frames.

There are three standard keyframes:

Linear

This is a good place to start if you’re new to keyframing. Linear keyframing refers to a uniform or consistent pace of transitions between keyframes. There is neither an increase nor a decrease in speed.

Continuous keyframe, a linear sub-category, is also quite common. As the name suggests, this calls for constant interpolations or transitions without missing a beat.

Hold

This is also known as the freeze frame, a popular effect seen in many old-school movies. As many may know, this keeps an object still until the next keyframe.

Ease

Easy frames are what most refer to as “motion effects.” They add flair to the final product by allowing motion acceleration and creativity, unlike linear keyframes.

The two common options are ease-in and ease-out. Ease-in involves an object starting with faster acceleration and slowing down once it reaches the ending keyframe. Ease-out is the opposite of this.

Characteristics of Keyframes

Note that there are different names for keyframing, so you may have to look for these functions depending on the software you are using.

When looking for a keyframe in a video editing application, check out the “Frame View” or “Action View” option in the control panel.

A bar with many “objects” in the timeline indicates a keyframe. Depending on the object you have added, you can customize transitions.

Some of the characteristics include:

  • Background
  • Position
  • Rotation
  • Opacity
  • Size
  • Text

All of these objects are highly customizable to achieve your desired results. You can change background colors, place objects in different places, change orientation, increase or decrease opacity, size up the objects, and even add text.

This explains why keyframing is such an essential aspect of video editing and animation.

Keyframing Animation Techniques

Let’s take a closer look at some classic keyframe effects:

Slow and Fast Zoom


Many video editors use this technique because it’s easy to integrate. This technique selects a spot where the frame needs to be zoomed in or out. Then, a keyframe is set on that spot and moves forward in the timeline where the frame needs to be zoomed in or out.

The process of zooming in or out is pretty much the same. The only thing that would change would be the effect’s time between the keyframes. Most experts recommend placing the second keyframe at least five seconds before the scene.

Rotation


With keyframe animation, you can also rotate video frames, images, text, graphics, etc. onto the keyframe. You can also refine the rotation and place it exactly where you want with the rotation tool.

Using “Anchor Point” will dictate where the rotation should begin and end. Playing around with the numeric values in the software will help you understand it so you can achieve the exact effect you want.

Title Zoom


Another simple yet excellent keyframe animation works similarly to video and image zooms—the only difference would be that it is specifically for titles. So, instead of scaling images, you’d be scaling the title up and down.

You can also customize the title’s position, opacity, and rotation—there’s a lot of scope for creativity and fun.

Tracking Motion


Some software offer in-built motion tracking effects. However, editing applications will have multiple tools to choose from for a more customized effect.

When looking at tracking motion, a box will appear on the screen on the frame. You can put any object that needs to be tracked and adjust it accordingly. Then, move the tracker and object to where you want it in the timeline.

Tracking motion can be added to titles, video clips, images, or even an effect (like blur, mosaic, or spotlight). Your title or effect will follow the object you tracked.

Remember, keyframes are automatically created when tracking motion. Double-clicking on the timeline’s newly added tracked object will help you see the scale and position keyframes created.

Text Pop


Keyframe animation is an excellent way to reveal titles or text creatively. You can simply add the text to the timeline, adjust the size, opacity, and color, and trim it where you would want it to appear and disappear.
The text will appear seemingly out of nowhere, like a pop-up.

Reveal Mask


You can use this setting to create a title that masks the video with a split screen.

Select the frame and where the title will mask the screen. Then, drag the tool to where the mask must split to reveal the frame. You can choose Object Settings to move the title anywhere on the masked area to hide or reveal the title as well. The options are endless.

Mask Object


Masks are used for many things, but their primary purpose is to cut objects out of the video and combine them with others. This technique is also known as compositing. You can be as creative as you want when incorporating keyframe animation. With a keyframe, masking would be static.

Most editing software have a masking designer with its primary tools. You can choose a predesigned mask or customize one to suit the object you wish to mask. Play around with different styles to create the exact effect you envision.

The actual process is different depending on the software, so giving yourself enough wiggle room and time to practice masking objects in various ways will help you in all your future projects.

Moving Lens Flare


This is a widely used keyframe animation technique that creates interest. Usually, this effect is seen under the “Effects” or “Lights Effect” tab. Under that, there are many lens flare options; simply choose the one that suits your style or the overall aesthetic of your project.

With the adjustment tool, the duration, timeline, and frame can be selected, rendering a moving lens flare effect that looks seamless. Experimenting with and adjusting the parameters will create different results every time.

Animated Light Rays


This effect creates streaks of light behind an object in the frame. The best part about this is that it is highly customizable—you can adjust the opacity of the light, its colors, the length and intensity of the rays, and more.

Click on the keyframe icon to adjust the duration and the timeframe for the light rays.

Can Keyframing Be Automated?

Keyframing can be a time-consuming affair. After all, getting the shot right and perfectly timing it to the frame that you want is no easy feat. A lot of technicality is involved, and some effects take a lot of practice to get right.

You can certainly automate keyframes with editing software, but it’s not that simple. The steps to automate keyframing may be quite complex, depending on the software.

Even then, you still need to specify the start and finish of the animation. These can be used in future projects as well. In some applications, these are known as animation presets.

How To Use Keyframing Animation Presets to Videos?

Presets are a list of existing effects, animations, and keyframes you can use in projects. These can be quickly implemented in a project, with a few personalized touches.

Applying keyframe animation presets is fairly straightforward. Some video editing software have these ready—all you have to do is apply them to the timeframe and make small modifications for a polished look.

Select the layer, frame, or property you want to animate to apply a preset to an existing video. Then click on the preset in the “Effects” and “Presets” panel; this will generally be under “Tools.”

You can also drag and drop the preset onto the layer or the timeline, but that would differ from software to software.

Finally, apply the keyframe preset and make small changes in settings to suit your needs and help you achieve the desired finish.

How To Create Personalized Keyframe Animations?

Most video editing software offer preset design templates and effects. All you have to do is adjust the duration of the effect within your frame. However, in some cases, a customized or personalized keyframe could be the solution to make a project interesting and unique.

Some of the software or applications that you can use to create personalized keyframe animation include:

  • PowerDirector
  • ColorDirector
  • Director Suite

Conclusion

So, as you now know, the keyframe is the main scene or frame of a video, while keyframing animation is the transition between two important frames. A keyframe defines the “start” and “end” points.

The concept was first used by old-school cartoonists, and to this day, it is used in modern video editing software. Video editing software can seamlessly integrate transitions or keyframing animations in between frames for a professional and highly engaging product.

There are many types of keyframe animations, each providing highly personalized options to make your project better. Objects, lights, text, opacity, background—everything can be fine-tuned for a cohesive output.

We hope this article has helped you understand keyframes, keyframe animation, and all that it entails.

Source:

https://www.fullharbor.com/blog/keyframe-essentials

The Journey of a Comic Book Artist

0

Comic book artist
Believe it or not, the demand for comic books, manga, and graphic novels is steadily increasing—beating mainstream books. The comic book industry is currently valued at $15.5 billion and is predicted to be worth a whopping $22.37 billion by 2030.

If you’re a creative person, love comics, and absolutely love drawing, pursuing a career as a comic book artist might be an excellent option for you. Admittedly, it isn’t the fastest-growing occupation but that’s typically the case for artistic fields such as this.

Onlinedegree.com pegs the annual growth rate for comic book artists at 3% while the US Bureau of Labor Statistics estimates the demand for craft and fine artists at 4% until 2032.

But if you’ve decided that you’re going to be the next Jack Kirby, Jim Lee, or Alex Ross, the journey of a comic book artist is an enriching, creative, and fulfilling one.

Join us as we take a closer look at what the role entails, how you can establish a niche for yourself, how to become a comic book artist and more!

What Do Comic Book Artists Do?

Creative individuals who make illustrations for comics or graphic novels are known as comic book artists. They create illustrations in a sequence so that they make sense and follow a narrative flow.

Comic book artists aren’t usually responsible for adding dialogue or text to comic strips, however, they must support the narrations they want to tell through illustrations.

Almost anyone can become a comic book artist but it isn’t easy to reach the top. Aside from drawing skills, you’ll need a solid portfolio, a knack for storytelling, and an ability to collaborate with others.

Comic Book Artists Who Changed the Industry

Comic Book Artists
From blockbuster action to comedy films, comic books have massively influenced pop culture. Today, everyone knows Marvel, especially when the company helped reignite people’s interest by producing a series of superhero movies that redefined the genre as we know it today.

Every new release has outdone the previous one in terms of box office numbers. In fact, Avengers: Endgame set the record for the highest-grossing film by earning an impressive $2.5 billion!

This wouldn’t be possible if it weren’t for the excellent work of comic book artists like:

  • Stan Lee
  • Jack Kirby
  • Steve Ditko
  • Adam Hughes
  • Joe “Joe Mad” Madureira
  • John Romita Jr
  • Will Eisner
  • Brian Bolland
  • Jim Steranko
  • Frank Miller

They managed to draw people of all ages and genders with their storylines, creating relatable characters and outstanding graphics.

Some of their celebrated titles include The Amazing Spider-Man Omnibus, Vol. 1, Mighty Marvel Masterworks: the Amazing Spider-Man Vol. 4 – the Master Planner, Thor: Tales of Asgard, Marvel Comics Library. Spider-Man. Vol. 1. 1962-1964, The Avengers, and Essential Iron Man – Volume 1, to name a few.

There are a plethora of comic book artists who are celebrated for their work. Now that you’re familiar with some iconic comic book artists, you may be wondering what sets them apart from cartoonists. The answer is simple.

Are Comic Book Artists and Cartoonists the Same?

Although comic book artists and cartoonists work in the visual arts and have similar jobs, their career paths differ.

Cartoonist

Cartoonist
A cartoonist usually creates illustrations on a single panel to deliver a message that’s political, humorous, and persuasive. Cartoonists also write their own text, so they must be capable of telling a story or sharing their views in the space of a few graphic boxes.

Usually, they create a draft and get it approved by the publication’s editor. Once they have the green light, they can start drawing. Cartoonists can find jobs in many industries, including entertainment, graphic design, publishing, and marketing. But they are most in demand in newspapers and magazines.

Comic Book Artist

Comic book artist
A comic book artist draws on panels in a sequence to tell a story. Although comic book artists do not write the dialogues, they work closely with writers and must have a sound knowledge of typography.

They create storyboards to narrate what a story would look like if it were in motion. Most comic book artists also develop a particular style to make their work stand out from the rest. You’ll most likely find professionals working with publications rather than other industries.

Do You Need a Degree To Become a Comic Book Artist?

Although you need to have knowledge about art, you need not pursue a particular degree or comic book artist training to become a successful comic book artist. As long as you know how to draw and use software, you should be good.

Many comic book artists study graphic design and animation to help them advance in their careers and create a solid portfolio. However, there are a plethora of self-taught artists who have made it out of sheer love for the craft.

This includes famous comic book artists such as:

  • Jim Lee
  • Todd McFarlane
  • Rob Liefield

None of them graduated from college but they learned on their own, practiced, and sought feedback from others in the industry.

So, should you consider going to art school?

It certainly won’t hurt, especially if you want to work in marketing or advertising sometime in the future. Having a knowledge of how illustration, editing, and graphic design software work and being extremely creative can take you a long way.

Software Used To Create Comic Strips/Books

Comic Book Software
Initially, comics were hand-drawn, but a lot has changed since then. Today, artists use more than one medium to achieve their artistry.

Consequently, this has made production more efficient, standardized, and easier to make. This also means that comics are more detailed than ever, improving the quality and overall feel of their work.

Some of the applications used to create comics include:

  • Adobe Photoshop, Illustrator, and InDesign
  • Clip Studio Paint
  • Corel Painter
  • Autodesk SketchBook

Skills Required To Become a Comic Book Artist

Comic book artists usually have a knack for story-telling. They also have knowledge about current events and pop culture. Here are other skills you need to master on your road to becoming a comic book artist.

Knowledge of Graphic Design and Illustration Software

Graphic design artist using a digital tool to draw a comic book character
Comic book artists need to know how to make their drawings come alive. Hence, they must be familiar with various visual elements like texture, color, dimension, scale, perspective, shade, composition, depth of field, proportion, and spatial awareness.

To learn the latest comic book art techniques and tools, you need a sound knowledge of graphic design and illustration software. Even if you like to draw old-school, many of today’s images are made or enhanced with graphic design software.

If you want to keep up with your contemporaries, you’ll need to know how to put industry tools to use.

A Strong and Original Work Portfolio

Original Portfolio
What are comic artists without bodies of original work? When you’re getting started, one of the first major projects you have to undertake is building a strong portfolio of your work.

Whether you’re looking for employment or someone to collaborate with, a portfolio that highlights your strengths is a great way to demonstrate your capabilities.

Choose pieces that best showcase your signature style. You can also include some experimental work to show your range. Additionally, companies appreciate artists who can work on multiple mediums. You might even add some sample layouts if that’s something you’re interested in pursuing.

As your work evolves and you develop your style, expect to keep updating your portfolio. Maintain a body of your work online and invest in a well-formatted website to make sharing and impressing potential colleagues easier.

Communication Skills

Communication Skills
Communication skills refer to your ability to create connections between images and the story you’d like to tell. It also means being able to effectively collaborate with others. Many successful comic book artists are good collaborators.

People like working with them because they can make appropriate suggestions and that helps them tell a compelling story.

Familiarity With Various Comic Genres

Comic books
As a comic book artist, you’ll likely be working on more than one project at a time. And not every comic might have the same genre or even artistic style.

For example, a superhero comic would not have the same style as a manga. Similarly, a detective comic would widely vary from a slice-of-life piece.

As a result, companies might want to hire someone who knows various comic genres and drawing styles when looking at potential comic book artists.

Storyboarding Skills

Storyboarding skills
Storyboards are a collection or an organized sequence of illustrations and graphics that narrate a story. Naturally, comics need to have a sequence in mind so they make sense to a reader.

Before creating a full comic, artists usually have to come up with a storyboard that shows the pivotal developments in a story. Once it’s been approved, comic book artists can then execute a more comprehensive sequence of panels that flesh out the entire story.

Typography

Typography skills in creating comic book art
Although comic book artists don’t add dialogue, they have to create typography for titles and such. As a result, assessing the type of typography that a genre, specific style, or comic requires can perfect a strip and make it look professional.

How Does One Become a Comic Book Artist?

If you want to join the likes of Stan Lee, Jack Kirby, Adam Hughes, and Joe Madureira, you’re probably looking at ways to upskill yourself and get hired as a comic book artist. Becoming a comic book artist takes persistence, commitment, and determination.

When looking at your portfolio, a publication will look at the following aspects to see if you have what it takes:

Technique

Comic book art techniques are different from those of a regular artist. This is what will set you apart from someone who doodles or paints. An artist who knows how to skillfully use shading, lighting, perspective, color, composition, and other elements is a strong candidate.

Knowing techniques like rendering, draftsmanship, drawing bodies, and expressions to accurately represent realistic body language and facial expressions is also valuable.

Storytelling

Remember, comics are stories, so a comic book artist should be able to tell a story through imagery. They should have the skill or imagination to turn any story into a comic. Any story should become visually appealing regardless of the genre (action, romance, horror, or comedy).

That said, not all comics can have the same style. You should be able to adapt various styles as each project comes along. Adapting to various formats with ease and having the ability to turn basic stories into compelling narratives is a talent very few possess.

Experience

Obviously, no one gets experience without working. But if you’re a beginner, you may want to begin working on your portfolio to showcase some of your best work. Work with different mediums, styles, textures, bodies, and expressions to show your range.

This can help a publication hire you as a comic book artist, even if it’s an entry-level job.

Tips To Get Started

Follow these tips if you want to make it as a comic book artist
It’s essential to get as much experience as possible in order to work with a publication. Here are some ways to hone your skills and show them off:

Start Creating Webcomics

Webcomics are posted online. They’re an excellent way to practice and showcase your work. This will also help you find like-minded people, be part of a community, and challenge yourself to try new styles. In addition, posting a webcoming can also help you get noticed.

Create a Portfolio

Create a portfolio. Showcase work that you’re proud of and show your skill. Curating a portfolio is the best way to represent your style and impress potential employers.

Start Networking

You want to branch out and meet people from the industry that you’re keen on working with. Consider attending comic book conventions or festivals. By doing so, you can meet editors and publishers that you can learn from and show your portfolio to.

There are at least a dozen major comic book conventions hosted throughout the country each year. Visit as many as you can. Get advice and feedback from experts so you can expand your portfolio and network.

Apply to Major Comic Book Companies

If you’re proud of your work and have an impressive portfolio, go ahead and start applying to reputable comic book companies. Although companies like DC, Marvel, or Dark Horse might be a little tough to get into in the beginning, other independent companies may be willing to give you a shot.

Even if you don’t get to work on a major comic book, you could have the opportunity to work on some out-of-the-box webcomics, graphic novels, manga, and anime which can help you build your portfolio.

These are some of the ways to get started on your journey as a comic book artist. While talking about a career as a comic book artist, we need to mention one of the most important aspects: the comic book artist’s salary.

What is a Comic Book Artist’s Salary?

Comic Book Artist Salary

A beginner or entry-level comic book artist could make about $29,000-$40,000 annually. However, this range depends on your skillset, geographical location, and education.

As you get more experience, an associate or senior could get about a 6-figure salary. Moreover, most full-time and freelance comic book artist jobs tend to charge per page. The average page could be worth between $100 and $300. Elite artists are known to charge as much as $1,000! Needless to say, this could be a lucrative skill.

Some artists also get back-end royalties on merchandise, trade paperbacks, and movie royalties which are more than generous. The paychecks are rather steady and the more experience you have, the better.

The Current Comic Book Industry

Before Marvel and DC decided to turn their most popular superheroes into box office hits, the industry had died down a bit and wasn’t as popular as before. Comic books that still rely on published volumes weren’t as saleable in the new era of digital media.

But thanks to the brilliant idea of movie production companies and comic book publishers, a new generation of readers is learning to appreciate classic comic book titles.

Today, the comic book industry is worth billions. In fact, many old-school comics are now considered “collector items” and re-sold at exorbitant prices. A man in Kentucky sold about 175 comics, including the first issues of Superman, Batman, and the Flash for $1.5 million.

So, besides getting paid for your artistic abilities, being a comic artist gives you flexibility while letting you unleash your creative side and become part of a legacy.

Conclusion

Becoming a comic book artist is perfect for creative people who love comics. Knowing about fine art as well as an understanding of storytelling, storyboarding, visual communication skills, and familiarity with comic styles and genres can certainly help you get one step closer to your dream job.

Additionally, creating a portfolio that showcases your best work and shows off your skills will also help you get noticed. That said, you should be realistic. Don’t expect to be poached by top firms right away. After all, there’s no harm in starting with independent publishers who have smaller projects.

Now that you have a deeper appreciation for what a comic book artist does and what it takes good luck! We wish you success and a rewarding journey.

Sources:

https://www.alliedmarketresearch.com/comic-book-market-A98892
https://www.bls.gov/ooh/arts-and-design/craft-and-fine-artists.htm
https://www.theverge.com/2019/5/5/18529601/avengers-endgame-marvel-disney-box-office-2-billion-worldwide

Image Sources:

https://katv.com/news/local/arkansas-comic-book-artist-and-creator-makes-a-name-for-himself-in-the-comic-industry
https://www.careers360.com/careers/cartoonist
https://edition.cnn.com/2022/07/21/entertainment/comic-con-preview/index.html
https://www.ziprecruiter.com/Salaries/Comic-Book-Artist-Salary

How to Build a Video Game Economy

0

Video game economy
Just like reality, games need an internal mechanism for the distribution of resources during gameplay.

This system is known as the video game economy.

The in-game economy creates balance within the game by enabling the player to earn and spend resources as part of the game’s progression.

A game economy design will differ from one game to another, but the core principle remains the same: it encourages users to play more by earning resources (like energy, gems, and in-game currency) and incurring losses, creating a loop of endless gameplay.

In the long run, this helps the gaming studio earn while encouraging players to keep playing.

How Does It Work?

Let’s use a farming game as an example. A player plants free seeds and after waiting a few minutes, the crops are ready to harvest. Once the crops are harvested, you “sell” them to customers or trade them with other players for other assets.

This action gives you access to more resources, like animals, additional farmland, buildings, etc., which will help you progress in the game. The currency or resources help you win levels faster and dictate your position in the game.

This in-game currency may or may not be connected to real-world money. But before a game can design an effective and well-structured economy, it has to define its currency.

How To Create a Well-Structured Economy

Gold coins
In order to create a game economy that’s functional and fun for the player, some things need to be established or defined.

Determining In-Game Resources/Currency

Using the same farm game as an example, games, seeds, animals, and buildings are assets. They indicate the player’s progression. On the other hand, the “coins” earned from completing tasks are a currency. They can be used for in-game purchases—like more seeds, animals, and buildings—or even for boosters.

In other games, your life or energy is used as “currency.” Anything that depletes quickly and dictates the game’s progression is the currency of the game.

Soft and Hard Currency

Soft currency can be found in games that are free to play. For example, players win a particular currency after they complete a goal or level. They use this to buy other resources, lives, or assets. In other words, they don’t require players to use real-world money.

Hard currency is more difficult to win, motivating players to spend more time in the game. Think of it as “diamonds” found in farming games. They’re rare, so to acquire them, a player would need to spend real-world money.

That said, some games will give you a small amount of hard currency to begin with. This will help familiarize players with the game’s mechanics, help them understand the benefits (like skipping wait times or levels), and entice them to buy them with real-world money.

Hard currency is usually available through in-app purchases.

Creating a Cost System

Players need to enjoy the game. To optimize this, a game designer would need to fix assets and other purchases at fair prices. Simply put, it is the process of determining how much everything costs.

For example, a farmer wins 100 coins after harvesting carrots. But would they receive 100 coins every time they harvest carrots? What makes them earn money? Those are some questions that help structure the point or cost system.

Understanding Sources and Sinks

Sources refer to currency earned after completing levels and other player rewards.

Meanwhile, sinks are moves implemented in gameplay to use up resources. For example, buying extra lives or boosters.

A well-structured game will have proportional opportunities to gain sources and sinks so that the game progresses and doesn’t end abruptly.

Defining the Progression

As established, the game’s currency can determine the player’s progression.

Depending on how the currency is designed to be earned, a game’s currency will either encourage a player to progress or simply quit the game. So, determining the correct way to use the currency is essential.

A game can have a perfect economy, but if it isn’t very interesting or fun, players will not play the game or buy resources. On the other hand, a video game can have an attractive design, but if the levels are too easy and there are no in-app purchases, they may not be motivated to play enough.

Similarly, if the game is too challenging and has no reward system, the player will give up playing.

Hence, it’s absolutely necessary to define the progression of the game. Most gaming studios incorporate primary and secondary goals. For example, after level 20 of playing the farming game, players gain access to a certain portion of the farm, get to mine gold, etc.

Balancing Deficit and Surplus

Just as progression is important to keep things interesting, balancing deficit and surplus is also vital. As levels progress and the surplus increases, the prices of resources and other in-game purchases should increase.

At the same time, the number of rewards decreases, creating a deficit and making the gameplay more challenging.

If a level gets too difficult, a player can use a booster with the surplus to pass the level. This obviously calls for meticulous planning, so balancing deficit and surplus becomes an entertaining challenge.

Video Game Economy: The Witcher

Defining Player Motivation

Not every player engages in games for the same reasons. Some may be looking for an immersive experience while others may be motivated by social connections. Similarly, some may want exclusive wins while others are highly competitive.

Understanding the game’s players and their motivations can help designers achieve the right economy while defining sources and sinks better. It helps create a cohesive economy that encourages players to continue playing.

Considering Player Behavior

Many casual players want to kill time and may not be actively seeking validation or rewards. Such players may not be too excited about spending their currencies on resources or boosters, thus ending the progression of the game.

On the other hand, there are those who heavily engage in games. They tend to play continuously and go through many levels at a time. To ensure players aren’t passing levels effortlessly and ending the game too soon, gaming studios can create hurdles, such as a time frame block, limited lives, or periodic rewards.

Test Before Anything Else

Building a game economy calls for many iterations—that’s a given. However, it’s essential to test the game economy. All your efforts will be in vain if the player does not behave as predicted.

Some of the factors to pay attention to when designing a game economy are:

  • Initial currency (how much currency a player will start with)
  • Periodic rewards
  • Rest time (lives and energy)
  • Costs of lives or energy
  • Cost of progression
  • Rewards and how they will be distributed

Testing your game economy allows you to troubleshoot how it works while ensuring that it is playable, fun, and easy to grasp for the gamer.

Designing the Perfect Game Economy

Designing a perfect video game economy
A well-designed economy makes for a fun game. It can help game titles rocket to success and become popular. Albion Online, RuneScape, EVE Online, and Guild Wars 2 are only a few examples of beloved games that continue to be relevant thanks to their in-game mechanics.

If you’re wondering how to create the perfect game economy, here are 5 tips that can help.

Start With a Positive Balance

No game should start with zero currency. It would be too discouraging and won’t leave the player with the opportunity to progress.

As a bonus or gift for playing, reward your players with a somewhat hefty currency at the start. This practice will draw in “collection-hungry” users as it nudges them to play and spend resources to advance.

Entice Gamers

If a game starts with an in-app purchase at the very beginning, players might not be motivated enough to want to continue playing. It’s essential to slowly, gently, and subtly introduce monetization opportunities.

When the gamer is completely immersed in the games and has shown interest in completing levels, you can introduce in-app purchases. Once they’ve taken the game for a spin and become more invested, they’re more likely to make a purchase.

Let Them Access More Than One Source and Currency

A game cannot have just one currency; it won’t be enough to motivate players. In fact, no player would want to shell out money every time. Instead, implement more than one way to earn resources.

For example, if a game has limited lives, a player can watch a 30-second to 1-minute ad to win additional lives instead of making a purchase. This will keep players motivated to continue playing and keep them on your app for longer.

Ads aren’t the only way to monetize games. Other options include in-game achievements and user actions. Striking a balance between soft and hard currency can make the gameplay interesting and keep the players enticed for longer.

Focus on Player Earnings

Who doesn’t love to be at the top of the leaderboard? Allowing players to win more resources keeps them hooked. The more options users have to win rewards and gain recognition, the more likely they are to play.

However, striking a balance is just as important. Players will get bored quickly if they get all the currency they want so set a limit and match the progression with the reward.

Make the Game Store Welcoming

Players need to be intrigued by what the game has to offer, so make the store welcoming. If done right, a player will repeatedly visit the in-game store to purchase assets with their in-game currency to enhance the experience.

One way to do that is by building curiosity. For example, certain items from the store are only available after a certain level, or certain items are only offered after a particular purchase has been made.

Ensure everything is not always available as it will discourage players from buying things. The store and its items may lose their novelty.

The Don’ts of Gaming Economy

game economy design
Just as there are best practices to follow in building a game economy, there are also a few things that you should stay away from.

Don’t Focus on the Sale

While having monetization options is important, don’t focus on the “sell” aspect of a game. Let the player build a base and earn enough currency in the game itself. Allow them to get hooked before introducing purchases.

Once players are loyal, it’s time to introduce in-game purchases and ads to drive monetization and increase sales.

Avoid Offering Unlimited Rewards

A game cannot keep giving rewards without taking anything. That will bore the players and affect the economy. Consider a “limited time” offer to keep players wanting more.

These goods or resources must have value or expiration over time, driving the players to purchase them via game currency, ads, or real money.

Don’t Focus Exclusively on Paying Players

Not all players who are interested in the game will be keen on spending. Always assume that approximately 95% of players are non-paying players.

In light of this principle, a game needs to find ways to award money even without in-app purchases, like in-game ads and game achievements. Consider smartly placed ads and offers to entice players.

Since some gamers may not know anything about in-app purchases, it’s essential to have these pop-ups placed organically so they don’t annoy users.

Conclusion

In many ways, the game economy is a lot like our economy in the real world. Although less complex, it follows the same principles. This involves the relationship between production, resource management, and the player’s money.

In some games, virtual currencies can be bought through real-life money and can impact a player’s progression in a game. In others, players have to interact with gaming elements and accomplish certain tasks before moving forward.

As a result, having free and unlimited resources isn’t ideal. Players must receive validation only after exerting some effort. A well-structured game economy pushes players to continue playing while subtly encouraging them to make payments through soft or hard currency.

A game economy designer will define the resources or currency, structure a cost system, define the game and player’s progression, balance deficit, and surplus, define player motivation, learn players’ behaviors, and vigorously test and implement iterations.

We hope this article has helped you understand what a game economy is, how to create one, and the basic dos and don’ts to follow.

Module 4: Designing vs. Programming (Lessons 4-5)

0

Lesson 4: Sound Engineer

Summary

In this video, we’re tuning into the world of sound engineers, the maestros behind all the immersive sounds and epic soundtracks in your favorite games. Join us to discover the art of sound design in gaming!

Lesson 4 Transcript

So now we’re going to talk about what a sound engineer is and what they do, because it’s not usually just going out and fetching sound effects and music and putting them in your game, although sometimes that is what they do because the sound engineer is responsible for everything you’re going to hear in your game.

But the sound engineer’s role goes way beyond that because they need to understand what emotion the game is currently trying to get the player to feel and align the music and the effects along with that. And that is a much harder said than done.

A good sound engineer is worth their weight in gold because the audio that the player hears in the game really enforces what they’re supposed to be feeling and doing and interacting with while they play, and it goes such a long way. Sometimes sound engineers will find sound bites online and use them just as they are.

That’s not a very common thing though, because they’re going to want to tweak it to fit exactly your game, whether that be changing the pitch, the length, reverberating it, or doing lots of other things. They have to fit it just to your game.

When it comes to music, creating music that is lable, that can play an infinite amount of times, depending on what the player is doing in the certain scenario is really hard, and they’re responsible for making sure that it functions well, sounds good, and doesn’t have any weird glitches when it’s looping between itself or other tracks inside of your game.

The sound engineer is crucial to having an awesome game.

I know for me, I often forget to add sound effects and music until the end, but every time I do, it just makes any game I’m working on. Whether it’s a small project or a large one, it makes it sound and feel much more like a game. So don’t forget, sound and sound.

Engineers should never be overrated because anybody can be one, but not everyone can be a great one. Up next we’re going to talk about the manager position.

Lesson 5: Game Manager

Summary

In this video, we’re getting to know the role of a game manager, the person steering the ship in the game development process. Join us to learn about the pivotal role managers play in bringing a game to life!

Lesson 5 Transcript

A manager in a video game company is a little bit different than a manager in say, a retail organization. A game manager has to make sure that they understand all of the roles that they have underneath them.

So that means having a little bit of experience in everything we just talked about. The more experience that they have in those roles, the better they’re going to be at facilitating communication between everyone and making sure that everyone stays on task because the manager has to make sure that the game is coming along at the right pace.

This can be really hard to do when it comes to coding and artistic endeavors because it can be really difficult to judge the time and the money that it’s going to take to do these things. But that’s the job of the manager. They have to make sure that the investment of money from wherever that came from and the timeline that was set up is being met properly.

A lot of times the manager is going to be the go-to between higher-ups who are funding it, depending on if you’re in a larger game studio or just the investment from people that paid into it. If you’ve got funding from an outside source or they’re just going to be someone who’s on the team that was dedicated to being manager and just saying:

Hey guys, we need to keep going. We need to drop this because it’s not essential and we need to focus on this because the game won’t run without it.

So sometimes the manager will have a specific role and sometimes they’ll just be someone on the team that is making sure everyone stays on task and works on the most important things first. So a manager is really important, kind of like the sound engineer.

Anybody can be a manager, but to be a good manager, they need to be able to listen and communicate in ways that people actually understand and respect.

It’s a very hard role to get right and a very easy one to get wrong. I’ve had really bad managers in my life and you probably have as well, although if not, you’ve probably seen bad management and thought to yourself, yeah, I could do better than that.

So that’s what a manager is in a games company. They’ve got to make sure the game stays on track and gets moving forward on the right timeline. And now we’ve looked at the most common roles in game development. There are still others out there, but for the most part, these roles are going to filter down into everything else that you do.

If you get into specific roles like UX, which is user experience, sometimes that’s going to be the artist or the game designer or the manager, making sure that those things fit in. You can hire specific people for very specific roles if you have a large company, but otherwise, these roles are going to be the primary ones that you work with.

And then everyone’s just going to pitch in and do what they can when it’s time for the game to get ready to launch.

And so up next we’re going to start working on our next game, which is going to be an awesome space arcade adventure. You’re going to learn a lot, and the game we’re going to make is really, really cool. I’m really excited and I hope you are too. So I’ll see you there.

GameMaker Studio 2 – Module 4: Designing vs. Programming

Module 4: Designing vs. Programming (Lessons 1-3)

0

Lesson 1: Game Designer vs Game Programmer

Summary

In this video, we’re breaking down the jobs of game designers and game programmers, showing you how sometimes, they wear each other’s hats, especially in small teams. Tune in to get the lowdown on who does what and how the designer and programmer work hand in hand to bring big ideas to life!

Lesson 1 Transcript

So as you saw in the last module, the roles of game designer and game programmer can very easily mesh together, and this is very true in smaller companies where the designer and the programmer might be the same person or the designer might help out in programming to help things continue along.

Now I want to take a moment and just try to pull those two apart and make sure that you have a solid understanding of the differences between the two. For the most part, the differences are pretty obvious.

If you get into a larger company, a game designer is not going to be the one programming, the programmer is going to be the one programming. But in a smaller space where you have just a few people, it’s still important to understand the distinction between them.

At the end of the day, the game designer is the one who is going to keep the game true to the vision, whatever that vision is, whether it be the game designer’s vision themselves, or it’s handed down to them, or they found it online and they’re just trying to do something, whatever the vision is, the game designer will make sure that happens.

The programmer is the one who creates it and then goes to the designer and says, Hey, is this looking the way you want? Does this function and feel the right way? The programmer will bow down to the game designer in terms of choices and decisions made.

Now, that’s not to say that the programmer can’t influence the game because, like I said before, everyone on the team is going to bring their ideas to the table and a good game designer will listen to their entire team, pull the best out of it, and that will make the game even better than if they were just doing it from their own head.

But those two roles can very easily overlap, and it’s important to understand the difference between them. Now in a game development team, there are lots of other roles as well. So far we’ve looked at game programmers and game designers.

Now I want to take a few minutes to look at the other roles that are really common. These are going to be short videos just to making sure that you understand what goes into making a game and when you’re working on a team.

The other roles that you might encounter out there if you join a larger company. So let’s take a look at those next.

Lesson 2: Game Artist

Summary

In this video, we’re shining the spotlight on the game artists – the magicians behind all the cool visuals in your favorite games. Tune in to get the inside scoop on how game artists bring worlds to life, from crafting enemies and players to designing menus and items, and how their roles can change big time depending on the size of the company they’re in.

Lesson 2 Transcript

Now let’s talk about game artists.

Game artists are the people who are going to create pretty much everything you see inside of your game. They’re responsible for enemies, players, items, menus, the gooey level, all of it.

The only things that artists traditionally don’t create are actually particle effects. So things in your game like fire, smoke, fog, things like that, that are dynamically generated.

Oftentimes the artists don’t do a whole lot, and that’s because the game engine themselves has programming that you can call on, functions you can use that will generate that kind of effect.

And it’s a lot easier because particle effects usually need to be dynamic based on where they’re hit or how they’re flying. So it’s a lot easier for a game engine to generate them and render them efficiently if it’s done with code. But everything else you see in the game is going to be by the artist.

The artist’s role will change wildly depending on the size of the company. So if you’re in a smaller company working by yourself or in an indie team, the artist is going to be responsible for making all of the game assets and probably just doing that.

There’s not going to be a lot of extra stuff that the artist does, but when you get into larger teams and big companies, artists are going to be responsible for all of the microtransaction items that you can purchase.

And that means that sometimes after a game gets closer to the end, the artists are going to be cubed off and just told to draw one thing in 20 different colors or minute differences so that they can be sold inside of the game.

And I say sold, but sometimes the game itself, you can purchase them with real money or it’s just in-game money that you actually earn by playing.

The difference is that it doesn’t really matter. But what I’m trying to say is that sometimes at a larger company, depending on the game that’s being made, our current era uses artists to just generate tons and tons of content that is very similar, that can be sold either in the game or with money.

And so the role of the artist there can sometimes be a little more monotonous and boring compared to a smaller studio where what they’re doing is actually bringing the game to life visually in everything they do.

They’re not going to spend a lot of time making extra content for little changes here and there. The things they make are going to be placed right into the game, and they’re going to be part of the core content.

And so a game artist is crucial for making your game come alive. The next role I want to talk about is level designer.

Lesson 3: Level Designer

Summary

In this episode, we’re diving into the world of level designers, the geniuses who take all the cool stuff game artists make and arrange them to build the stages and worlds you love exploring in your favorite games.

Lesson 3 Transcript

A level designer takes the art assets that the artist created, whether that be tile sets for 2D games or 3D objects for 3D games, and puts them in the level so that the player can move around and explore and do everything that they’re supposed to do.

Now, there’s a whole lot more that goes into good-level design than just putting objects or placing the tile sets so that they look pretty. We’re going to have a whole design talk on that later, so I’m not going to get into it now.

But the job of a level designer is to make sure that the level looks good, it functions well, that it’s bug-free, and that the player only goes where they’re supposed to go. So if a player is not allowed to go too far to the left or go outside of this area, they have to make it look natural.

Games used to just put up invisible barriers all the time, so you’ve probably seen that in older games that you’ve played. If you weren’t allowed to go somewhere, there was just this wall that you were not allowed to go past and it was really unnatural.

Now, level designers instead block it off in a much more natural way. They’ll place an ocean there. They’ll put a line of boxes or a steel wall, or they will just naturally curve the level to go a certain direction. That way you don’t even want to explore over there.

The level designer does all of those things and makes sure that playing the game in whatever level they’re on feels good and fits everything that it’s supposed to. Next up, we’re going to talk about the sound engineer.

GameMaker Studio 2 – Module 4: Designing vs. Programming

What Are Asymmetrical VR Games?

0

Asymmetric VR Games
Gamers are often forced to sit around while others play because of the lack of a joystick.

Not being involved can make you feel left out, which is unfortunately the case when several people want to play traditional video games.

Fortunately, advancements in gaming systems are helping solve this problem, especially in the field of VR.

Virtual Reality or VR is a simulation where you can see and interact with 3D reality as if you were actually there.

The computer-generated objects and scenery appear real, and you can engage with them directly.

VR-based video games are played while wearing a headset or helmet, not through a console or computer. As a result, only one person can play VR games.

The general consensus is that VR is even more isolating than regular gaming, as you’re tuned out of the real world once you put the headset on. And if you only have one VR headset at home, your friends and family can do nothing but sit and watch you play.

This is where asymmetric VR games (AVG) have changed the industry.

What Are Asymmetrical VR Games?

Friends playing asymmetrical VR games

Asymmetrical VR games allow games with and without VR headsets to play together. Those without headsets just need a secondary screen like a phone or PC. In simple words, players need not have a VR headset to play the game, which means multiple people can participate.

The gameplay remains largely the same, but there are small changes to accommodate multiple players and make it enjoyable for all. This is a great way to enjoy gaming as a group and engage with multiple people at once.

Popular games have adapted the asymmetrical format to be more inclusive and more fun. As a result, you’ll find a plethora of options for every group, irrespective of how many players or which type of game you’d like to play.

How Do Asymmetrical VR Games Work?

In order to play AVGs, at least one person needs to have a VR headset. After choosing a game, you need to select the multiplayer option to get started. Players without the VR headset must download the game app on their devices. Usually, mobile phones are the easiest option.

Meanwhile, the player with the VR headset needs to select the individuals they want to play with. As mentioned, although the gameplay would be the same, certain changes were made to accommodate multiple players.

For example, in Acron: Attack of the Squirrels, the Quest player plays as a tree demon, while other device players play as the squirrel.

Acron: Attack of the Squirrels

The squirrels have different professions and skills, and they must work together to distract the tree demon and move the acorns.

Asymmetric VR games need at least two players, with accommodations for up to nine players, including the one with the VR headset. Most of them show a different perspective and provide contrasting gameplay for those playing on secondary screens.

Some asymmetric VR games can also be played in one-person mode, while bots or AI mimic other players.

The Advent of Remote Asymmetric VR Games

During the pandemic, millions were stranded at home, all seeking entertainment and connections with family and friends on virtual platforms. This gave companies an excellent opportunity to experiment with remote asymmetric VR games.

This led to the popularity of remote multiplayer options. Players on secondary screens need not be in the same room as the player with the VR headset. This allows gamers to play, interact, and remain connected no matter where they are in the world.

And given continuous advancements in technology, asymmetrical VR games will be so much more than we had ever imagined.

Which Devices Can Connect To Asymmetric VR Games?

As mentioned earlier, non-VR players have a different point of view. Their devices are considered “social” or “secondary” screens. And any device with a screen can be a “social” screen, such as a desktop, laptop, smartphone, or any other mobile device.

Players on secondary screens can interact with the game in the traditional ways: through the touchpad, mouse clicks, and gestures (if on a mobile device).

So, as long as you have a VR device and people to play with, you can play asymmetrical VR games.
That said, not all games that can accommodate external devices are considered asymmetric.

For example, Keep Talking and Nobody Explodes require a VR headset and a printed sheet. Non-VR players instruct the one wearing the headset to deactivate a bomb. The game is chaotic, highly interactive, and fun.

Popular Asymmetrical VR Games

Takelings House Party

This VR game is based in Hal’s household, where Takelings interrupt his quiet suburban bliss. Hal (the player with the VR headset) is tasked with restoring his house by getting rid of the Takelings (players with secondary screens).

The game is free, and the Party Mode is available on smartphones (Android and iOS) and PCs. Up to eight players can play the game.

Do You Copy?

In this multiplayer asymmetrical VR game, you can play two roles: a hacker or a thief. As a hacker (without the VR headset), you must guide your accomplice to infiltrate a bank’s security, solve riddles, and look out for security.

Meanwhile, the thief (the player with the VR headset) must ensure they’re not caught while stealing the bank. The thief must move around in real life to hide, run, and stay off the radar.

This game requires a minimum of two players and is available on Windows, iOS, macOS, and Android.

IronWolf VR

This submarine playable is available as a single-player and co-op (roomscale). The game is fast-paced, as you must shoot down enemies, hunt convoys, and survive amidst chaos and bombs. It can be played on a PC or PlayStation.

Panoptic

Panoptic is a fun game where you and your friend will be pitted against each other. You can play the Overseer (with the VR headset) or Challenger (without the VR headset). The latter must tire out the former’s energy and blend into the crowd before it begins to attack.

The game requires two players. However, there’s no online multiplayer option available yet.

VR Tribes

This online game lets each player choose a tribe character, and each tribe must compete against each other to prove its worth. At the moment, the PC-only edition requires at least one player with a VR headset.

VR Tribes is available on all PCs and Android devices. It can also be played on LAN.

Besides these, you can also try games like Acorn: Attack of the Squirrels!, Keep Talking and Nobody Dies, VR The Diner Duo, and more. Before you decide to buy a game, make sure to check its device compatibility, how many people can play it at once, and the safety guidelines.

Conclusion

Asymmetrical VR games are multiplayer games that need at least one VR headset, while the rest use smartphones, laptops, or desktops. Sometimes, even a piece of paper will do.

It’s a great way to connect with your friends and family. You can avoid the feeling of isolation, as everyone can participate on their devices (the secondary screen) or take turns using the VR headset.

Moreover, most of these don’t require gamers to be in the same room to play together. People from all over the world can easily connect and play together as long as they have a device with a screen and stable WiFi.

We hope this article has helped you understand the value of these games and why they are so much fun to play.

Module 3: Attack of the Snake (Lessons 11-12)

0

Lesson 11: Game Difficulty

Summary

In this video, Aaron delves into the nuanced topic of difficulty in video games, emphasizing the role of a game designer in setting the difficulty level to align with the narrative and the intended player experience.

Lesson 11 Transcript

Let’s talk about the difficulty of video games. This is one that I’m sure you have your own opinion on because difficulty in video games is something that varies wildly depending on what you’re playing the preferences that you have, and sometimes just the mood that you’re in.

Now, there are games that range from very easy to very hard, and most of the time that is on purpose by the designer. Sometimes the difficulty of the game actually helps influence and tell the narrative that the player is supposed to be engaging with and responding to. Think of Dark Souls.

This is a game that is wildly compared to difficulty, but the thing is that the game itself, its story revolves around that. It is a dark and gritty world filled with depression after depression, and the game is supposed to be hard.

The designer and creator himself talked about how the difficulty of dark souls played into it, and that was his purpose from the very beginning.

(01:13)
So when a game’s difficulty is designed by the designer, that would be you when you’re making your own games, if you have it in mind to be one way, then in my opinion, that is the way it should be.

And you shouldn’t have to compromise by making easy modes, or even on the flip side, if you make an easy game, you shouldn’t make a hard mode just because that’s what people want.

Now, if you’re making a game that doesn’t matter. If it’s hard or difficult, then yeah, you probably want to include ways for everyone to be able to play it at their level that they enjoy.

But if your game is intrinsically tied to the difficulty, whether that be hard or easy, or if it’s supposed to just be right in the middle, then as a designer you need to stick to what you want to do.

(02:02)
The story, the game, and the experience that you want the player to have are the first and biggest concerns that you have as the designer. Well, I guess those are several different concerns, but you understand what I mean.

The overall experience difficulty plays into that. So difficulty in games is a very subjective thing. Some people like games that are really hard. Some people like games that are really easy. Some people don’t care, and they’ll just play everything that is suggested to them.

But difficulty in games, whether it be hard, easy, or right in the middle, is up to you as the designer. If you have an idea for something, stick to it. If it is to be as accessible as possible, then definitely add in those accessibility options, whatever those look like.

But that’s all I want to talk about on difficulty. You could probably have an entire course on difficulty and everything that

(02:58)
entails, but this is just a very brief discussion to get you thinking about it and to get you going where you need to be. So up next we’re going to talk about obvious game expectations and if you should subvert them, and then how to do that.

Lesson 12: Game Expectations

Summary

In this lesson, Aaron discusses the importance of meeting and sometimes subverting player expectations in game design, emphasizing the balance between conforming to familiar control schemes and introducing surprising elements to engage experienced players.

Lesson 12 Transcript

So game expectations are things that the player has when going into them. And when I’m talking about obvious expectations, there are things like how to use a controller, which buttons on the keyboard will probably be used if you jump or attack, what happens, and what they expect to happen.

Now, for the most part, these are things that are actually learned. They’re not things that are just innate. If you give a four-year-old or a 40-year-old who has never played a video game before, if you hand them a controller, they will not know what to do unless they’ve seen lots of let’s plays.

And in that case, that’s a terrible subject for what we’re talking about. But for someone who has no idea how to play a game, the fact that the space bar is traditionally jump or the A button is that’s not something that people who’ve never played video games will understand.

(01:01)
It could just as easily be the left trigger or pressing the right stick in to jump if that’s what they were told to do. These are obvious game expectations, and for the most part, it is best to conform to these.

There are games that really, really want to be unique sometimes in how they handle and how they work. And changing up the controls just makes it difficult and sometimes flat-out annoying for the player.

Now, if you want to try something and try altering the controls to do the best experience that you think you can provide, that’s great. Just make sure you have a way for them to change it. Go and look at all of the FPSs out there.

The first-person shooters. There are a dozen different control schemes if you’re using a controller, and that’s because there are way too many games that have tried to do their own thing.

(01:53)
Some of them have worked out and some of them haven’t. But the ability to switch between Halo and Call of Duty and whatnot and so forth is really, really helpful to the player.

The more options that they have, the more likely they are to find the one that they are used to and enjoy and actually be able to just engage with the game instead of trying to figure out what buttons they’re supposed to be pressing.

So that’s conforming to obvious game expectations. Something that is probably a good idea. But what about subverting those expectations?

This comes for people who already know how to play games, and this is something that you definitely want to use. So if in our game we have a character that cannot run around or shoot and jump, whatever the case is, if we press the jump button, we expect them to jump, and if we press the shoot button they shoot.

It makes total sense. And an experienced player will just do these things without even thinking, and that’s where subverting their expectations comes in. What happens if you change that jump button because of a power-up they

(02:58)
received? No longer are things going to work exactly the way they wanted or expected, but they’re going to be different.

If a game takes the usual approach to platforming and that’s going well and everything’s just fine, but then flips it on its head, somehow the player is no longer going to know what to expect.

And all of the things that they’ve done in the past for specific platformers, they now have to kind of unlearn because your game is doing something entirely different. Your players are going to expect something out of your game.

A lot of times you want to conform to those when it’s things like how a game controls and how to save and load those things. You want to be uniform across the games that are played. But when it comes to playing the game, subvert the expectations.

When a player goes in to talk to an N P C, make something crazy happen when they go check out behind a waterfall because there are always secrets there. Do something that surprises them.

Subvert the expectations of experienced players while conforming to the normalities of things that make the game easy to engage with.

It is difficult to achieve well, but when done, it makes your game easier to access for more players and it makes it more fun for the experienced players because there’s always going to be something new for them to discover.

Up next, we’re going to look at adding a score to our snake game.

Module 3: Attack of the Snake (Lessons 7-9)

0

Lesson 7: Randomness

Summary

In this lesson, we explore the role of randomness in games, distinguishing between input and output randomness. The discussion emphasizes balancing randomness to maintain fairness and enhance player satisfaction, sometimes even tweaking probabilities in the player’s favor to foster a sense of achievement and prevent frustration.

Lesson 7 Transcript

So what I want to talk to you about in this design talk is randomness in games.

Now we already implemented some randomness in our snake game, and I think that just makes it better. It’s more interesting and that way the game is more fun to play over and over.

But what kinds of randomness are there? Is it always good? Is it always bad if you’re a pessimist? And how often should you be using it?

So there are two primary types of randomness that are agreed upon in games, and that is called output randomness and input Randomness. Now, the two of them are kind of on a spectrum as they play with each other, depending on how heavy you use one over the other. But you can think of input randomness as the player has no control.

So if you’re starting a game where a map is procedurally generated like Minecraft or civilization, that is input randomness, you had no control over it, the name is kind of deceiving, you had no control over it, and now you have to deal with it.

(01:06)
You have to strategize around it. Sometimes the whole game is based around how you can deal with that input randomness.

And then output randomness, on the other hand, is when you make a decision that is not guaranteed, such as shooting in excom where you have a percentage or making a role where you play a card, and it has the ability that it might hit a player, a 50% chance.

That is, you are taking action and you have a chance to succeed. It’s not guaranteed. So input randomness, you have no say over the game, actually input it and do something and then you react to it.

Output is from us, the player. So those are the two types of randomness that you’ll find when you start talking about it in video games.

So is one better than the other, and is randomness good or bad in general?

(01:56)
And that question is kind of deceiving because depending on your experience and your feelings and how you like to play and make games, you’ll have different feelings about randomness.

And in some cases, you might not want any randomness in your game because it doesn’t call for it. If you’re doing a story-driven RPG, then you probably don’t want randomness in your game, or at least in the combat section because you want your players to always know that what they do is going to work.

But if you’re doing a strategy game or a game that involves a lot of luck, such as a board game where you have to roll dice, and things like that, then randomness is required.

And if you take that away, you take away a big part of that game. Now it’s not always a bad thing if you’ve ever played risk, you can understand the frustration of randomness when rolling dice.

Now you take that away and you essentially have the underworld another board game where it’s very similar to risk except that when you attack, if you have more

(02:58)
Troops, then you win. There’s no randomness at all. So taking it away can create something entirely new that isn’t good or bad either.

So using them is the key to it. Doing too much or too little one or the other can lead to a bad experience. So not every game needs randomness, but when you have it, you want to make sure that it’s fair to the player.

So a lot of times in games you’ll actually end up what is called, but in video games you’ll also often find that randomness isn’t actually what it says on the screen. You’ll often find that programmers actually tip it in the player’s favor.

So something that excom does is if you take a lot of shots and you miss them, it’ll actually make the next couple shots more likely to hit than what it actually says.

Because as humans, it’s really important for us to feel that the game is fair, which we’re going to spend a lot of time talking about fairness and what that is and how exactly to implement that in games.

(03:57)
But if we are supposed to make a hit when we take a shot in a game and it says 87% and we miss, that’s frustrating.

If we take another 87% shot and we miss again, then we start feeling like the game is unfair. So developers will often tip it in the player’s favor and make it more likely to hit if they’ve had failures recently.

So in that case, it’s not as much as a random as it is kind of cheating the system to make the game feel fair, but it still feels, or at least it looks random. And we’re much happier when we get that.

And a side note on randomness is that it’s always better to play into the player’s favor. So if you wanted to have a system where they make random actions, then it’s okay if you weigh it in the player’s favor because the player will always be happy if something works for them.

(04:48)
When it seems kind of risky, they’ll be much happier if that happens. And they’re not going to complain if they take a risky shot or they play a risky card and it pans out. That’s great. And that’s really all I want to say about it.

We’ve talked about it quite a bit and I think you should have a much better understanding of it now. Randomness can be great and if you want to use it, do it. Just make sure you test it out plenty before you ship your final product so that you don’t upset a lot of players.

In the next video, I want to have another talk about what makes up a game. What are the essential components to a game, and does the game we just made have that? Let’s talk about it next.

Lesson 8: What Is A Game

Summary

In this lesson, Aaron discusses the evolving definition of what constitutes a “game,” acknowledging the blurred lines between traditional games with set rules and win/loss conditions and modern, experience-based games that prioritize player engagement and exploration.

Lesson 8 Transcript

So here’s a question for you. What exactly is a game?

How would you define it to someone who has never played a game, not just a video game, but just like a game in general?

What are the requirements that distinguish a form of activity that is a game from not a game?

It’s kind of a blurry line and it’s gotten even blurrier in recent years with many games becoming more of an experience. Things that we thought were required to be a video game or a game in general. A lot of games have come out and said, no, we don’t want to stick to that.

We’re going to do our own thing. So you may have heard of some of these games. They are more experience-based. A lot of times there’s no combat.

Sometimes there are no real mechanics besides just moving around and reading things, and they can still be extremely engaging and fun to play.

(01:04)
So we have to broaden our definition of what a game is. It used to be that a game was something that you would play, had strict rules, you could win or lose, and then some other things mixed in there.

But from a super-wide, broad view, it’s more like a game is just something that you can do with your time and you can enjoy it. So with a super loose definition like that, as a game designer, you have a lot more freedom now.

So anything that you want to create, any kind of experience that you want the player to have will probably be considered a game. And because of that, as a game designer, you now have the freedom and the flexibility to do whatever you desire.

Now for traditional games, like the ones we are going to create, a game is going to consist of rules, and mechanics that the player can do in a win and loss condition.

(02:04)
So they’re going to be fairly traditional in that sense. You’re going to go from one level to the next. There’s going to be some combat, and then eventually you’ll be able to beat it or you’ll be killed and you’ll have to restart.

That’s what a game usually is and still normally consists of. So if you’re going to make a traditional game that is not just an experience for the player, you’re going to want to keep those things in mind.

The win-and-loss conditions are going to be important. The mechanics that the player has are essential for how they play it and what they get to experience it.

And so right now is both a great and kind of a terrifying time to be a game designer. You have total freedom in what you get to make, and pretty much everyone will consider it a game as long as it produces some kind of experience for the player.

But that being said, you also have a lot of pressure to produce that experience, something that is memorable, exciting, and engaging.

(02:59)
So if you know what you want to make, focus on that experience. Sometimes that experience will come from reading, text, hearing people talk, or challenging the player with doing specific actions, critically thinking, or solving puzzles.

There are so many different ways to engage the player and give them an experience that you really have total freedom when it comes to designing your games, which is really, really cool.

But what we’re going to tackle next is the ability to lose your game, because still, that’s an important aspect. You need to be able to win or you need to be able to lose sometimes both.

But at the very least, you need to be able to lose, which is what most endless runners games these days have is that you can lose. So we’re going to look at implementing that in our snake game next.

Lesson 9: Losing The Game

Summary

In this lesson, you’ll learn how to create a barrier in our game using a new sprite called SPR_block, which ends the game if the player collides with it, enhancing the game’s difficulty and engagement level.

Lesson 9 Transcript

So now that we understand how to lose and win, let’s look at implementing a way to lose this game.

So we want to create a block that basically acts as a barrier, and if you run into it, you die. So let’s make a new Sprite.

We’re going to call this S P R block, and we’re just going to fill this up. We’re going to first change it to 32 by 32. Then we’re going to fill it up with Red Press F for the fill tool and voila. And there we go.

Then we’re going to make an object called O B J Block, and we’ll assign it to Sprite. Let’s come into the room. Let’s make sure we’re on our instances layer, and let’s drag in a block and side note.

If you do anything with these layers and you move them around, or you accidentally close one, you can come up to the room and reset windows on the current desktop and set everything back to the way it was originally.

(01:02)
You can do that everywhere as well.

So in a room that pops up in a workspace, it disappears. But in images, if we come in here, you can see that there are contextual menus here, so you can reset all of that kind of stuff. So that’s helpful to know.

So let’s place a block and now let’s come over here. And what we could do is then place more blocks all the way around, but that would be a lot of blocks and a lot of time. Instead, we can actually stretch these.

So I’m just going to grab the bottom of this and pull it and make one long red block, and then I’m going to control C to copy, control V to paste, and then I have a second block that I’m going to put over there.

Then I’m going to grab one more block, place it up top, and do the same thing.

(01:50)
You can stretch it once it’s there, once you see that little icon, and just pull it across. Copy, paste, and voila. Now we have a barrier inside of our game, so if we run it, we’ll see that all the way around the edges, and that looks really good.

Okay.

Now we want to make it so that when we run into this block, we die. And when we die, we lose the game. And because we want it to be fast-paced, we want it to keep trying. We’re just going to restart immediately as soon as we die.

The way to do that is by using a function actually called Game Restart. So let’s add an event collision with the snake. So if we collide with the snake at all, we are going to restart the game. And the function is called game restart.

It doesn’t take any arguments and it just does exactly what it says it does. So for speed of testing, I’m going to pull this guy right over here, press F5, and now I’m going to move up a little bit. I’m going

(02:58)
To come over and bam, the game just restarts immediately. And that’s exactly what we want.

So depending on how much we’ve done and how much score we have, it doesn’t really matter, but we’re playing. We hit a block and then we die. And that makes it, well, essentially, a game.

We have a goal, we can achieve that goal through our skill, and then we can lose and we can keep playing when that happens. So this is, although not a fun one, it is essentially a complete game.

Now, there’s still a lot to do because right now the player knows how many foods they’ve collected. Well, assuming they can keep track if they start doing really well, but the game is really boring.

If we look at it, we have just a snake and a food and a barrier, which is all we need, but we need to do more with it. Currently, we don’t go any faster.

We don’t see our score because we’re not actually keeping track of it inside of our game. So there’s a lot that we can still do to make it more interesting and definitely more fun.

So in the next one, let’s look at adding more of a challenge to our game and making it more fun to play.

Module 3: Attack of the Snake (Lesson 6)

0

Creating New Food

Summary

In this lesson, we enhance our snake game by introducing a feature where a new piece of food appears at a random location every time the snake consumes the existing food.

We delve into the concepts of instances and objects and learn how to use the “instance_create” function with random ranges to spawn food at various positions within specified boundaries.

Lesson 6 Transcript

We have the ability to run into our food and make it disappear, but that’s not much of a game.

We’re going to take this game and every time we run into that food, we want to create a new one. We are destroying this food when we touch the snake, which means that we can add a new event called Destroy.

So when this gets destroyed, we want a new one. So create new food.

Now the way this works is using a function called instance underscore create, and then we have two options, depth and layer. Now if we open up our room, we can actually take a look at what both of those mean.

These are layers. You can see it says right here, layers for room zero. You have instances which is our objects, and we’ve been throwing this word around a lot and I’m going to continue to use it.

(01:03)
But I want to provide a little bit of description between the difference of instances and objects. An object is what we’ve created over here. An instance is the specific thing in the level that is there.

So if I add another food inside of here, we only have one object, but now we have two instances. We have two specific creations of O B J food and we have to know them apart. We have to be able to tell which one is which because they each run their own event.

Otherwise, if we ran into one food, then all of them would disappear and that’s not what we want. So an instance is the specific object in the level objects are over here, which are kind of like the blueprint for how something works.

Alright? So whenever we do something with an object, we’re really doing it with an instance.

(02:06)
So we have an instances layer and a background layer. And both of these have something called depth.

Now it is locked on the instances layer and we don’t really want to do anything with the depth, but understand that the depth is basically how close we are to the screen.

So if I moved this background above instances, its depth is now zero and the instances depth is now 100, which means that the background is actually closer to the screen than the objects we have in the level.

So we don’t want that. So we can create something at a specific depth or we can put something on a specific layer. What we want to do is put it on a layer.

So now we have to give it a coordinate, an X and a Y, which is on our grid system, which we understand, but then we also have to give it a layer ID or name.

(03:00)
So the easiest way is to give it this name right here, and it has to be spelled exactly the way this is. If it’s not, then you have a problem.

So make sure that it’s spelled exactly like these capitals and everything. And last, we tell it which object we want to spawn in.

So where do we want to create this new food? Well, we don’t know, right? We want it to be random. We don’t want it to just spawn at our current X and Y because then it would just always stay exactly where it is.

And we can’t just put in a number like 25 and 400 because then it would always spawn at 25 and 400 and that would be a pretty boring game if the food was just always in the exact same spot.

So what we need is a random set of numbers, but we don’t have any yet.

(03:58)
So let’s go ahead and create a few. So we are going to say random x equals, and now we want to choose a random number. We’re going to say random underscore range.

The reason we’re doing range is it allows us to choose between two sets of numbers, whereas random says it’s from zero to the number you put. This one says it’s from the first number to the second number.

This is important because if we didn’t use the range, then our food could easily end up at zero, which would be right there. And we’re eventually going to add some borders to the walls here.

And if the food spawned over here, it would be impossible to get. So we have to make sure that it at least spawns over here so that we have access to it.

Okay, so let’s put in the range between 32, and let’s come in here and take a look at where this range would be at. So we double-click on this, it’s at the furthest, and that’s 992.

(05:11)
Let’s put that in there. So that is the random x, so we can pass that in right here.

Now we need a random Y and that’s going to be equal to the random range again. So let’s come up here. I think it’s going to be 32.

Once again, yeah, the Y is equal to 32. So we’ll set 32 and that is going to be coming down here, 736. So let’s put that in there.

And you might be wondering where all these numbers are, what’s controlling, how big or how small these numbers can get. Well, in our room over here, which we haven’t talked about yet, and we will get too soon, we have a room property.

So if I actually minimize some of these, you can see there are room settings and there’s width and there’s height. That’s actually controlling how big our room is.

If we were to come in here and make the width of the room 2000, all of a sudden it’s now huge.

(06:20)
So this is what’s actually controlling the width and the height of our room. We’re not going to mess with that right now because this is a really good width and height. But we’re going to come in and talk about rooms at a later point.

So we have our X and our Y. So let’s go ahead and put that in. Now we need to pass in the layer name as a string. So we’re going to say instances. And if this is spelled wrong, I’ll show you exactly what happens. We’ll get to that in just a second. And the name of the object is O B J food.

So now we’re going to create this and it’s going to be put somewhere random every single time, which is pretty cool. So let’s bring our food back right next to us. So we can easily test this out and run it one more time.

(07:07)
We’re going to run it, seeing it correctly here. There we go. It created a new one down there. So if we come down and we touch this one, we should probably increase the speed.

This is really slow. Boom, it makes a new one over there. Awesome. So now we are trying to catch this food over and over and over again. So it’s turning into a game.

Now, if we didn’t spell this correctly, let’s say we left out an in. If we try to do this, we’re not actually going to get an error when we run the game.

We’ve gotten those errors before, but this is only going to occur when we collide with it. It’s going to say it can’t find this layer; it doesn’t exist.

So we have to make sure it’s spelled correctly. And it looks like you can actually leave this as a lowercase letter, and it’s perfectly fine.

(07:52)
I would still encourage you to follow the naming convention exactly with uppercase, but GameMaker Studio is very lenient when it comes to programming, so it will let you get away with that. And that is creating a new piece of food every single time we run into it.

One last thing I want to mention is that if we wanted to have our game be truly random in the sense that it always picks different numbers, then we need to call one function. And that is a randomized function.

So if we just call this one-time inside of our game, randomize, you can spell it with a Z or an Ss. They both do the same thing.

You call this and then these numbers are actually going to be different if you don’t call that, I’m sure you’ve already seen if you’ve played your game a couple of times, it actually is always in the exact same spot right there and they’ll always be in the same spot.

But if we call randomized just one time, then it’ll always be in a new spot.

(08:55)
So randomize sets the seed and we’re not going to get into what a seed is or anything like that just right now, but it sets the seed to a random number.

If you don’t call this, then it’s always the exact same seed, which means your game will run at the exact same time, it’ll pick the same random numbers every time.

And for what we’re going to be doing in this course, we’re not going to reuse, or randomize because a lot of the time we want to debug or find out or test something, and we always want it to be the same.

That way it’s easy to test if we wanted to test collecting our food or if something specific happens when we did A or B and it was truly random, it makes it a lot harder to test.

But once you actually make your game, you probably want to throw randomize inside of it. It makes it much more interesting and much more fun.

But I wanted to add that there so that you know about it, and you can change that in the future if you so desire. Alright, we’re going to take a quick break from coding and have a design talk about randomness in games.

Module 3: Attack of the Snake (Lesson 5)

0

What Are Functions

Summary

In this video, we explore the concept of functions in GameMaker Studio, highlighting their role in simplifying complex codes into single lines and facilitating various game actions.

Learn how to utilize built-in functions, understand the manual, and get introduced to debugging through the “show message” function.

Lesson 5 Transcript

So what we’re going to tackle right now is understanding functions and what they are and why you need to use them.

So if we click on this and press F one to open up the manual, it will take us to the page that explains everything that this does. And it’s a fairly lengthy description and everything, so we’re not going to read all of it.

But essentially what it does, you call this function when you wish to destroy an instance. So that’s how we can remove something from the game while the game is running and you can pass in something called an ID and an execute event flag.

And what that means is if you want to destroy something else, you can say instance, destroy, get rid of all the food or get rid of all the snakes or whatever the case is.

Or you can just call it inside of the object and then it will destroy itself.

(01:04)
Now a function is a block of code that runs when you say that one line and that block of code can be any length that you want it to.

So it can be huge; it can be small; it can call other functions that then call more functions and just do tons and tons of stuff. But essentially you are short-cutting some code into one line right here. And what’s really cool is that GameMaker Studio has tons and tons of these functions in here.

And really, what a game engine is besides the platform to create a game is a bundle of functions that make your life easier as a game developer.

So in GameMaker Studio, if we want to do something, there’s probably a function for that inside of here. If we wanted to get the distance from our snake to our food, there’s a function for that.

(02:06)
If we wanted to get how many foods there were in this room, there’s a function for that. If we want to change rooms, there’s a function for that.

Pretty much everything you’re going to want to do, at least at a basic level, there is a function inside of GameMaker Studio. And knowing what those are is half of the battle.

Because if you want to do something but you don’t know how to describe it, or you don’t know what the function is for it, it can be really, really hard to find it, which is why the manual here is also really, really helpful.

So if we come over here and we click on instance functions, there’s tons of stuff right here. These are all functions that do something and you can just click on it.

And if the name isn’t clear enough, this will just tell you if an instance exists. So if our food object is

(02:58)
In the level, we can check to see if it is there or if it’s not. And there’s functions for everything you want to do.

The really, really cool thing is that you can also create your own functions called Scripts. Now, we’re not going to talk about that now, but we will discuss it when we start making our space shooter.

In that module, we’re going to create our own scripts to do things that GameMaker Studio hasn’t created functions for, but I want to introduce you to just a few functions that we’re going to use quite often.

One of the very useful ones is show message. Now this function is specifically for what’s called debugging, figuring out what’s going on in your game. You would never leave this function in a game that you’re going to ship.

Now when you type out a function, you can see that it’s color changes.

(03:54)
GameMaker Studio always has them in the underscore. So this is how all of them are going to look. Each word is going to be separated by an underscore, and then down here you can actually see what you’re supposed to pass in.

When you pass something into a function, it’s called an argument. Sometimes you have to like this one. If we just close this, this is going to produce an error instance, destroy. We don’t have to pass something in.

This little asterisk down here means that we do not have to pass anything in. We could, but we don’t have to. Now show message says it wants an s t r and s t r is short for string.

So we know how to make a string quote word end quote. Now, if we run this and we collide with our food, we’re going to get a little box that pops up and says Hello.

(04:50)
So this is really, really helpful for when you want to see where your game is at or you want to test something that’s a function that we’ll probably use quite a bit.

Another really helpful function is a math function called random. And there’s a bunch of different random things you can do here.

But essentially what it does is it gets you a number, either a whole number, which is 1, 2, 3, just any number that’s not a point number.

Or you can get just a regular number of any kind. So 1.2 5 6, 2 3 or 25 point whatever. You can set a range between those like a random range to get zero to 10, get any number in there that’s really, really helpful.

Or I random range, which is the whole number or the integer number. These functions will just return a number. So if we were to assign a variable to this function called number equals random, and then we open this up and it tells us

(05:56)
It wants an X, and that’s not exactly helpful. The parameters or the arguments that the GameMaker studio functions want are not always very descriptive and sometimes unhelpful, but random.

You put in a number and on random, let’s take a look at the description. The argument that it wants is the upper range from which the random number will be selected.

Random 100 will return a value from zero to 99. So let’s close that and let’s try random 100. Close that out. And now what we can actually show inside of message instead of hello is our random number because it gives back a number between zero and 100.

So let’s run this one more time and check this out. As soon as we collide, we get a number and we didn’t specify it to be a whole number, so it’s actually a decimal, but that’s still really, really cool.

(06:59)
We’re going to use random in here a lot because a lot of times you want a random thing in your game to happen, because if your game is always the same, it’s not as interesting.

But that is a design topic discussion that we are going to have later on for now. That’s the basics of functions.

I’m going to introduce a lot of new functions as we go through this course, but every time I do, I’m going to explain it. We’re going to look at the manual and I encourage you to play around with it to make sure you understand it.

Because functions are the bread and butter of every game engine. You want to know which ones you can do, how to use them and to just throw them in your game all the time because they will make your life so much easier.

But that’s all I’ve got for function.

So let’s move on to instead of just destroying the food, actually acting like the snake has eaten it by increasing the score and spawning a new food somewhere else in the level.

Module 3: Attack of the Snake (Lessons 3-4)

0

Lesson 3: Comments

Summary

We take a break from the coding process to discuss the important yet often overlooked aspect of adding comments to your code. Give your variables descriptive names and discover how to create both single and multi-line comments in GameMaker to make your code more readable and manageable.

Lesson 3 Transcript

I want to take a quick break from coding and talk about something that is fairly important, but oftentimes gets overlooked. And that is comments.

So anytime you’re working on a complex, large project, it’s important to leave comments both for yourself, for your future self, or for anyone else that you’re working on.

The way we are doing it is by making our variables descriptive names. That is super helpful in the long run. But the other way is to actually leave comments in the code itself. And you’ve already seen these.

When we make a new event, this top line here is actually a comment, so we’ve ignored it for now, but let’s take a look at it more in depth.

Every event, you can have a description here at the top, and if we add something right here, save it. It actually shows up over here in the event, which is pretty cool.

(00:57)
Sometimes this can be really helpful, other times it might not be necessary. But setting a description on these is a good thing to know how to do. And the other thing that’s really important is to actually leave inline comments.

And there are two ways to do this. Two slashes, which are right next to the shift key, will make that line completely into a comment.

So you can then type anything you want here. And GameMaker will not try to do anything with this. This is only for you reading it. This is also a really helpful way of commenting out code that isn’t working or you’re trying different things with.

You can comment it out and then you can uncon it out later. So that’s helpful too. The other way of relieving a comment is called a multi-line comment, which is a slash, and then an asterisk, which on mine is shift eight.

(01:53)
And this turns it into a multi-line comment. So you end it with another asterisk and another slash somewhere down the road.

And everything in between here is taken as a comment. This is a great way to comment out a large comment.

If you need to explain something that you’re doing that’s very complicated, or if you have a big chunk of code that you want to take out because you want to test something different, that’s a quick and easy way to do that.

So use comments because they are essential for maintaining sanity. When your project starts getting larger, get into the habit of doing it now on smaller projects, and it will just be easier later on.

And now let’s get back to the next video to create what we’re going to eat as our snake.

Lesson 4: Snake Food

Summary

In this video, we take the next step in our Snake game development by creating food for the snake to collide with and “eat.” Learn how to create a new sprite for the food, set its dimensions, and assign it a color before placing it in the game room.

Lesson 4 Transcript

So what we’re going to do now is create the food that our snake object is going to be able to collide with and destroy, and then we’ll be able to add to our score. So let’s first make a Sprite.

Let’s come in here, right-click create Sprite. We’re going to name this S P R food, and we want this to be significantly smaller.

So let’s go ahead and resize this image and it’s going to be just 16 by 16. And press apply full screen just so that we can see the image. Double-click to open up the editor.

And I’m just going to do a yellow, choose any color and make an ellipse just like that. And that’s all we need to do for the Sprite.

Let’s come down and make an object called O B J Food. Assign that Sprite to it, and then go into our room and let’s place that food right here.

(01:02)
So now we have two objects in our room, the snake we can control and it moves. The food has no logic in it right now. It just has a Sprite associated with it. Nothing else.

So we’ve talked about events already. What event can we use to make it so that when we touch this food, it goes away?

It can add an event called collision. And down here you can see that now that we’ve added more objects, we have more choices for collision. So what we want to do is add a collision with O B J Snake, and I’m going to say destroy self.

So now how do we actually go about destroying ourselves?

We can’t be watching the player and pause the game every time they touch it and come in and remove the object. That doesn’t work. We know how to add objects like this, but that’s not the same as destroying them.

Instead, what we have to do is use something called a function. A function is a block of code that does something when you call it, and I’m going to take the whole next video to talk about that.

But what I want to do right now is just show off the one we need to get rid of this food when we touch it. So type out instance underscore, destroy, and then do brackets.

(02:25)
Okay? Instance underscore destroy. Now press F5. Let’s collide with this. And you should see that it goes away instantly.

There we go. So what is this doing?

Well, it’s doing exactly what it says because we collided with something. This calls this code and it just removes itself from the game.

But how exactly does that work? And what exactly is it doing underneath the hood? That is what we’re going to talk about next.

Module 3: Attack of the Snake (Lessons 1-2)

0

Lesson 1: Breaking Down Snake

Summary

In this lesson, we break down the classic Snake game to understand what makes it tick. Learn the key elements that define the game and get ready to create a unique version of it yourself.

Lesson 1 Transcript

So what we’re going to do in this module is take the classic game of Snake and make our own version of it.

We are going to look at what makes the game Snake, how you would dissect it as a game designer, and what important parts of it are required to do a clone-like game of your own.

So onscreen. I’m going to throw up just a little bit of gameplay of a snake that I found. It’s a pretty old game. Goes back to, I don’t even know when, but if you had a cellphone in the two thousand, it probably had a snake running on it and you probably played it, but that’s what it is.

It’s a very simple game in terms of aesthetics, but there are hundreds of variations on it. If you search for a snake game, you will find tons and tons of different types of art styles and variations on it.

(00:55)
But if they are trying to keep the essence of what made snake snake, then there are certain things that it has to have.

Now, here is the first challenge that I will give you as a game designer. How do you break this game down and what makes it snake?

If you had to describe it to a friend or a colleague, or if this was your game idea that you wanted to pitch to someone, what is it that you say to sell them on it? How do you describe it in a way that is clearly talking about this game, not any other one, but this game?

(01:34)
How would you do it? Here’s what I would say.

It is a game that has increasing difficulty. Every version that you play, the snake gets longer and longer and you can kill yourself by running into yourself. That’s the way it works. So as you play, the game gets harder progressively, and eventually, you will lose.

This is not an endless game because even if you are a perfect snake player, because you are in an enclosed area, you will eventually run out of space and you will die. That’s just how it is.

The game is designed that way, so it increases in difficulty. It eventually ends probably not too long. I would say like 10 to 15 minutes is the most you could get out of it if you’re very skilled at once and you collect things.

But how important is that aspect of it? Do you have to collect things?

It’s probably pretty important. It shows you when it’s going to get more difficult because every time you collect something, that increases the difficulty.

But probably the bigger part is the score. You have a high score that you are trying to beat, whether it be from someone somewhere else in the world or just your own score that you’ve seen

(02:59)
Past attempts. It keeps track of how well you’ve done. It’s a challenge to yourself and it’s a challenge to others if you pass the game on to them. Those are the core concepts of what makes this game snake.

So how do we come up with a game like this but is also kind of our own thing?

Well, here’s what I’ve got for you. This is what we’re going to be doing in our course. It’s going to be a game that looks a little bit like a snake but is not exactly the same thing, partially because of coding limitations.

Snake isn’t exactly a complicated game, but we’re going to keep things fairly simple, and creating boxes that follow each other is actually harder than it looks.

So instead we’re going to do this; it is going to be a game that increases in difficulty. It is going to be a game in which you collect things and it has a score that you are going to compete with against yourself as you go along.

So it’s going to be fun. We’re going to learn a lot of stuff as we go along and as we make this, and we’ll dissect a lot of design topics as we go along to help you become the best game designer that you can be.

Up next, what we’re going to look at is getting our snake into the game.

Lesson 2: Creating Our Snake

Summary

In this lesson, we start building the Snake game from scratch, beginning with setting up a new project and creating a sprite for our snake.

Learn the basics of pixel art and how to resize your sprite, both in terms of the canvas and the image. By the end of the session, you will have a playable snake object that responds to arrow key controls.

Lesson 2 Transcript

Alright, I’ve got an empty project here that I have named Snake Game. I’ve just increased the resource size over here by double clicking and that’s all I’ve done and that’s where we’re going to get started.

So the first thing we need to do is create a Sprite. I’m going to right-click on Sprites up here and create Sprite. I’m going to name it s p r Snake.

So again, naming conventions are important. If you don’t do exactly what I do, that is okay. Just make sure that whatever you do is consistent so that it’s always the same.

Alright, our snake, we need to actually change the size of it because we’re going to have a fairly small room as you saw. So over here we have the width and the height. That’s what this w and H stands for, and it’s in pixels as you can see.

(00:52)
Now if you don’t know what a pixel is, it is the smallest unit of measurement on a screen. Every electronic is just made up of lots and lots of pixels.

So when we talk about resolutions such as 1920 by 10, 80, that’s 1920 pixels across and 1080 pixels down. That’s what it’s talking about. It’s the pixels in there.

So when we create something for 2D art, it’s normally made from pixels. So if the size is one, that right there is one pixel.

So currently our snake is 64 by 64 pixels. We’re going to click on this little arrow and we can resize it. We’ve got two options.

We can resize the image or the canvas. So when we resize the image, it takes everything inside of it and squishes it down. If we resize the canvas, it actually just takes the overall width and height, brings it down, or brings it up and it doesn’t care what’s inside of it.

(02:05)
So most of the time you’re going to want to scale an image, but let me show you the difference between the two.

So if we come in here and I make a circle like this, come back out, let’s resize it two ways. I’m going to resize it to 32 by 32, and if you want it to have a different width and height, a different ratio, you have to uncheck this box right here.

Otherwise, they’ll both change in accordance with what they were before. So I’ll click apply and now you can see it kind of changed, but it’s still the same spot inside of the image and it looks roughly the same. And now it is 32 by 32 pixels.

So I’m going to double click on this and I’m going to press Ctrl Z and now it is back to 64 by 64. Okay, the other way to resize things, I’m going to go into our Sprite and show you another way. If you click on an image up here,

(02:59)
All of the image options appear and resized frames are the same thing we were clicking on out there. So voila.

Now if we come in and resize the canvas to 32 by 32, you can already see the preview right here. It has changed dramatically because we’ve actually cut out the excess area around the circle and we haven’t cared about the circle itself.

So let’s come back in control Z and control Z one more time to get rid of the circle. And those are the two ways to resize. Most of the time you’ll want to resize the image itself.

What I’m going to do is come up to image resize all frames 32 by 32, and then I can press F for the fill tool over here. It’s a big bucket. I’m going to click on this green. I’m going to paste it right there, and the whole thing becomes green.

(03:53)
So there is our snake. Here’s a center fit. So you can see the whole thing. And it has a lot of properties that we’re going to touch on as we go, but for now, that’s all we need to do. You can now create and modify your sprites.

Awesome! Let’s go ahead and make an object called O B J snake. Let’s assign it to Sprite, which is done right here.

And now what I want to do is get this object moving around in our world, just like we’re going to do in our game. So the first thing that I often forget is you open up the room, and you bring in the snake. If the object is not in the room, it’s not going to show up in your game.

There you go. Okay. That’s all we need to do on the room front. Now let’s add some events.

(04:43)
What I want to do is use the events for our movement. There are a lot of different ways that we can do movement, but the way we are going to do it is by using the key pressed and then we can choose left, right, up, and down.

So we’re going to use the arrow keys here. So I’m going to choose this one first, and then I’m going to add the other events as well. So do the key pressed for right, the key pressed for up, and the key pressed for down.

Okay?

Now we have all of these events. So if any of the arrow keys get pressed, we want to make it go in the direction that the arrow key is facing. That makes sense. But how do we do that really simply?

Well, we use the built-in properties of every object. We’ve talked about the built-in variables, X and Y already, but there are a few more. One of them is direction. And this is the direction that it is going.

Not necessarily how fast it’s going, that’s controlled by something else, but this is just the direction it is moving. And GameMaker Studio

(05:56)
Uses a 360-degree direction system. So let me just show you what that looks like. I’ve taken a screenshot of the room and this is how the direction works.

In the GameMaker studio, it’s 360 degrees. So it’s all the way around the object, whatever one you’re looking at. And it starts on the right. So this is zero, this is 90, left is 180 and down, as I’m sure you’ve already guessed is 270. And you’ve got all the numbers in between. So you can go from zero to 359.9.

Once you hit 360, it just goes right back to zero. So it knows that. So we want to set the direction based on the key that we press. So let’s go ahead and do that On key press down, we’re going to set direction to 270.

Let’s go to the right and say direction equals zero because the right is the first one.

(07:07)
And GameMaker starts by looking at the right. If we go up direction equals 90 and the left direction equals 180.

So with these events, we have now set the direction that our snake should go. The only thing left to do is to set its speed. And right now we don’t have that, but fortunately, there is also a built-in variable for speed.

It’s right here. It’s just called speed, which is great, but we don’t want to set that inside of here. We actually want the snake to always be moving.

That’s one of the things about the game, that’s pretty much in every single game the snake moves on its own. So we want to set our speed, but we only want to set it one time. The way we do that is to add an event, then create event.

So the first time the snake gets created, we set our speed equal to one, and then from there it will just always be one unless we change it.

(08:13)
So now let’s press F5 and test out our snake. So now it is moving to the right because that’s what it defaults to.

But if we press up, we go up left down, right? Perfect.

We have our snake, we have some controls, and that is awesome. So that’s our first object in the world being controlled by us. It is a playable object.

Good job.

And now before we move on to creating the food we’re going to consume as the snake, I want to take a quick break and discuss comments and how to use them and why you should use them. And we’re going to talk about that in the next video.

Module 3: Attack of the Snake (Lesson 10)

0

Adding Difficulty

Summary

In this tutorial, we enhance the challenge in our snake game by increasing the snake’s speed each time it eats food and introducing blocks that appear where the food was consumed, eventually filling the level.

Lesson 10 Transcript

So what I would like to do to add challenge to this is one; increase the speed of our snake each time we collect some food and two spawn a block inside of the level where we ate that food eventually filling up the level of so many blocks that it becomes impossible, just like the original snake.

So how would we go about doing this if we want to increase the speed of our snake? Well, we’ve already set that in the creative event. How do we add more?

Well, it’s just like the X and Y or direction that we’ve talked about. If we wanted to increase it, we could just say speed plus equal one. But where do we do that? That’s the question.

We can actually affect our snake object inside of our other objects. So let’s go to O B J food. And in the destroy event, when we die, we want to increase the speed of our snake.

(00:57)
And the way we do that is by typing the name of our object O B J Snake. You can see it turns red, indicating that it found it.

So now if we put the period, which is called dot notation, we will have access to all of the variables and all of the data we have used on O B J snake, and then we can set and get that data information.

So our speed is what we want to change here. So I’m going to say speed plus equals one. Now when we collect food, when it gets destroyed, it will increase the speed of our snake. Lemme press F5 and let’s try it out.

Okay, that works. We clearly start going a little faster each time. It’s a slow build, just like the original snake. It’ll get harder and harder as your score gets higher and higher, which is the fun part of the game.

(01:57)
Awesome. So we are increasing our speed, but now I want to spawn a block and here is where it gets a little tricky, and thinking like a clever programmer really helps.

So we want to spawn a block, but we cannot just spawn a block where we are the way it is right now. Well, we can, and let’s see what happens.

If I say instance create layer and I just use our X and y coordinate exactly where our food is currently at. We spawn it on instances and we create a block.

So if we do that and we run it, you’ll see that we run into a problem, the block gets spawned and the snake is immediately colliding with it, which means that we die and the game restarts over and over and over. So we can’t actually collect the food because the game just restarts indefinitely.

So what we want to do is make it so

(02:58)
That when we spawn it there, it doesn’t kill us for a little bit of time. And the way to do that is by altering the collision mask on our block.

Now, we haven’t talked about collision masks yet, so let’s do a quick overview of them and we’re going to dive way deeper into them in the next module where we make our space game.

So open up your S p R block or really any of your sprites. And over here on the left you have this option for a collision mask. So if you drop that down, this all becomes darker.

And the reason for that is that this Sprite, the entire Sprite, all 32 pixels of it are actually inside of its own collision mask. And so if an object touches this Sprite, this collision mask, then the collision event gets triggered.

If we open up our S P R food, you can see it a little more clearly.

(03:51)
Right now, even the spots that don’t have our Sprite in there will trigger the collision mask for some things. That’s okay. It doesn’t really matter if there are five or six pixels on each side where we can collect the food.

It’s making it a little bit easier for the player, not a big deal. You can come in here and you can change the collision mask. You can change the mode and the type.

So the mode is automatic full image or manual. Manual. You can come in here and actually set the collision mask. So if we did this, the only time that the collision event would trigger is when we were actually this far inside of the Sprite.

We don’t want to do that here, so let’s reset that. But what we want to do is actually take away the collision mask from our block. Unfortunately, there’s no way to just remove a collision mask entirely.

(04:47)
You can set it to something different, but it will still always have one. The way to remove it is to actually remove the Sprite itself.

So let’s open up our O B J block. And you can see over here that we can choose a Sprite and we can choose a collision mask. So if you ever wanted to have a Sprite with a unique collision mask, you can set that right here.

But what we want to do is actually remove the Sprite completely. Now, if you look in your room, it looks like it’s really, really messed up now, but it is still the same. It just changes the picture of what’s being displayed here and the stretching properties of that look different.

If we reset the Sprite, the room goes right back to the way it was, so you don’t need to worry about the way that looks. So let’s take it off again.

So what I want to do is spawn the block and have it set its Sprite back to itself, which will also reset the collision mask after a second or so so that we don’t run into it immediately.

So inside of our food, we’re actually still creating that block. That’s totally fine. So let’s keep that there and let’s go into our

(05:56)
block. And now when we get created, we are going to say we are going to set an alarm. And an alarm is just a ticker. It is something that will trigger after a little bit of time.

And the way you use an alarm is like this, the keyword alarm left bracket, which is not the one we’ve been using, the parenthetical marks that look like that.

This is a left bracket; it’s a square one right next to the P. So we’re going to open that up.

We’re going to say zero, and then we’re going to close it and we assign it with one equal sign to a number. And this is the number that will say how long until the alarm triggers.

So we’re just going to set it to be equal to 100. So this alarm will go off after 100 frames, not seconds, frames. So remember, our game runs at 60 frames a second.

(06:54)
So this is almost two seconds. Now the alarm will not go off if there is no code inside of it.

Let’s add an event alarm zero. It has to be that alarm because that’s the one we’ve set. We’re going to say reset Sprite.

The way we do this is by using a built-in property called Sprite Index. And this controls which Sprite this object has, which is really, really cool and very useful. So we’re just going to set it equal to S P R block.

And now when we run the game, our food will create a block. That block will then get set. And there we go, a hundred seconds, a hundred frames after that gets put there.

So you may have noticed though, that the walls weren’t there originally, which isn’t ideal. And these are also taking a really long time to come in. So let’s do two quick fixes.

(07:53)
The first one is in our room. We can actually double-click on this, and zoom in a little bit. And we can actually manually set our Sprite right here.

And the way we can do that is in our creation code. This code that happens when this instance, this specific instance, when it gets created, it runs right here.

So if we just say Sprite index equals s P R block, that will set this instance to that. So that’s awesome. So we’ll save that and we’ll go around and we’ll do it to each one of these. So creation code set creation code set.

Last one, creation code set. Now if I press F five in our game, the walls will be there immediately, which is awesome. Okay, that’s the first fix. And lemme exit out of these because they take up a lot of room

(08:54)
here.

The second fix that we want to do is maybe increase how fast this goes on, but we have to be really careful because our speed changes throughout the game. If we spawn it at 10 frames after we collected 10 food, that’s fine.

We’re moving so fast we won’t collide with it. But if we do that in the beginning, well we’ve got a problem. So what we need to do is just a little bit of math and all we’re going to do is just divide 100 by OBJ snake speed.

So the faster we get, the lower this number becomes. So the first time I’m going to run it and show you the first time we run into it, it’s going to take a while.

But the second time and the third time and the fourth time, it’s only going to start spawning faster and faster and faster. And now we have a game that’s coming together to be fun, challenging and to kind of resemble the original spirit of snake. And that is adding challenge and difficulty into our game.

What I want to talk about next is the design topic of difficulty. Is it right that we’re doing this? Should we make it easier? Should we add some options for difficulty?

As a designer, you have all the power in that area. So let’s talk about difficulty.

Module 3: Attack of the Snake (Lessons 13-14)

0

Lesson 13: Adding A Score

Summary

In this tutorial, we add a scoring system to our snake game, utilizing GameMaker’s built-in score variable and learning how to manually draw elements on the screen to display the score.

Lesson 13 Transcript

What I want to do now is add a score to our game, a visualization of how well the player is doing.

There is a built-in variable that we’re going to use called score, and then we’re going to look at drawing stuff to the screen manually because underneath the hood, out of all of the things that we’re doing already, anything that shows up on our level is being drawn.

What we want to do is take a little bit of that power and draw things exactly where we want and how we want to do it. All right, so let’s jump into that.

Now, inside of the food, once again, when it gets destroyed, this is the best place to upgrade our score. So I’m going to go ahead and say plus plus score. So score is a built-in variable and it just keeps track of a number.

(00:52)
You can use that number for really anything you want. Just because it says score doesn’t mean you have to, but it is the score that we’re going to use.

So it starts at zero when you begin the game, and we’re just going to increase it every single time we gain food. Now, if we ran this, we wouldn’t see anything because the score, it doesn’t have any visual component yet, so we need to add something.

So let’s open up our snake and I’m going to add a new event, and this is going to be a draw event. So inside here we’re going to draw score.

And the first thing to know about draw events is you must, if your object has a Sprite, you must say draw self, because otherwise your Sprite will not show up at all.

Your object is there, but the draw event is inherently being called in every object that is in the game, and the first thing that it does is it draws itself to the level.

(01:47)
Now, if we override the draw event like we just did, then we must say, Hey, don’t forget to draw yourself on the level.

So if I say take that out and I run it, our object is still there. There goes the food, and now we are somewhere, but we have no idea where.

So we’re not trying to make the game that hard, so add and draw self, and then when we run it again, we will appear.

I have made that mistake plenty of times. So be sure that you draw self if you ever put in a draw vent, assuming you have a Sprite, if you don’t and you try to draw self, I’ll show you what happens. You’ll get an error because you cannot draw something that doesn’t exist. That’s a philosophical statement.

I’m not going to worry too much about the implications of it, but if you do not have a Sprite, then you cannot draw it. So s p r Snake, there we go. Drawing self. Now there is a whole host of drawing functions.

We are going to stick to the simplest one, which is going to be a draw underscore text. Now we pass in where we want to draw it, and the string we want to draw. So I’m

(02:58)
Going to just draw it in the top left corner over here. I’m just going to say right around here. And so I’m going to put in 32. 32. That’s going to be our X and our Y and the string that we want to draw. We want to draw the score.

Now, draw text is a special function in that it will take whatever is passed in here and convert it to a string. We haven’t had any in-depth conversation on data types because I don’t want to get bogged down in that, but it is really important to understand that there are different types of data.

This is an integer. It’s just a whole number. That’s really all that means. And score is also an integer and it’s expecting a string. And so normally when you try and do something with a data type that’s not allowed, you get an error, which just makes sense because if you’re looking for the letter in a number, well, it can’t do that.

(04:00)
It tries, it fails, it blows up. So data types are very important, but there are times that the functions will let you get away with doing other things. So putting our score in here, it’s going to just show the number, even though it says string.

So I’m going to press F5 and it should show up right up here. There’s our score. So every time we collect food, that will increase by one.

Of course, just having a number there, although fairly self-explanatory, we should probably put in what that number actually means. So I’m going to say player score, colon plus score.

Now we are going to run into an error doing this, so I’m going to press F5 and show you the error that we get. This says do add execution error. This is an extremely frustrating error if you have not seen it before and you’re not familiar with what that means.

(05:02)
An execution error essentially means you’ve done something fundamentally wrong like dividing by zero or trying to say Player score plus zero. GameMaker cannot do that. It doesn’t understand what you want.

So what we have to do is put these two data types in a way that they can be added together. So we can’t convert this string to a number that doesn’t make any sense, but we can convert a number to a string and there’s a function for that called string, and you just pass in whatever value you want.

Make sure you put it in those parenthetical marks, and then it will understand that what you actually want to do is not add two strings together to get a value of 500 of adding up all the asky values or something strange like that.

No, it will understand that you just want to put

(05:56)
This on the end of that. So when we run it again, we have an explanation for what that number is and voila, a basic introduction to data types and what you can do with them and what you cannot do with them.

So that actually concludes our first game. You have made a clone, not a pure clone, but a heart clone of snake. It’s a really cool game. It’s something fun, and now I encourage you to go and kind of make it your own.

So the art we did was two blocks and an ellipse. Nothing too special there, but if you’re artistic and you want to try your hand at that, go and make some sprites, maybe increase the size of them. Play around with the room, the size of the room, and move around it.

There are a lot of things you can do even with just such a simple game. There are still a million variations that can be done in this game and probably will continue to be done in this game because it’s just a classic game.

But that concludes all the code we need to put into it. What I want to tackle next is how to export and build your game to be able to share it with a friend. That’s just a file they can click on and run it on their computer, and then they can play the game wherever they are.

I’m going to show you how to do that next.

Lesson 14: Sharing Your Game

Summary

In this tutorial, we conclude the module with a walk-through on how to export your game using GameMaker, highlighting that this feature is only available to paid users.

We demonstrate the process step-by-step, showcasing how to create an executable file that can be shared with others, and emphasizing the importance of packaging it as a zip file for easy sharing via email.

Lesson 14 Transcript

So if you’re using the free 30-day trial version, you’re not going to be able to do this because it limits the functionality of what you can do. Pretty much only in this feature, you’re not going to be allowed to export.

But if you purchase GameMaker in the lowest form, I think it’s $39 for a year’s license, then you can build and export your game perfectly fine. The way you do that is by first you choose where you want it to go.

If you remember, there are lots of different versions of GameMaker, and so it can export to Windows, it can export to HTML, to the Switch, to the Xbox, to anywhere that you can think of. You can make a game that plays on there.

And up here in the top right corner, Targets is where you choose where that goes.

(00:50)
So right now I’m able to export to Windows, Mac, OS, and Ubuntu. I’m just going to choose Windows because that’s what I’m on and that is where it’s going to go.

So now up here near the top left, if I click on Build, I can go to Create Executable. Then you’ve got two options, package as installer or package as a zip.

Now the installer, both of them are going to look exactly the same, but an installer is like a program that you click on and then it actually installs itself into your computer.

So it’s going to go through the whole process of choosing where to put it, installing it, and doing all of that in a finished game. That’s what you would want for a game like this, that you just want them to be able to run.

You want to do a package as a zip, and you come up and you save it.

(01:39)
I’m going to save it on my desktop, and then it goes through the whole process of compiling it, and then it brings it up for you over here, and now it comes up as a zip file.

So you will have to extract it, and then it opens up again, and here’s our game. And if I click on it, our game is now running. We don’t have to install anything. It goes really quickly. It just runs immediately, which is really, really cool.

And then you can share this with anybody you want. It’s in the zip file, so you can send it over email. You cannot, just so you know, send an exe just by itself over email.

Clients just won’t allow it because exes can contain viruses. And so they will not accept you to just send it, but you can build it that way.

(02:25)
Choose your platform and then share it with your friends and family. So what we did in this module was make a game.

We created a snake-like Clone Game where we discussed what the essence of a game was. We learned how to dissect a game. We created it. You learned how to code; you learned how to use functions. We’ve done so much and it’s been so awesome.

Now I want to take a little bit of time to dive deeper into the conversation of designing versus programming because in this game you’ve done both.

We’ve kind of blended them together, but I want to take some time to separate them and talk about the responsibilities of a designer versus a programmer and kind of what that life is like in the industry.

And we’re going to do that in the next module.

How To Perform Video Game Critical Analysis

0

How to review a video game
More than 730,000 video game apps are available for download on Google Play and the App Store. Over 10,000 video games are released each year on Steam and other platforms.

With so many video games on the market, an avid gamer may have a hard time choosing one to play. They could do the trial-and-error method and download or purchase multiple options, but they would be wasting a lot of time and money.

Video game critical analysis helps gamers pick the best options based on their interests and preferences. This way, they don’t need to try multiple games until they find the best one or waste their money on something they may not like.

Game analysis is crucial in the industry. But how do you go about making one?

What Is Game Analysis?

Game analysis is an unbiased evaluation of a video game to provide audiences with critical insight into the content.

It is helpful for all types of gamers, but especially to newbies, as it would help them understand the role of the player and the game’s goal and core story.

Many people play video games because they are fun. They are a means to escape the real world. Video games allow them to explore a virtual world where they can do things that are impossible in real life.

Thoughtful, thorough game analysis makes this virtual world more accessible and easier to understand for people who want to dip their toes in video games.

What Is Critical Analysis of Any Game?

Video game analysis report
A video game critical analysis is an in-depth look into all the elements of the game. Some may think the word “critical” indicates negativity, but it does not.

Critical analysis is an impartial deep dive into any type of media, including video games. It goes beyond shallow interpretations or comments—it explains how the game is played and the elements that make it worth investing in.

And this type of deep-dive analysis isn’t just for gamers. They are also for designers who want to know if they have successfully executed the game’s objectives.

If the critic understood the game the way the designer intended, it will be reflected in the critical analysis. If not, the designers will know which parts of the digital product must be improved.

Analysis helps developers improve on storytelling and gaming elements for future games. They can boost certain features to become even more entertaining and attract wider audiences.

How To Do a Critical Analysis of a Video Game

Game designer analyzing a video game
It must be noted that a video game critical analysis is not a simple video game review. How to review a video game focuses on the quality of the game, which can be highly subjective.

Reviewers may talk about the entertainment value and how fun it is to play.

In contrast, critical analysis dissects the parts of the game and explains, in an unbiased manner, why each is good or bad. Arguments must be supported by clear evidence.

Here are the basic steps in creating a video game analysis:

Determine Your Objective

Why are you writing a video game critical analysis? It’s a question that only you can answer, and it will impact how you write the critique. Some may do it because it’s their job, while others have to do it for a class project.

Professional critics do it to help their audience decide whether they should purchase or download a game.

Such an analysis will also help video game designers understand what went right or wrong with their game. An outsider’s point of view is always helpful in making things better.

Knowing your objective means knowing your audience. It will make it easier for you to find the right voice when writing your analysis.

Play the Game Multiple Times

No one can critique a video game unless they have firsthand experience playing it—ideally, multiple times, which leads to a comprehensive grasp of all its elements. Take notes while playing the game.

Be meticulous and observe everything about the game, from the characters to the dialogue, overall storyline, design activities, levels, difficulty, music, and even the color palettes.

Don’t start writing your analysis until you are confident that you have truly understood and mastered the game.

Write the Draft of Your Game Analysis

Now that you have all the information you need, you can begin writing the video game analysis.

First, describe the basics of the game: the characters, storyline, and the developers.

Second, you must establish the following:

A game designer looking at the draft of his report

  • Audience – Who is the game designed for? It may be helpful to point out the age range and interests of the target market.
  • Goal – What is the player trying to accomplish in the game? Explain the point of the game and why the developers have worked on this project for so long.
  • Resources – Enumerate a player’s collaterals in the game. These are the resources that players have control over.
  • Decisions – Explain the decisions players must make while playing the game. You must be as thorough as possible.

Third, get into the player-game relationship. Explain the rules and the sequence of events in the video game. It is also important to touch on what advantages the player can use and the pitfalls they should avoid.

Finally, describe the overall experience of playing. This evaluation must be as unbiased as possible and deliver an in-depth take on the video game. Dig into how video games affect critical thinking as players deal with complex situations in the virtual world.

It can help to delve into parallels with the real world. More often than not, video games reflect current society, with elements of fantasy or fiction to be more exciting and adventurous.

Review and Finalize Critical Analysis

Read your draft, edit, and finalize. The final output must be useful to gamers and designers to improve the video gaming industry as a whole.

Download the Video Game Critical Analysis Template Here

Conclusion

There are many reasons people play video games. They want to escape real life for a while, and video games are incredibly entertaining and engaging. Critical analysis of video games can help improve the industry and ensure that more and better video games are in the pipeline to entertain as many people as possible.

What Is Iterative Game Design?

0

What is iterative game design
One of the most important steps in game development is iterative game design. It’s built on the idea that games aren’t perfect after one round of development.

It encourages developers to repeatedly perform certain steps in an effort to come up with a final version that is playable, enjoyable, and as technically glitch-free as possible.

Let’s learn more about iterative game design and what it entails.

What Is Iterative Game Design?

An iterative design is a systematic approach to repeating certain steps in game development. It aims to achieve a desirable final product by implementing small changes every time it produces a new software version.

Each iteration is tested until the product is perfect. It entails identifying user needs through research, generating ideas to meet those needs, developing a prototype, and testing it to see if it effectively addresses them.

Just like software, game designs usually undergo multiple iterations or versions until the final product is ready for release.

Chess as an Example of Iterative Game Design

Chess is a common and relatable example of iterative game design. The game includes numerous moves and outcomes. Developing a computerized version requires developers to anticipate all of them.

Since it’s impossible to completely incorporate them in the first version, multiple iterations are necessary.

As a gamer, you might already have noticed game iteration to some extent. Whenever you start a game, modern games usually check for patches and new versions that improve the gaming experience.

Though this example is confined to games that have already been released, it’s still a good example of how developers continue to refine their games according to user needs.

Here’s an interesting fact: the title with the longest development period is Beyond Good & Evil 2. After the idea was pitched in 2008, it remains in development to this day!

6 Stages of Iterative Game Design

When developers want to engage in iterative game design, they have to do the following:

1. Planning

At this stage, developers and game designers decide on the objective of the iteration. Do you want your game to be easier to learn? Are you aiming to give players more freedom? Do you want it to be fun to watch?

These are a few examples of objectives that can be established during the planning stage. During this phase, ideas are pitched and discarded. The best ones are retained for execution.

Planning also becomes more streamlined with each version since each iterative game design process begins with this step.

2. Design

The design stage is when developers analyze how they can meet the objectives established in the planning phase. They have to establish certain parameters like the language they want to use and the number of variations they want to have.

Note that exact metrics will vary from project to project.

With each version, the design terms and conditions become more defined. The designers get a clearer picture of what they have to do and progressively build on that through feedback until the final product is ready.

3. Coding

Coding kickstarts the actual game development process. Coders follow the requirements that were enumerated in the previous steps. They will use a specific computer language and multiple software to write the new code.

Iterative Game Design Flowchart

4. Testing

This involves testing the code written for bugs, additions, and issues that may have been overlooked in the initial three stages. The people who test the game design could be gamers or in-house game testers who have dabbled in a variety of professional game tests.

Any bugs will be reported and sent back for further coding. The designs will be modified and their codes will be rewritten.

Note that designing, coding, and testing take place in multiple rounds. There is a lot of back and forth that often takes months. This will go on until developers nail the project requirements and the testers are satisfied with the experience.

In rare instances, the three stages take place simultaneously.

5. Evaluation

A team of experts will again evaluate the game and its performance for any bugs. This is the last sweep for quality issues and glitches. At this point, the final results are sent to the manager in charge of the project.

Based on the evaluation, the management team will decide:

  • If it’s ready for implementation
  • If the execution of the idea needs work
  • If it’s flawed and needs to go back to the design stage

6. Release

After all the steps have been successfully completed, the bugs are fixed, and iterations integrated, the final product is ready to be released.

Depending on the project’s requirements, a company may have to actively look out for bugs and fix them even after it’s been released. This is completely contractual and not necessarily part of iterative game design.

Why Engage in Iterative Game Design?

Iterative game designs take time and involve different teams. But when done right, it can make a game smoother, more playable, and a lot better than the first version. Here are some of its benefits:

  • It ensures that the vision and design for the game are realized.
  • It encourages teams to carefully plan the next iteration before the coding work begins. Meanwhile, coders have the assurance that their work adds value.
  • It helps game developers choose and pursue the best ideas.
  • It keeps game development teams organized.
  • It provides opportunities for testing, allowing coders to remove bugs and glitches.
  • It gives stakeholders greater transparency over the game development process.

Continuous testing and coding mean refined results, but they take time. This is why interactive game designs are mostly suitable for big long-term projects. The financial burden and time investment aren’t feasible for small projects.

A Systemic Approach to Game Design

Iterative development is a systemic approach to game design. It works through small variations to achieve high-quality results. This development model is a great choice for large, long-term projects that have the bandwidth for feedback and review stages.

Meanwhile, small short-term projects may not be equipped to handle this approach.

Moreover, its production cycle is flexible, allowing for a quick and reactive approach to design. The coding, design, and testing teams can all work together without having to constantly follow up with each other so game development becomes smoother.

We hope this post has given you a renewed appreciation for the game development process and enabled you to decide if it’s worth adopting.

Unity DOTS for Beginners

0

What is unity dots?
If you’re looking for efficiency, performance, and data-oriented programming in your game development platform, Unity’s Data-Oriented Technology Stack (DOTS) may just be what you need.

Apart from leveraging its powerful engine, you also get to widen your skillset and enjoy a growing market demand for Unity DOTS professionals.

Today, we take a closer look at this powerful framework. We’ll explore what it is and why you may want to use it. We also recommend Unity DOTS tutorials and other learning resources.

What Is Unity?

The Unity game engine is a powerful and versatile tool for developing games and applications for diverse platforms, including consoles, mobile devices, and personal computers. It offers a robust technology that’s become popular among game developers regardless of skill level.

What Is Unity DOTS?

Unity DOTS’ game development framework seeks to transform how developers build games in Unity.

With DOTS, the Unity development team promises “performance by default.”

The technology stack offers an innovative way to create and structure games while ensuring superior performance.

DOTS includes a collection of new technologies, such as:

  • Entity Component System (ECS) (preview package)
  • C# Job System
  • Burst Compiler
  • Unity Physics (preview package)
  • Unity NetCode (preview package)
  • DSPGraph (experimental package)
  • Unity DOTS Animation (experimental package)
  • DOTS Runtime (preview package)

You can use this set of technology packages to build any game or application you have in mind. Keep in mind that Unity DOTS’ full potential is unleashed when games have tens of thousands of entities simultaneously on the screen.

It leverages data-oriented design (DOD) principles to improve performance by leaps and bounds.

Unity DOTS sidesteps the conventional Unity development cycle and provides game developers with a new game architecture.

Its main idea is to harness the central processing unit’s (CPU) cache and your graphics processing unit’s (GPU) single instruction, multiple data (SIMD) capabilities for extraordinary performance.

Unity DOTS is a reliable way to achieve the performance you need if you’re developing a game or other real-time simulation that requires the most efficient usage of your CPU.

How Unity DOTS Revolutionizes Game Development

What is Unity DOTS for? This tool allows game developers to achieve increased performance and scalability, leading to more complex and immersive games. A few significant ways in which Unity DOTS transforms game development include:

  • Using DOD principles to optimize CPU usage
  • Using the C# Job System to offload work to different CPU cores
  • Enhancing runtime performance with the Burst Compiler

Reasons To Learn Unity DOTS

Should I learn Unity DOTS? If you’re a game developer, mastering this framework offers the following advantages:

  • Boosts game performance and optimizes resource usage
  • Helps build more advanced and sophisticated mechanics to realize a game’s maximum potential
  • Helps you stay abreast with current industry trends and developments
  • Improves your game development skills and gives you a competitive edge in the job market

Unity DOTS: Current State

Unity DOTS is a constantly evolving tech stack, so it gets updates and improvements regularly.

This helps game developers keep up with current developments while sharing their feedback and experiences with their peers. It also helps fine-tune and build on the Unity DOTS ecosystem as developers learn from each other.

Unity DOTS Tutorials and Learning Resources for Beginners

Check out the best Unity DOTS tutorials and learning resources that will help you become an expert in using this framework:

1. Zenva Academy’s Unity Associate Programmer Certification Pathway

A Unity Authorized Learning Partner, Zenva Academy offers high-quality courses that are relevant to the modern learning landscape. It provides a comprehensive collection of courses called the Unity Associate Programmer Certification Pathway that help you prepare for the certification examination.

These courses delve into 2D and 3D games, C# programming, asset management, user interfaces (UIs), and debugging. They will help you work on real projects as well as create a portfolio of Unity projects and games.

Your Unity Portfolio

What you'll learn in the program: Unity Associate Programmer Certification Pathway

The Certification Pathway is suitable for beginners and advanced learners. Also, its curriculum includes challenges that will enrich your learning experience.

2. DOTS Best Practice Guide

You cannot dive straight into Unity DOTS’ API documentation if you want to use the tech stack to its full potential. Before working on a DOTS project, you must master the following elements:

DOD is a technological leap from the object-oriented programming (OOP) that most game developers have worked with throughout their careers. So, you may have to deal with a steep learning curve for this framework. You may also have to tackle common pitfalls that could prevent you from getting the performance boost you want.

How OOP vs DOD Works in a Game: Beach Ball Simulator

An imaginary game "Beach Ball Simulator: Special Edition" demonstrating OOP vs DOD
The Best Practice Guide includes essential tips and advice to help you overcome these traps. It delves into using Unity DOTS for building games or real-time simulations while optimizing CPU usage.

It’s not an all-encompassing tutorial, but it helps you learn how to achieve the best runtime performance possible in code written with DOTS packages. It also discusses ECS, making it a valuable tool in your Unity DOTS learning arsenal.

3. DOTS Guide: Tutorials and More

The Unity DOTS Forum published a set of reference materials called the DOTS Guide: Tutorials and More to help developers learn DOTS with a focus on ECS.

The guide includes a video overview and a summary of essential ECS concepts. It also has a tutorial that helps you understand ECS and C# Job System basics as well as cheat sheets covering API topics.

This guide is available on GitHub, and its creators have encouraged game developers to share feedback to improve the content.

4. Unity DOTS Official Website

The Unity DOTS official website provides learners with essential information about DOTS and its different aspects, including ECS, C# Job System, and Burst Compiler.

Many studios have used DOTS with incredible results. The website also offers a treasure trove of resources to help you learn DOTS and DOD’s fundamental concepts.

5. Getting Started With Unity DOTS Part 1: ECS

Getting Started With Unity DOTS Part 1: ECS is an excellent tutorial that introduces you to Unity DOTS, especially ECS. It covers crucial concepts like entity, component, and system. It also discusses more advanced topics such as memory chunks, archetypes, and entity queries.

6. Intro to Unity DOTS Physics

Intro to Unity DOTS Physics is a fantastic text tutorial that explains Unity DOTS Physics. It teaches learners how to use Unity DOTS Physics for players, prefabs, and bullets, as well as handling collisions.

Physics Course Preview

It also has information on using Unity DOTS NetCode for multiplayer functionality and the UI Toolkit for creating a responsive game UI.

7. DOTS 101: Introduction to Unity DOTS for Beginners

DOTS 10: Introduction to Unity DOTS for Beginners is a short seven-minute YouTube video that offers a basic summary of the tech stack. It presents DOTS’ main packages and introduces the core concepts of ECS in an easy-to-follow manner.

Conclusion

Unity DOTS is a game-changing framework that every budding and experienced game developer must know about. Its collection of technology packages helps them create high-performance games that players will love. It offers various benefits for game development, making it a crucial component of developers’ toolkits.

We hope that our list of the top Unity DOTS tutorials and learning resources will help you navigate the powerful framework and get started.

Sources

https://learn.unity.com/tutorial/part-1-understand-data-oriented-design
https://learn.unity.com/course/dots-best-practices
https://forum.unity.com/threads/dots-guide-tutorials-and-more.1342700/
https://dots-tutorial.moetsi.com/unity-dots-physics/intro-to-unity-dots-physics

What Is a VFX Compositor?

0

How to become a compositor
Visual effects (VFX) compositors are in high demand in many industries such as film-making, gaming, and animation.

Most studios need compositing in some form, whether it involves the seamless integration of special effects (FX) with environments or VFX shots with computer-generated (CG) characters.

VFX compositors also work on less noticeable VFX elements like rain, fog, and stray hairs.

In this article, we delve into what a VFX compositor is, what they do, the salaries of VFX professionals, how to get started as one, as well as the skills and tools they need.

What Does a VFX Compositor Do?

What is a VFX compositor?

A VFX compositor works in the tail end of a VFX “pipeline” or production process. They either work as freelancers or get compositor jobs at VFX studios.

Compositors are responsible for creating the final render of a shot, frame, or visual effects sequence. These professionals combine multiple rendered assets or digital design materials, including CG images, matte paintings, and live-action footage.

The ultimate goal is to make them look like single-moving and cohesive images or shots.

A VFX compositor considers a scene’s visual aspects, such as realistic lighting, and relights the scene to enhance the appearance of the image. Essentially, they must take care of anything created when the light hits the lens.

Compositors creatively match different layers, factoring in aspects like light and shadow, perspective, depth, color, and grading by using color correction and z-depth techniques. Z-depth is a black-and-white render of an object’s depth in a scene which is a crucial aspect when compositing 3D design elements.

Before starting a job, a digital compositor must know a shot’s depth of field and the type of camera or lenses used to shoot plates.

They must also use different techniques to refine and polish their work on technical and creative levels. Moreover, they must ensure that every shot within a sequence supports continuity and seamlessly flows from one image to another.

VFX compositors may be tasked with building or merging complete worlds so they must be ready to tackle a variety of unique projects that come their way. Their daily schedules differ depending on the production type and budget, so they must also stay flexible.

In smaller studios, compositors may have to perform all the tasks related to compositing. Meanwhile, larger studios often hire junior compositor artists to handle duties like green screen keying and rotoscoping.

Some other tasks and duties VFX compositors perform include:

Researching


Compositors must research real-world references, watch reference videos, and develop different concepts before creating a shot. During production, they must research various elements, including sourcing stock footage, creating matte paintings, referencing color correction, and matching shots to a scene or film.

This research is crucial for ensuring successful outcomes in a VFX project.

Chroma Keying


Chroma keying or keying involves selecting a specific aspect in an image with distinct lighting or color so it can be extracted and used somewhere else.

A compositor artist commonly combines this method with a “green screen” or a “blue screen” footage. It involves shooting subjects before a plain blue or green background so they can be later placed in another environment or setting (called a plate) in the post-production stage.

Rotoscoping


A day in the life of a compositor may include rotoscoping. This common compositing task involves creating outlines with a pen tool or other tools to isolate specific objects. It helps separate objects from other design elements in a scene or shot so effects can be added to them.

De-aging and Aging


A VFX compositor job description may also include de-aging or smoothing out an actor’s appearance to make them look younger. In contrast, compositors may also have to use aging techniques to make an actor look older to suit a scene’s requirements.

Adding 2D Effects


Compositors may also be responsible for adding 2D special effects to a scene, such as motion blur, lens flare, dust particles, and graphics.

Skills Needed To Become a VFX Compositor

What do you need to be a VFX compositor? A compositor should have interpersonal, technical, and creative skills.

VFX projects involve extensive collaboration—a single shot will pass through many departments before it reaches the VFX compositing department. This means that compositors need a solid understanding of the VFX pipeline as well as excellent collaborative abilities.

In addition, they need to have a good eye for making images look extremely realistic, especially when it comes to perspective, color, light, and composition.

Here are other skills that aspiring VFX compositors should look to develop:

  • A thorough understanding of image properties, composition, and color theory
  • Photography skills—they must understand composition, framing, lighting, shutter speeds, depths of field, and apertures
  • Knowledge of anamorphic compositing and stereo (3D)
  • Sound knowledge of VFX compositing tools such as Nuke, Blackmagic Fusion, Houdini, Maya, After Effects, and Photoshop
  • The ability to efficiently work with a team of other VFX professionals while drawing on each other’s skills and resources
  • The ability to adhere to deadlines and work within stipulated time frames
  • The ability to perform under pressure

VFX Compositing Tools and Software

Here are the most popular software programs and tools that VFX professionals use for video editing, digital painting, and compositing:

  • Nuke
  • Adobe Photoshop
  • After Effects
  • Autodesk 3ds Max
  • V-Ray
  • Arnold
  • Houdini
  • Blackmagic Fusion
  • Houdini
  • Mental Ray
  • Maya
  • RenderMan
  • Shake
  • Combustion
  • Flame
  • Inferno

VFX Compositor Salary

How much is a VFX compositor’s salary? A VFX compositor earns anywhere between $75,000 to $180,000 a year.

Glassdoor reports that the estimated annual salary of a compositor is around $87,547 in the United States, with an average yearly pay of $82,248. Senior professionals with years of experience and knowledge may earn more.

How To Become a VFX Compositor

VFX artists planning their next project
Creating showreels to showcase your strengths and abilities as a VFX compositor is one of the best ways to become one. A college degree in VFX is also handy since it provides you with credentials as well as the resources and time to develop your portfolio.

Many compositors begin their careers as runners or as junior VFX artists for VFX studios. This is a good starting point for working your way up. A few studios also hire junior compositors.

Here are a few ways you can become a VFX compositor:

Get the Necessary Qualifications

In college and high school, there are certain courses you can take to give you a leg up as a VFX compositor. You can enroll in these subjects or their equivalent:

  • Art
  • Graphic design
  • Design
  • Graphic communication
  • Maths
  • Physics
  • Computing
  • Computer science

You can also opt for a Level 3 vocational qualification to dive straight into an apprenticeship or a job.
Getting a university degree in VFX is also an excellent choice. Select a course that offers training in relevant software, gives you time to build a portfolio, and has strong connections with the VFX industry.

Build Your Portfolio

Master video editing and compositing software and experiment with a versatile palette of VFX programs and projects. For example, you can create and collect images and footage to build a landscape. This will hone your skills and help you get the necessary training.

Also, create showreels you can share with institutions and potential employers. Concentrate on building a relevant work portfolio that showcases your practical skills.

Moreover, learn the finer points of VFX and familiarize yourself with the latest tools, techniques, styles, and other aspects of the industry.

Network

Networking is another way to become a compositor. You can leverage networking opportunities like online and in-person meetups and conferences. These events will help you reach out to professionals in the VFX industry. Ask them about their work, and show your knowledge and interest in the field.

Also, offer to share your contact details with them and stay in touch. This will boost your learning and help you get an apprenticeship or a job.

Many networking events feature guest speakers who share exclusive tips and tricks, especially at Q&A panels.

Get an Apprenticeship

Apprenticeships are jobs that offer training. They are an excellent opportunity to earn an income while you learn at a VFX company. Try to land an apprenticeship as a compositor or junior 2D artist.

If you cannot get an apprenticeship with a VFX studio, you may want to find an apprenticeship in a related industry, such as animation or games. It can teach you essential skills, give you some industry experience, and help you get your foot in the door of the VFX industry.

Look for Jobs

Identify VFX firms you want to work with. Visit company websites to see if they have any compositor job postings. If they are not advertising jobs, you can still send them your showreel and CV so that they can contact you in case they have suitable roles or projects in the future.

Also, keep an eye on job websites to cast a wider net.

Conclusion

VFX compositors add to the realism of special effects in videos, films, and games. They help make special effects look more credible and cinematic by injecting them with that wow factor.

Acquiring essential skills and the right tools will help you become a successful VFX compositor who can creatively blur the lines between fiction and reality.

Are Video Games a Sport?

0

Are video games a sport
The introduction and rising popularity of home consoles and arcade games in the 1970s transformed entertainment for children and adults worldwide.

Gaming has become a popular and well-accepted hobby for many people. But most avid gamers and non-gamers have a common question, “Is gaming a sport?”

The advent of competitive gaming and international competitions promising millions of dollars in cash prizes has more people debating if we can consider video games a sport.

Traditional sports fans will shun the idea outright since gaming lacks the physical element that typically defines sports.

However, esports enthusiasts argue that professional gaming requires extensive practice, effort, and dedication like traditional sports. They also point out that competitive gaming involves some level of physical exertion.

Let’s dive into the reasons why gaming should and shouldn’t be a sport.

We also shed light on how video games compare to traditional sports for a well-rounded overview that looks at both sides of the argument.

Reasons Why Gaming Should Be a Sport

Friends hanging out and playing video games
Why should gaming be a sport? There are many compelling arguments on this side of the fence such as:

Physical Exertion

One of the most powerful arguments for classifying competitive gaming as a sport is its physical demands.

A 2016 study by the German Sports University in Cologne reported that eSports athletes experience high levels of physical strain during competitions just like traditional athletes. It also explained that gamers’ heart rates could reach 160 to 180 beats per minute—similar to that of marathon runners—during competitions.

Gamers also exhibited cortisol levels comparable to that of F1 drivers.

Moreover, many popular competitive games require a complex level of tactical understanding for players to win. These games force players to quickly react to opponents and create strategies on the fly. So, professional gaming simultaneously activates different areas of the brain.

Also, professional gaming calls for highly refined motor skills and hand-eye coordination. The same 2016 study established that players use their keyboard and mouse 400 times a minute on average. That’s four times more than your average person.

Teamwork and Communication

Similar to traditional sports, video games can teach players to communicate and collaborate. Several games demand that players work in teams which necessitates good team dynamics, communication, and coordination.

Though some games allow players to succeed on their own in their early stages, the higher levels can only be beat with collaboration and teamwork. Hence, video games are great tools for fostering teamwork and social skills among players.

Skills Development

Over the past few years, several researchers have explored how video games affect the mental health, intelligence, cognitive development, and behavior of children. They discovered that playing video games offers many benefits, particularly in these aspects.

Young players who regularly play games often have higher IQs than those who don’t play. At the same time, video games improve spatial cognition, attention, memory, perception, problem-solving skills, and multitasking skills.

In addition, they enhance cognitive flexibility, allowing players to quickly switch strategies as they respond to challenges.

Other studies credit gaming with boosting creativity and persistence. A 2013 study found that college students who regularly played games showed greater persistence in accomplishing challenging cognitive tasks than their peers who didn’t.

Gaming also improved motivation, conscientiousness, impulse control, and academic performance.

Dedication, Practice, and Training

Becoming an esports professional requires you to consistently dedicate time and practice to your craft. The more skilled you become, the higher you can rise through the ranks of competitive gaming.

But esports athletes don’t only play a few games in the morning and laze around all day. Like traditional athletes, they usually belong to a professional team and have coaches, rigorous training routines, and a healthy diet. Many also stay physically active, adhere to proper sleep schedules, and socialize in the real world.

Professional gamers do strength training to prevent common esports injuries, such as tennis elbow or carpal tunnel syndrome. Physical training also improves coordination and responsiveness.

Global Recognition

Since 2017, many bespoke esports venues have popped up worldwide—with Canada, China, the US, and the UK having some of the largest arenas.

Canada’s Toronto Esports Arena, set to open in 2025, will have 7,000 seats, while China’s Three Gorges Harbor Esports Stadium holds 6,000 fans. Meanwhile, the UK’s Dundee Esports Arena accommodates 4,000 spectators, and the Esports Stadium Arlington in the US holds 2,500 visitors.

Esports prize pools are also enormous and will only grow in the future. DOTA 2 International, one of the world’s biggest annual esports events, has a $40 million prize pool, which includes crowdfunded prize pools. The League of Legends World Championship and the Fortnite World Cup Championship are other worthy mentions.

Besides new arenas, esports were also digitally included at the Tokyo 2021 Olympics backed by Intel. Intel also plans to give esports more visibility at upcoming Olympic editions.

Moreover, in January 2020, over 443 million people worldwide regularly watched esports tournaments.
These developments show that esports are becoming a recognized form of sport by more official bodies and members of the public.

Inclusivity

Another valid reason for treating gaming as a sport is that it offers inclusivity for all kinds of players. A 2008 survey showed that over 20% of casual gamers are physically, mentally, or developmentally disabled.

Although disabilities may make it challenging to play many traditional sports, video games often level the playing field. Almost anyone can play video games whether they struggle to walk or perform regular activities with ease.

Games also allow disabled players to connect with other people and make friends.

Studies have also reported that active video games promote the development of motor skills in children with autism spectrum disorder, cerebral palsy, and Down syndrome. These games also improve muscular fitness and motor competence among overweight or obese children.

Reasons Gaming Shouldn’t Be a Sport

Friends connecting over pizza
Most arguments against counting gaming as a sport appear to come from traditional sports fans. They argue that video games are not sports since they lack the typical physical elements that characterize sports like football, basketball, cricket, rugby, and running.

Even if we count moving the joystick and tapping the keyboard and mouse as physical exertion, the playing field is still limited. Barring active video games, most games do not push players to be active and instead contribute to sedentary lifestyles.

Another concern is that excess gaming can lead to addiction, but setting gaming hours can mitigate this issue.

Also, many consoles like the Nintendo Switch have built-in features to help deal with addiction. Loved ones of gamers can download an app that helps them schedule gaming time on the console.

If players exceed this set time, the app allows their loved ones to send a reminder to the console. If players keep playing despite the reminder, their loved ones can shut down the console remotely.

Gaming vs Traditional Sports

As the name denotes, traditional sports are tradition. We have known their rules for hundreds of years, and there is no need to alter them. The only difference seen in traditional sports—be it soccer, running, or javelin throwing—is new records.

In contrast, the gaming industry is ever-changing and constantly experiencing breakthroughs and improvements. Esports competitions can also revise their rules over time, especially with the availability of new equipment and the release of new games.

Why Is Competitive Gaming Booming?

Competitive gaming is witnessing growing interest from gamers, fans, and tournament organizers globally since it is more accessible. Like traditional sports, anyone can follow esports and enjoy watching their favorite team’s struggles. Viewers can also become casual or professional gamers and explore the other side of the coin.

They can also buy titles of their favorite teams and engage in competitive gameplay in similar settings using similar strategies. Also, new video games boast better quality and guarantee a seamless viewing and playing experience. It creates new career and income opportunities since more people can enter competitions and organize, finance, and manage them.

Wrapping Up

Are video games a sport? Yes and no, depending on who you ask. Traditional sports enthusiasts still consider gaming as merely a form of entertainment or hobby. Also, sports TV channels only broadcast conventional sports matches and tournaments.

Meanwhile, professional gaming live streams are limited to platforms like YouTube and Twitch.

That said, gaming requires constant skill training, exceptional focus, dedication, and team cooperation. Also, esports professionals earn up to millions of dollars, have a large fan base, and enjoy more fame than some Hollywood veterans. Esports also have dedicated venues, competitions, prize pools, and viewership.

This means the gaming industry will soon get its due recognition as an official sport, creating more legitimate careers for people globally.

A third argument sits somewhere in the middle, suggesting that gaming does not have to be a sport. It may lack the physical exertion of traditional sports but still demands fast reaction times, refined motor skills, and excellent strategy formation skills. Esports have different demands that offer an experience unique to it.

Sources

  • https://www.deakin.edu.au/about-deakin/news-and-media-releases/articles/study-shows-active-video-games-could-improve-kids-development
  • https://www.wsj.com/articles/how-professional-video-gamers-train-for-a-world-championship-1524495294?ns=prod/accounts-wsj&ns=prod/accounts-wsj
  • https://www.npr.org/2010/12/20/132077565/video-games-boost-brain-power-multitasking-skills
  • https://scitechdaily.com/research-shows-that-playing-video-games-increases-your-intelligence/

Module 2: Programming & Design Basics (Lessons 7-8)

0

Lesson 7: The Manual

Summary

In this video, Aaron highlights the importance of the GameMaker Studio manual, a resource that explains everything from functions to built-in variables. Unlike many technical documents, this manual is comprehensive and user-friendly.

Aaron demonstrates how to access relevant sections of the manual, discusses the manual’s structure, and encourages the use of its search function, autocomplete feature, and examples.

He emphasizes the importance of asking questions when encountering difficulties, as others likely face similar challenges.

Lesson 7 Transcript

So now I want to cover something that might seem really boring and not necessary, but believe me that it is.

The manual in GameMaker Studio explains how everything works, every function, every built-in variable, all of the stuff, and it does a very good job at it.

If you’ve ever done any programming and you’ve looked at manuals, then you probably know a lot of times they’re really bad. The technical documentation can just be awful and useless and lead you to look anywhere else. But fortunately, that’s not the case here.

So the way to access the manuals, but coming up and clicking on help and Open Manual, but I never use that because when you want help on something, you usually are looking at it and you’re trying to understand it.

So if you put your mouse over or next to whatever, you click on it and you put your mouse there and you press F one, it will open up exactly what you’re on and what it’s about.

(01:01)
Assuming it can find it, if it’s a variable that you’ve made that won’t be useful. But if it’s anything else, it will be able to find it.

So I’ll press F12 to maximize our screen real estate here. And you can see that this is telling us all about why, which is really cool and has a really good explanation for it. And down here on the left, you have going back. So this is like the hierarchy.

Where does this built-in property come from?

It comes from instance variables, and those are made up of instances. And then language reference, scripting, and contents. And then you’re at the very front here, over here on this side is all of the stuff that it has.

So looking through this can be a little daunting because there’s tons and tons of stuff in here. But I do encourage you to come in when you are confused about something or if you want to know if GameMaker can do this or that.

(01:56)
There is a search function up here so you can search for something. And there’s also an index if you want to just look that way if you know the actual name of what you’re looking for.

And then of course, whenever you’re typing anything out, you can let auto-complete come in. So if I typed in something like S P R, you can see it’s going to come up with a lot of options.

It has built-in variables, constants, and functions that you can access. And you can just click on one of ’em, have it auto-fill for you, and then press F1, open up the manual, and see exactly what that does. This is a great way to just learn.

So in the manual, it has a great description. It has the syntax of how you use it, and the arguments which we’ll get to later, but then it tells you what it returns and some examples. And usually, these examples are actually really useful. So check those out.

A lot of times what I will do is I will just open up the manual on something, scroll right down to the example, and look at it because my knowledge lends it to looking at the example

(02:59)
Code. But if you’re not quite there yet, read the description and you’ll probably understand what it does. If you don’t, after looking at the manual, then ask questions.

I am here for you. I will be available to answer questions. So just let me know and reach out, and I will do my best to help you.

And I’m sure the other students taking the course will also help you because let me tell you something if you are struggling at all, you are not the only one.

I guarantee there’s another student, probably another five to 20 to a hundred that are struggling with the exact same thing you are. And if you remain silent, you won’t be able to find the help, and then they won’t be able to get the help either.

So speak up, and ask questions. If I’m never clear enough if I don’t explain something in a way that resonates and connects with you, then ask and I will explain it and I will answer to the best of my ability.

And what I want to talk about next is actually when you ask for help, I’m going to give you some examples of the worst way to do it and the best way to do it. Because asking questions can actually be more difficult than you think. As a designer is one of your biggest skills that you have to work on.

Lesson 8: Asking For Help

Summary

In this video, Aaron explains the difference between bad and good questions, emphasizing the importance of providing enough information to get a helpful answer. He provides examples of poorly phrased questions and contrasts them with well-constructed ones that include specific details about the issue.

Aaron highlights the importance of including the full error message, screenshots of the code, and as much relevant detail as possible. He stresses that asking questions is a skill crucial for game designers, as it facilitates better communication and problem-solving.

Lesson 8 Transcript

When it comes to questions you’ve heard it said that there is no such thing as a stupid question, but there are definitely things such as bad and good questions.

So here are some examples of bad questions.

It is not working. That’s not actually a question, but you might be surprised how often I get that I did exactly what you did, but it doesn’t work.

Again, not a question, something I see all the time though, and it doesn’t tell me anything because if you actually did exactly as I did, then it would be working because when I did it, it worked. So that doesn’t give me any usable information.

I’m getting an error when I run my game, how can I fix it? So this is a little better. It’s actually a question they tell me they’re getting an error, but if I don’t have the air, there’s not a whole lot I can do because it could be one of a thousand different things.

(01:06)
So these are examples of bad questions because I am unable to answer the question or statement because you don’t give enough information or I don’t, I’m sometimes I’m really bad at asking questions too.

Here are some good questions.

I’m getting an error variable, not initialized on line 13 with variable my name. Why? Okay, so there’s something specific.

Tells me the line, you tell me it’s a variable, you tell me the actual error that’s happening and you want to know what’s going on. I can answer this question with pretty certain specifics and help you find a solution. That’s awesome.

The second one, when I collide with a solid, I move straight through it, but only while running on the left. What’s happening?

So we’re going to tackle collisions when we are moving characters, and this is going to be something that you might run into, and this is a pretty good question.

(02:06)
It does help me. It could do a little more information, but I can probably guide you to what you need to do based on this because there’s enough information on it and I want to give you some examples of what great questions include the full error message.

Now, when I say error message, what I mean is, that if you try to run this, we’re going to look at errors more specifically in a little bit. But if I try to run this right now because I misspelled the variable, I’m going to get an error.

This is an error message right here, and if you copy this whole thing and paste that in there, that is helpful. I’ll be able to tell you exactly what went wrong with your code or game. If you do that, screenshots of your code is also very helpful.

(02:58)
And then as much detail as you can. Really, you cannot include too much detail, assuming that it is relevant. The amount of detail you add will only help the person answering. So why am I going over all this?

Well, as a designer, your goal is to get people to work together. But to get people to work together, you have to understand why it’s not working. What each person wants. Maybe their goals are the same, but they can’t communicate that.

You have to be able to draw out of the people you work with exactly what’s going on so that you can fix it. And when you can ask good questions, you’ll get better answers.

So asking questions is a skill, and as a game designer, if that’s what you want to become or do, then you’ve got to ask great questions. Both when you’re looking for help yourself and when you’re trying to solve problems amongst people or groups or whatever the case is.

(04:03)
Asking questions is a skill. The more you do it, the more you practice, the better you’re going to get.

So I highly encourage you both for you and for me as we’re going through this course. Ask great questions, give me lots of details, include examples, and tell me what is going on and what’s not working exactly. It’ll be better for you and it’ll be better for me.

So what we covered in this module was what is a game designer. What is a game programmer? What’s the difference?

We looked at GameMaker Studio 2 and what it can do. I introduced you to what makes up a 2D game, how to make a Sprite, create an object.

And we started to code. We looked at all the events that you can put into your game and how it all fits together to start creating something.

In the next module, what we’re going to do is start working on a snake-like game. If you ever played Snake, the old-school game that used to be on every single phone ever, we’re going to make something similar to that.

It’s going to be really fun, and we’re going to have a lot of really good discussions on how to design a game what that means, and what that looks like. That’s going to be coming up in the next module.

Module 2: Programming & Design Basics (Lesson 6)

0

GameMaker Variables

Summary

In this tutorial, Aaron discusses the significance of variables in GameMaker and in programming languages in general. He guides you through the process of creating a variable, navigating potential warnings, and underscores the importance of using descriptive names for variables.

Lesson 6 Transcript

Variables inside of GameMaker and pretty much across all languages are data that you can access and manipulate by a name that you set. This is super valuable information.

You’re going to be using variables left, right and center as soon as you understand how to do it. So let me show you.

We already have a creative event inside of here, but if you don’t add one now the creative event is a great place to set variables because it only triggers one time and you can make them just once and then you can access those variables everywhere.

So the term variable really just means changing something that changes depending on circumstance, and that’s really what it is. So a variable can be any name and it can hold anything that you want.

So let’s test it out. Let’s create a variable called speed.

(01:05)
If we type that, we suddenly get a list that pops up and these say built-in variables and then we have constants and functions and what is all this?

Okay, let’s not worry too much about the rest of these, but let’s talk about built-in variables really quickly. Because a built-in variable is a reserved word that you are not allowed to use.

You can set these but you can’t do a whole lot more than that. You can read them and set them, but GameMaker Studio has already said this is going to do something very specific and you are not going to alter what that can do.

So these are very helpful and we’re actually going to use them here and there, but you cannot control what speed actually does inside of your game. So if it has green, it is built in and we might want to rethink about using it instead.

(02:05)
Let’s name this something different. Let’s call it move speed, and then that’s our variable, but we have to set it to something. So if we don’t set it, we get an error over here that says unnecessary expression, move speed, used as a statement, blah, blah, blah.

We’ll talk about what that actually means later because it’s not that helpful of an error statement, but we have to use the equal sign and then give it some kind of value.

What I want to do is give it a value of three and then a semicolon. So now essentially you can think of move speed as equaling three. So that’s really cool. We can then use this anywhere, but you might be wondering why we need to do that if we can just put three there instead well move speed.

You can now put lots and

(02:58)
Lots of places to control all of the movement of your player. And then if at any time you wanted to change it to increase it, decrease it, stop it. You just have to change it in this one spot.

So let’s come into the step event and let’s say instead of adding five, let’s add our move speed. So already we have this in two places and if we want to change it, we can just come in here and change it right there and now these have both been changed.

You can start to imagine when you have a lot of events with a lot of movement, you want to control it with a variable because it will save you so much time. The rule of thumb here is that if you use some piece of data or a number or anything like that more than one time, you should make it into a variable.

(03:52)
So we’ve done that.

Now, a variable can also hold other kinds of data such as if we type in my name. The way we actually put in text inside of our game is with double quotes and double quotes.

This is what’s referred to as a string. A string is just a line of text. That’s essentially all you need to know. There’s some technical jargon that you could get into, but GameMaker Studio just says, everything inside of these quotes is considered a string and I’ll do anything you want with it, assuming that it’s allowed.

So some of the things that you can do with a string are find out what’s inside of it. You can alter its contents, you can get just the numbers, you can get just the letters, pretty much anything that you want to manipulate when it comes to a string, you can do, but it has to know that it’s a string.

(04:54)
Now, GameMaker Studio is super relaxed, like I’ve said when it comes to variables as well.

So we can come in here and now set my name equal to 10 instead. And now my name equals 10, not Aaron, which is kind of confusing other programming languages. If you come and try and do this, it will throw an error because there are different data types.

We’re not going to get into that too much right now, but essentially GameMaker Studio is very relaxed and easy to work with.

Now you’ve probably seen this pop up a couple times already. This is a warning. This will not keep your game from running. You can still run it totally fine. If I press F five right now, the game will run. All right.

This warning simply means I have not used this variable anywhere else. And a lot of times when you get that warning it’s because you misspelled something. So if we come into the step event and I said

(05:57)
Move speed without a capital S, all of a sudden I’m going to get this warning over here, and that should be a flag to me to say, oh, I’ve made this variable in here. So if I’m getting a warning that it hasn’t been set or used anywhere else, I’ve probably mistyped something.

So let’s fix that.

Okay, now we’ve got that fixed, this warning, that’s okay. Just make sure that if it’s a warning in the Create event, you’re probably fine. If it’s in another event, then you’re in trouble. So make sure you watch that.

So we’re going to be using variables all over the place and all the time. So you make them with a name and I’m going to highly encourage you to use a descriptive name. Some programmers don’t and it can get really hard to tell what’s going on because you do not have to say, move speed.

(06:50)
I could say that is my variable name equal to one, and I could copy this and I could paste it in here and I could run and it will work. Nothing wrong with that. GameMaker does not care what the name of it is, as long as it’s not a built-in variable.

But this right here is not useful. You are never going to remember what this is supposed to be, and you’ll have a very hard time typing it out anywhere else. So I’m going to use descriptive names as we go along.

Sometimes we’re going to be a little bit longer, but it will be much more helpful if you ever take a break or come back or you’re working with someone to know exactly what this variable does and probably where it is getting used.

So that’s just some good advice that I encourage you, highly encourage you to take up. Next, I’m going to introduce you to the manual, which sounds super boring, but GameMaker’s Manual is super helpful and actually one of the best that you will find when it comes to helping you program.

Module 2: Programming & Design Basics (Lesson 5)

0

Event-Based Programming

Summary

In this video, Aaron explains the basics of GameMaker Studio and the fundamental concepts of 2D game development. He discusses:

how the X and Y coordinates work in the GameMaker grid system,
how to modify object properties, and
the importance of the ‘step’ event that runs every frame of the game.

He also covers the significance of different events like ‘create’, ‘destroy’, ‘collision’, etc., and touches upon the importance of semicolons in programming languages, despite GameMaker being lenient about their use.

Lesson 5 Transcript

So with our project still up, let’s take a few minutes to talk about what we did.

In that last video. We created a Sprite, an object assigned an event to it, and wrote some code. But what does this code do?

Well inside of GameMaker studio and with two D games in general, they run on a grid. So if we open up our room, we can actually see down here these numbers are the X and Y on our grid, and you can actually see the grid here because we have toggle grid.

If we take that off, it gets rid of that whole toggling system, but we’ll keep it on because I think it makes sense to see it. So this grid, oh, and by the way, the way I’m zooming in and out is holding control and using my mouse wheel to go in and out just in case you ever need to do that.

(00:55)
If you ever want to full screen, you can click this center fit button, which is also really, really helpful. So this grid is where everything is at your level.

In every single room, you’re going to have this grid and it has an X component and a Y component. So the X component is from left to right. So you can see if we move our mouse, it gets bigger and bigger and bigger.

Now if we move down, the Y component gets bigger and bigger. That is how we think about it. The top left is going to be zero. Zero, bottom right is going to be the maximum of our level, both in width and in height.

So looking at our code, when we typed Y, that is where this object is currently at. So if we double-click, we can actually see a bunch of properties.

(01:52)
Now they’re kind of hard to spot, so I’m going to hold control and zoom in a lot. Now we can see that there’s a lot of stuff in here, but if we come and look right here where it says X, it says four 80. So that is the X coordinate of our player.

The Y coordinate is 64. So we get the Y coordinate with this keyword. A keyword is a reserved word inside of GameMaker studio or inside of any programming language.

So Y refers to the Y position of our player and we are saying, take Y, which is where we are, add five to it, and then assign that back to our why. And we do that inside of a step event. Now a step event is just something that runs every frame of your game.

And games these days all run at 60 frames per second.

(02:57)
So this logic is happening 60 times every single second, which is really, really impressive. Computers are very powerful.

So getting the Y coordinate, assigning, which is one equal sign, two are y plus five, and then it just does that over and over, which is why the player moves down and down and down because the Y coordinate goes from the top to the bottom.

So if we are increasing the Y by five every single frame of our game, then it’s going to move down, down, down. So let’s try something different.

What if we only said Y equals five? Well, that means our Y position will be set to five 60 times a second, but it’s just setting it to the same spot so it doesn’t move, it’s just stuck right there.

Okay, that’s not as interesting.

Let’s press Ctrl Z to bring that back. Alright, so we can increase our Y.

(04:02)
Can we also increase the X in the same way? Sure, X equals x plus five semicolons. Now you might also be wondering, we’re going to increase the size of this first. You can increase the size with F8 and you can decrease it with F7. You might be wondering what is the semicolon all about anyway?

Well, in most programming languages you have to tell the computer when you are done with that specific piece of logic. And a lot of times that’s done with a semi.

So GameMaker studio is very, very, what I would call generous and lenient. So if we leave off a semicolon, nothing bad will happen. It will still run and it will still work perfectly fine.

But in other programming languages, if you ever move out something like C, if you leave off a semicolon, the program will not run at all.

(05:02)
You’ll get big red errors and you’ll get nothing at all. So you have to have it in some languages and it doesn’t matter in others.

GameMaker Studio is lenient so you can have it or you cannot, but I tend to put mine there simply because it’s a good programming practice because you might not always use GML and someday you might move on to something else.

And when you do that, having good coding practices in place will save you a lot of time and frustration. Let’s run this now and see if this works.

(05:39)
There we go. He’s moving down five a second and he is moving right five a second, which is exactly what we would expect.

Now, what are the other events inside of GameMaker studio? Well, if we click at event, we can actually see them and most of them are self-explanatory.

Create happens one time when it gets created only once and you can put the code inside of there. This event is really great and we’re going to use it all the time destroy.

So when we destroy that object, this code will run also very useful, clean up. Not going to worry about that right now, so don’t even worry about it.

Step event, you have step, which is kind of the middle one, begin and end. If you ever really needed to control the order of your code, which is very important, you could do that with these begin and end steps.

(06:35)
Alarms we’re going to talk about later, but basically it’s a timer that you can set and then it will run after that set amount of time, draw event, really, really great and it allows you to draw Sprites to the screen that you don’t have objects for.

This is something we’ll also use a lot. Mouse controls, everything you do with the mouse, moving it around, pressing keys down, this is really helpful.

Key down is when a key is being held down. So any key on your keyboards, you can check right here with this event.

Key pressed will only trigger once when the key gets pressed. Same thing for key up. When it is released, that code will run. Gesture is for mobile-based games, very useful but not something we’re going to be talking about. Collision is when objects actually start touching each other in the world.

(07:31)
This is very helpful and we will use this quite a bit. There is another, which contains a lot of ones such as outside the room intersecting the boundary of your level, game start, room start, animation end, and so on and so forth. These are all really useful and we’re going to touch on quite a few of them as we get going.

And the last one is asynchronous, which we’re not going to worry about at all. They are for doing stuff online with web games or for getting information from the internet, which we’re not going to worry about right now.

So those are the events that you can have.

They trigger when they basically say they will. So create and destroy and step event is really the one that is kind of strange. Step events will trigger every single frame of your game.

All of the other events are purely event-based. So when this gets created, the create event will trigger and for the most part, that’s what most of the events are.

When something happens, GameMaker will go in and check all of the objects that are on your level and say, Hey, we just started a room. Does this object have a room start event? Does this have a game start event? If so, let’s run that code. Otherwise don’t worry about it.

So GameMaker is event-driven, which is really, really great. The

(08:54):
Step is kind of a cheat because you can drive events with it. Instead of having events drive, we’re going to use the step event a lot to our advantage.

It is very, very crucial, but we’re going to talk about all of this, how to use them when to use them, and what to put in them as we go about making our games. What I want to introduce you to next is variables, what they are, how to use them, and why we absolutely need them in our games.

Module 2: Programming & Design Basics (Lessons 4)

0

Easing Into Code

Summary

In this tutorial, we dive into GameMaker Studio 2 and learn the basics of creating a sprite, an object, and writing our first line of code.

This video serves as a practical introduction to GameMaker Studio, demonstrating key features while guiding new programmers through their first steps in game development.

Lesson 4 Transcript

So let’s go ahead and open up GameMaker Studio 2. And if you open it up like this, this should be what you’re seeing. It’ll have some images up here talking about the tutorials or free stuff you can get, and you’ll have all of these options over here.

The one we want is new, so click on new, and then you’re presented with drag and drop and GameMaker language. Now, GML is what we’re going to refer to that as, and that’s what we want to use.

Drag and drop is a visual-based programming, and it’s really, really great if you’re just starting out, but there are some limitations. There’s some stuff that you just cannot do with it, and it also takes a lot longer and you’ll also find a lot less support for it.

So as a new programmer, sometimes it’s tempting to use the drag and drop because it’s actually easier when beginning, but if you ever run into a problem using it, you won’t be able to find support because anybody who’s making games is probably going to be using GML itself.

(01:05)
And that’s what we’re going to start with. So go ahead and click on GameMaker language. Give it a name like First Code Press. Okay, and it will open up.

So I’m going to increase the size over here, and what we’re going to do is we’re going to make a Sprite and an object, and we’re going to go through exactly how to do that now. So over on the resources, you can right click and create Sprite.

You can also do that with the shortcut Alt S, or you can come up to resources and click on create Sprite. I’m never going to do this because it’s way out of the way and it’s much easier to just do it over here. So right click and create a Sprite, and you are presented with this window right here.

Now, let’s talk super quickly about naming conventions, because once you start coding and developing anything like a large project, you have to have good naming conventions.

(02:02)
I’m going to be using something called Camel Case, which looks like this. So if I type a word, let’s say this is going to be a Let Player Sprite. So if I typed player, then the next word, the first letter will be capitalized. So the S Sprite. So that’s what that would look like. Now, that’s what I am going to use.

A lot of people instead, use underscore and no caps. Some people will capitalize each one and other people will do things completely different. That’s okay.

Whatever you do, just do it consistently because if you are not consistent, you will have a very hard time remembering what things are named and how to access them, and you will have a lot of errors and frustration. So whatever you’re going to do, just be consistent.

I encourage

(02:58)
You to follow what I’m doing. That way if you have any problems and you ask questions, I’ll be able to help you easier, but whatever’s comfortable for you or whatever you’ve done in the past, feel free to do that.

The last thing I want to talk about naming conventions inside of GameMaker Studio specifically is we have all of these kinds of resources here and we need to use a prefix for each one. It helps to know exactly which one we’re referring to because if we create a Sprite for the player and then we make an object for the player, we cannot name them the same thing.

Resources can’t have the same name. So the way we fix that is by adding a prefix. So I’m just going to say Ss p R for the prefix for Sprites. That’s what I’m going to name all of my sprites is s p r first, and then we can put in what it is.

(03:53)
So I’ll tape this S p r player and press enter. And you can see over here it has also changed. Okay?

Now there’s a lot inside of here that we can talk about, but for now I just want to show you how to create a Sprite.

This window right here, double click on it or now this opened up so you can see that there are tabs up here. So if you want to get back to where we were, you go to workspace.

Okay, so I’m going to close that really quick. You can double click on that to get it, or you can click on this button right here to edit Image. Both of them will take you to the exact same place. Okay?

Now inside of here, GameMaker Studio has a pretty robust Sprite creation tools, so you can make pretty much anything you want inside of here, including animated Sprites, which is really, really awesome.

(04:46)
We’re going to talk about animations later. For now, we’re just going to use a tool to create a circle.

So we have an ellipse tool, there’s an outline and a fill. So if we click on fill, you’ll see that it fills it up. If we click on outline, it will do an outline.

All right, let’s go ahead and do a filled one for now. Choose any color you want. I’m just going to start at the top, drag it all the way to the bottom, and then I’m going to choose another color, and this is the paintbrush tool over here at the top.

If we click on this, we can actually just draw regularly. If you want the brush to be a different size, you have some pre-selected sizes right here, or you can choose exactly what size you want with this right here, if you go really large, it’ll cover up the entire screen, which is not what you want.

So I’m just going to keep mine at one and I’m going to draw something like this. There’s a happy look and player. Now, I am not an artist, so whenever I do some custom art, it’s going to be very bad and very silly. If you are an artist, I encourage you to take the time,

(05:57)
Make something a little more complex, but don’t spend forever on it. We want to get to the next part, which is when we actually do a little bit of coding. So we have a player, let’s close this and you can see he’s right here now.

Now let’s go over to objects. We’re going to right-click and create an object, and the prefix for objects is going to be O B J, and I’m just going to name it player. So now we have a Sprite player and an object player. So now we can do a lot of stuff over here.

For now, all I want to focus on is assigning the Sprite. So you click on no Sprite, and then you can choose the one we made. You can choose no Sprite. You can also choose to create a new Sprite from right here in this object if you wanted to and have it automatically assigned to it.

(06:49)
That can be really helpful.

If we choose the player, we can edit the Sprite and we can also edit the images directly. If we click on this, it opens that back up, which we’ve seen before. And if we click on this, it’ll take us to this window of the Sprite where we have all the options to edit inside of there.

Now, that’s our Sprite, and this is our object. Now I want to show you how to program inside of GameMaker Studio, and then we’re going to do a more in-depth discussion of it in the next video. GameMaker Studio is event driven, which means that if you go to ad event, you have all of these options, things that can happen to the player, and that’s where you put in the code.

What I want to do right now is add a step, event step, and then we come over here.

(07:39)
If you double-click on this from wherever you are, it will focus it getting around Game Maker Studio. If you hold space and then click and drag anywhere, it’ll move it around, which is really, really helpful. So I’m going to double-click on that.

I’m not going to worry about this first line. Instead, all I want to do is type Y equals Y plus five, and you can see there’s a little star here, which just means that we’ve made changes that have not been saved. You can press Ctrl Ss to make it go away, or if we bring it back by pressing space, we can just press F five or click run up here.

That will save your game, and then it will run it. So if we do that, oh wait, nothing happened. Okay, that’s because we forgot to actually put our object in our room. So let’s double-click on our room. It will open it up in a new window.

And again, there’s a lot of stuff here which we’re going to cover, but not right now. Instead, make sure that you have this instances layer selected and you click on the player and you drag it in

(08:54)
Here. Just put it right up near the top. If you click on the background and you try to drag it in here, you’ll get a red error and it will not work. So make sure you have instances selected and you put it right there.

Let’s click run again, and now we’re going to see our player move down the screen and disappear off of it forever and ever. Okay, that is your first Sprite, your first object, and your first line of code.

Congratulations. That’s awesome.

So what we’re going to cover next is what we just did and how it worked, because you’ve got your first line of code here, you added an event, but what does that mean and what do you do with it? That’s what we’re going to talk about in the next video.

Module 2: Programming & Design Basics (Lesson 3)

0

Showcasing GameMaker Studio 2

Summary

In this lesson, Aaron introduces you to GameMaker Studio, highlighting its capabilities by showcasing popular games created with it, and walking through its user interface and core components of a 2D game.

He also highlights the importance of staying motivated and inspired by customizing the background of GameMaker Studio with concept art or favorite game art. Aaron concludes the video by indicating that the next lesson will start with programming, easing into it by writing a few lines of code and discussing how it works.

Lesson 3 Transcript

So before we actually start programming, which is what we’re going to tackle next, I just wanted to show off some of the games that GameMaker Studio has made. Probably some titles you recognize just to get you excited about what it can do and to show you where your game can end up once you get it made.

So they have a little showcase here. I’m just going to click this and play it and let you watch it because it’s really, really cool and shows off some of the most popular games that they have right now.

(01:00)
So you can see that there are some really, really awesome games that they’ve got. And if we go down, they actually have listed a lot of games on here, some that you might recognize, like Hyperlight Drifter, rivals of Ether Under Tail Minute.

These are games that I have played that are really, really awesome. Rivals of Ether is a fun 2D brawler, kind of like Super Smash Brothers Minute is a fantastic game. If you haven’t played these, go and do it. It will show you what GameMaker Studio is capable of and what you’ll be able to make inside of it.

GameMaker’s specialty is 2D games, but as you saw in the showcase, it can also do 3D games. So there is really nothing you cannot do as long as you put your mind to it and you are willing to work hard.

You can make anything you want, which is really, really cool.

(01:52)
So that’s some of the games that Game Makers Studio has created. And now I want to just go through GameMaker Studio and cover the UI and some of the parts that make up a game.

We’re going to go more in-depth in these as we go through the module of creating our first game, but I just want to introduce you to these concepts so that they are not totally new as we use them.

So the parts that make up a 2D game are sprites, which are the images that you actually see and interact with and move tile sets, which are traditionally the background and the level design that you use Sounds, which are music and sound effects.

Then you’ve got objects, which are basically everything you interact with. If it can do anything based on code, it needs to be an object. So they are the core of everything you’re going to do inside of GameMaker Studio two.

(02:45)
And then you’ve got rooms, which are levels, just a different name, but that’s all that they are. And we’re going to put all of these together in your first game as well. Or not the tile sets, but those will come in our action platform or the last game that we’re going to make.

But we’re going to put everything else together as we go through this course, and you’ll be totally familiar and ready to create anything you can set your mind to. The last thing I want to show you is just a few preferences and shortcuts that we’re going to be using.

So you can see this resource bar over here inside of GameMaker. Everything is actually tabbed, which means that you can grab it and you can move it. So it can be docked like this, or you can dock it to the bottom or the left.

(03:27)
I am going to keep mine on the right as that is just what I am used to. But you’ve also got down here, you can slide to increase and decrease the size of this. If you double-click on this little square, it bumps up to 150%, which is what I always have mine at.

You’ve also got recent windows down here, which you can right-click and close or minimize or use it, but we’re not going to really be using it for this course. So I would just close it for now. Give you more room over here.

And then you’ve got the F 12 key. Yeah, it’s a key. If you press it, it takes away all of the tabs on the bottom, which can come up like this, and on the side and on the left, which happens when you open up a room.

If you need more space to see or do anything, you press F 12 and you’ve got a bunch more space, you press it again and they all come back.

(04:21)
I’m going to be using that key a lot. The other one I’m going to use a lot is F five, which is to run your game, as you can see right here, and F6, which is to debug it, which we’ll talk about later.

But if you press F5 right now in a blank project, it will open up this room. We don’t have anything inside of it, but this is your first game.

Well, I wouldn’t really consider it a game, but it’s your first time running GameMaker Studio, which is a good thing to know how to do. The other thing I want to talk about is file preferences.

So there’s a lot of stuff you can change in here, but the big thing that I know has helped me a lot is to change the background.

So you click on general settings background, and then you can select what you want in here, change the scaling of the image and press apply.

(05:10)
This is really, really important I think, because it helps you to stay motivated. You can take some concept art for the game you want to make and throw it on the background to inspire you every time you open up GameMaker Studio.

Or you can put some art from your favorite game, something that I’ve done, something that just inspires me to keep going, to show me what I can do and remind me why I started in the first place.

So definitely take advantage of that and if there’s anything inside of GameMaker that you want to change that you don’t like, it’s probably in here in the preferences.

But that’s all I want to cover right now. What we’re going to do next is start programming. We’re going to ease into it nice and slow by just writing a few lines of code and talking about how it works and why it does what it does.

We’re going to do that next.

Module 2: Programming & Design Basics (Lessons 2)

0

What Is A Game Programmer?

Summary

Discover the intricate role of a game programmer – they are responsible for coding all elements of a game, from player interactions to menu functionality.

This video explores the challenges and responsibilities of game programming and the complex roles they undertake beyond coding which includes extensive problem-solving, research, experimentation, and, most importantly, debugging.

Whether working solo, in a small company, or as part of a larger team, a game programmer’s responsibilities vary, impacting the development time, task complexity, and potential for problems.

Lesson 2 Transcript

So what is a game programmer?

Well, they’re the ones who create something out of nothing. Nothing happens in the game without the programmer first being the one to code it in.

This role is all about solving problems through code. They’re going to write the code for the player to jump, move, attack, interact, use the menu and everything else that the game consists of.

Usually what this looks like is the programmer typing out some code, figuring out exactly what they want to happen, trying to run it, have it fail, and then debugging it, which is the process of figuring out why it didn’t work and then getting it to do exactly what you want.

That is a very common loop when it comes to programming and game programming specifically, and that’s because rarely does code work the very first time you type it in. It requires a lot of trial and error, research, experimentation, and just figuring out exactly what you have to do to get it to work the way you want.

(01:08)
It’s kind of like a logic puzzle through code, which is how I look at it. And for me, that’s kind of what makes it fun.

In a small company or by yourself, the programmer might actually be the one to code the entire game. Everything from movement to the physics to the menu and how it works and interacts, and sometimes that’s a really great benefit.

That means when something goes wrong, that person who coded it now knows probably exactly where to go to fix that issue. Fixing it itself is a totally different thing, knowing where something is and how to fix it.

Two separate issues, but the benefit of having just one programmer code the game is really substantial, but it also means that it’s going to take longer and if you want to make any changes that one programmer has to go and make those changes.

(01:59)
Instead of building out more of the game.

In a larger company, the programmer is going to be set upon specific tasks. You’re not going to be able to just code whatever you want. The game is going to be broken up into dozens or hundreds or maybe thousands of different pieces that have to be done by individual programmers.

So that means you may tackle a little bit of the movement, a little bit of physics, maybe how the menu is going to be worked in the background or something like that. You work on it, you get it just right, and then you merge your code into the larger base and make sure that it works there. Do we any debugging?

And if it’s all good, then you go and pick up another piece of the game and you start working on that. This really improves efficiency as it allows many programmers to work on one game so that you can get it done faster.

But it also comes with the risk of having more problems and being able to solve those problems becomes much more difficult because it’s not just one program

(02:58)
Or everything. Now multiple programmers have to come together, talk, figure out what might’ve caused it, and be able to communicate exactly what they were trying to do, what they did and what’s not working now. So there is a possibility of increased efficiency, but there’s also the possibility of increased problems.

But a lot of that is managed through the project manager and making sure that communication is going well and that they have steps in place to figure all of that out, which is a totally different subject.

Just thought it would be worth mentioning, but whether you are a solo game developer or part of a team, your time is going to be spent coding and then probably the most part of your time is going to be spent debugging.

It is finding out what’s going wrong or what’s not working exactly the way you want it to and fixing it.

(03:50)
And really, I have to stress this is it is a lot of it going to be debugging.

Unless you’re doing something you’ve already done and know how to do, you’re going to fail when you first start writing code, and that’s just natural. It’s okay. I fail all the time when I’m writing code, even doing things I’ve done before, which is kind of sad, but just part of the gig.

Programmers have to have a lot of knowledge. But the thing is, we don’t memorize it all. We learn how to look it up, store just little bits that are essential and then figure out where to find it later on.

And so that means when we try and do something, it requires research, trying it out, debugging, and then finally getting it fixed and moving on to the next problem.

Like I said, it’s kind of like a logic problem.

(04:40)
And if you like logic puzzles and you like solving things like that, then coding is probably something that you’re really going to enjoy. And in this course we’re going to solve a lot of those logic puzzles.

The first couple games that we make, I’m going to walk you through exactly what to do and how it works. And then in the last one, I’m going to show you what it’s more like to be a programmer working on your own.

I’m going to make mistakes. We’re going to find bugs that we didn’t know were there and have to fix them on our own. And I hope you’re really excited about it.

If you’re not interested in being a programmer, but you want to be a game designer, this part is still really important because as a game designer, when you assign a task to a programmer, you can’t really know how fast they can get it done.

And that’s because you may ask them to do what you think is something simple, but is actually much more complex and requires a lot more time and leniency from you, the one who’s assigning the task.

So this will not only benefit the programmer who’s taking this course, but also the designer. So with that all being said, let’s go ahead and jump into the software we’re going to be using and get an overview of GameMaker Studio 2.