Home Blog Page 16

Module 2: Programming & Design Basics (Lesson 1)

0

What is a Game Designer?

Summary

Game designer wears many hats. This is especially true in a small indie team.

Whether game designers are part of a small or large company, they play an important role in ensuring that all aspects of the game development align with the initial vision of the creators.

They are entrusted with the responsibility of streamlining the communication between different departments and resolving any conflict that arises in order to create the best video game possible.

Dive deep into what it means to be a game designer in this video.

Lesson 1 Transcript

What is a game designer?

A game designer is the one who is the backbone of the team. They’re the one who makes sure that everyone stays focused and everything that gets created from all of the disciplines across game development meet that one initial vision.

This role will look very different though, depending on where you’re at. If you’re a solo game developer or in a small indie team, odds are as the game designer, you’ll actually end up doing lots of different things such as programming, art level design, management, PR, all of that.

And that’s because in a small team, the game designer doesn’t really have the ability to just focus on making sure everyone does their job because there’s so few people, they also have to contribute more.

But at the heart of it, the game designer is still the one that makes sure that everything that gets done, so that coding, the art, the PR, all of it lines up with that initial vision that the game designer had for the product.

(01:04)
But if you’re in a larger company with dozens to maybe hundreds of employees, the game designer role is going to be very specific. Your job will be to make sure that the game stays focused. And the vision is always what’s being worked on.

And that is going to mean communication, communication and more communication. And I really do want to stress that because as the game designer, you’re going to be the one going between lots of different people, groups, views and ideas.

So the game designer and a large company has to go to programmers, talk to them, figure out what’s working, what’s not what they want to do, and then go to the artists and do the same thing to the level designers, to the music, to the sound effects, to the PR, every single set of employees, the game designer is going to be communicating between and making sure that they all understand what the goal is and that what they’re creating leads to that goal.

(02:00)
And that’s not nearly as easy as it sounds because programmers are typically very logic and goal oriented. Artists are much more likely to be freeform and want to do their own thing.

Both sets need to be able to communicate. And when you try to communicate between different opposing views, then conflict happens. So as the game designer, you have to resolve that, figure out what each side is actually trying to do and make sure that both sides are happy and the game is continuing to be created.

And so whether you’re in a large company or a small company, the role of the game designer is to make sure that everything that gets done is to that initial vision of the product. And sometimes that initial vision is not going to be the designer himself or herself.

So if you are a part of a large company, odds are you’re going to be working on something that someone hands down to you, whether that be from an adaptation of a book, a movie, a TV

(02:58)
Show, a sequel, a spinoff of a different game, or something like that. A lot of times you’re not going to have total creative control of what you get to make.

Now the thing that you work on, you’re going to have a lot more control over how that is interpreted. But the actual vision, a lot of times, depending on the size of the company, you’re not going to have any say in that.

And so if that’s a turnoff for you, then you may want to make sure that you work in a smaller company where you have more power and your ideas are actually what you get to put forward and have the team work on.

Now, that’s not to say that the game designer is the one who says how everything is going to go. Each person on the team contributes their ideas, their feelings, and their thoughts to the project, which will influence both the play, mechanics, leveling story, all of that stuff.

(03:47)
The designer, depending on the size of the team, is going to have the final say.

If you’re working in a larger team, then you may have a project manager that you have to refer to and that they actually have the final say. But whatever the case is, the game designer is going to be the one at the heart of all of it. They are the backbone of every games company.

And as such, they’re the one who has to have a huge range of skills in communication. They need to know how to program to do some art, to how to do everything because they have to communicate with all of those people.

And that means the more that they know about those subjects, the better communicator and the better they’re going to be at being able to bridge those different fields to create the best game possible.

(04:31)
So if that sounds like something you’re interested in, then great. This course is going to be perfect for you.

We’re going to discuss tons of different game design ideas such as difficulty forms of feedback, audio, and so much more. But if you’re a little more interested in the programming side, don’t worry. This course we’re going to go over and make three complete awesome games as well, so that you’re going to have the knowledge to go and make whatever game you want to create.

And that’s because whether you want to be a programmer or a game designer, you’re going to benefit from this course and just learning as much as possible both about the programming side and the designing side.

But now that we’ve talked about what it is to be a game designer, I want to talk about what it is to be a programmer. So let’s tackle that next.

Module 1: Course Snapshot (Lessons 3-5)

0

Lesson 3: Make It Your Own

Summary

In this lesson, we emphasize the importance of making the games your own. Throughout the course, we will be creating three different games – a snake game, a space game, and an action platformer called ‘The Castle of Doom’. We encourage you to customize the games to your liking.

Whether it’s changing characters, sound effects, or level design, making the games your own will not only make the process more enjoyable but also help you learn more. Even if you use entirely different assets, you can still follow along with the course, and we will show you how to quickly find and fix any minor issues that may arise.

Remember, customization is key to making the games truly yours and overcoming small challenges will make you a better game designer.

Lesson 3 Transcript

So all throughout this course, we’re going to be creating three games. We’re going to be doing lots of design discussions and programming discussions as well.

But the three games we’re going to make are going to be the snake game, the space game, and the action platform or game called The Castle of Doom.

And what I want to encourage you with here is, one, you can do this and two, take the time to make these games your own, however you want to do that, you should definitely do that. So I’m going to provide to you assets, so sprites, sounds, images, everything you’re going to need to make these games.

The first one, we’re just going to create the Sprites ourselves. It’s going to be super basic. Don’t worry if you’re not an artist. I’m not an artist, but for the latter two games, I’m going to be using Sprites that I found online and I’m going to show you exactly where I found them.

(00:53)
I’m going to show you that I’m linking to the creators of all of these assets, and I want to encourage you to go follow those links. Check out art online and find your own. Make these games entirely, your own games. Change up the characters, change up the sound effects, change up the level, design everything.

Now, if you do that, you are still going to be able to follow along and everything I do will still be applicable to the game that you are making, even if it doesn’t look like mine at all. There may be a few minor issues here or there, but I’m going to show you how to find those and fix them quickly.

And the benefit that you will get from making these games your own and just customizing them to your heart’s desire is way greater than any sort of small issues that you might run into because you’re using different assets.

Even if you are using totally different assets than what I’m using, you can still ask me for help and I will do my best. We’re going to have some great support in this course, which is really awesome, and that is actually what we’re going to talk about next.

Lesson 4: Support System

Summary

We would love to hear from you! Please leave a comment below sharing your thoughts, questions, or any topics you would like us to cover in future videos. Your feedback is incredibly valuable to us and helps us create content that is most helpful to you.

If you find our content helpful, please give it a thumbs up and subscribe to our channel for more great content. Don’t forget to hit the notification bell so you never miss an update!

For more helpful resources about game design, visit our website: https://www.gamedesigning.org/. We have a ton of articles, guides, and courses that will help you take your game design skills to the next level.

Thank you for your support, and let’s create amazing games together!

Lesson 4 Transcript

So when you start doing anything in life, you know that you run into problems and bugs and headaches. So that’s why I’ve designed this support system to alleviate as much of that as possible. So there are three ways you’re going to be able to contact me.

The first way is on Teachable itself. On the video you’re watching, just feel free to leave a comment or question below and look through there, because there’s probably going to be other questions that have answers to what you’re going through. If you don’t see an answer to the question you have, then post one and I’ll go back to there as soon as I can.

The second way is going to be email. So you can email me at aaron@gamedesigning.org, and you can have a very descriptive description in there, and you can send attachments, including the project itself if you zip it up, and I can take a look at that and get back to you as quickly as I can on there too.

(00:52)
The third way is going to be the Discord server, which you will have received a link to in the welcome email. There’s going to be a link in the first lesson on here and in this video description. So find the link, join the Game Designing Discord server, and I’m going to be on there and other students will be on there as well.

So we’re going to just have a full community where we can help each other out. If you need even more help, then I’ll be able to do a one-on-one session with you where we can share a screen and do a voice call and figure out exactly what’s going on. Because even in my years of experience, I still make mistakes.

Everyone still makes mistakes, especially when it comes to coding. That’s part of the fun, is figuring out what went wrong and getting it to work right. So we’ll make it as painless as possible. We are in this together. Just remember that.

Before we actually start coding, I just have one more word of encouragement for you, and that’s in the next video.

Lesson 5: Time To Jump In

Summary

Instructor Aaron emphasizes the importance of self-belief, especially for those who have never programmed before, as it makes the learning process smoother and more enjoyable.

He shares a powerful mental trick that he discusses in detail at the end of the course, titled “The One Trick to Succeed,” which centers around the importance of believing that you can accomplish what you set out to do. You are capable and smart, and with perseverance, you will complete the course and become designers.

The journey to creating awesome games begins now, and the first design talk will start in the next video.

Lesson 5 Transcript

Alright, this is the last video in this module. We’re going to move into the next one, and then we’re going to start talking about game designing and start working on programming as well.

I hope you’re really excited because I am, and before we do that, all I want to say is this. You can do this. You are capable and smart, and if you persevere, you will make it through this course and you will be a designer on the other side. It’s going to be awesome.

Now, I do a long discussion on this mental trick I’m going to give you at the end of this course, so feel free to skip to the end and find the video labeled The One Trick to Succeed. I just want to share it with you really quickly, upfront because I think it’s super powerful.

The one trick is this, you need to believe that you can do it.

(00:52)
You’re going to be learning a lot in this course, especially if you’ve never programmed before. We’re going to take it slow, but there’s a lot to take in, and if you believe that you can do this, if you believe that you are capable of learning this, it’s going to go so much smoother and you will learn it.

Trust me, I had to learn this the hard way.

Believing in yourself is one of the best things that you can do. Believing that you can do what you’re trying to do makes it so much easier to actually get it done.

You can not believe in yourself and still accomplish it, but man, it is so much rougher to do that. Believe in yourself because I believe in you and you can do this.

We’re going to have an amazing time in this course. We’re going to make some awesome stuff and all of that begins right now. Let’s jump into the first design talk in the next video.

GameMaker Studio 2 Course – Module 1: Course Snapshot

Up Next >>> Module 2: Programming & Design Basics

Module 1: Course Snapshot (Lessons 1-2)

0

Lesson 1: Getting Pumped

Summary

Welcome to this game design and programming course by Aaron Craig! If you are aspiring to be the best game designer you can be, then this course is perfect for you. We will cover everything from functions, variables, to using GameMaker Studio, by creating three fantastic games.

Starting with a game inspired by the classic ‘Snake’, followed by a classic arcade space shooter, and concluding with an action-adventure platforming game called ‘The Castle of Doom’.

Throughout the course, we will learn about various game design topics and programming skills needed to excel as a game designer. So, let’s dive in and start by downloading GameMaker Studio!

Lesson 1 Transcript

Greetings and welcome. My name is Aaron Craig, and I’m going to be your instructor for this course. I am super stoked that you decided to take this course with me because it is going to be an awesome time.

We have a ton of content, and if you have come here looking to become the best game designer that you can, then you’ve come to the right spot.

We’re going to be talking about game design and programming and everything that has to do with those, and the way we’re going to do that is by making three awesome games.

The first game we’re going to make is this. It’s a game inspired by the classic game of snake. In it, we’re going to be learning functions, variables, the software that we’re going to be using and how to create our first game.

Then we’re going to move on to making a classic arcade space shooter that looks like this. Inside of it, you can see that it is a fun, awesome game that you will be proud to show off.

The last thing we’re going to do is make a really cool action-adventure platforming game called The Castle of Doom. Here’s a little bit of gameplay.

(01:27)
As you can see, it is a really awesome full game that you’re going to be able to tweak and customize to exactly what you want to create, and through it all, we’re going to be learning about game design topics. We’re going to be learning how to program and everything you need to be the best game designer that you can be.

So let’s just jump right in and get to downloading GameMaker Studio.

Lesson 2: Up and Running

Summary

In this tutorial, we will guide you through the process of downloading and installing GameMaker Studio 2, the software we will be using for this course. We will walk you through the registration process, including setting up and activating your account.

Once installed, we will show you how to change the default sprite origin to ‘middle center’ in the file preferences to align with the course instructions. With GameMaker Studio 2 installed and configured, you are ready to start the course and begin creating games.

Lesson 2 Transcript

So the software we’re going to be using is GameMaker Studio 2, and we’re going to need to download that and install it. Then I’m going to show you just a few customizations that you can do.

Before we get started now, go to YoYogames.com or just search for GameMaker Studio 2 spelled like this and it’ll bring you to this website. Might look a little bit different depending on when you’re coming here, but this is the right place.

You can click on free trial or click on GameMaker up here. Either one will take you to this page here where you need to either log in or register, and I’m going to show you how to register here.

I’m going to use a temporary email, which is just a throwaway email, which gets deleted after a little while because I can’t show you it with one I already have.

(00:47)
You have to use a password that is mostly secure. It has a couple of requirements there, so 8 to 64 characters, one uppercase, one lowercase, one digit, one special, and then you have to click both check boxes.

Once you do that, then it’s going to look for an email. So now it’s going to send us an email right here. I can open it up and click on that link to activate it so we have to activate our account before we can actually get into downloading the software.

The first thing is going to be preferences, so you can get emails for all of these different things. I’m just going to click unsubscribe all.

Then you have to set up a security question, which you should actually do. I’m just going to put in a fake answer here, and you should use two step authentication. It’s always a good thing, and then you have to set up a username, so username with some numbers, set up a first name and a last name.

(01:45)
Choose your skill level and click complete. Then you can finally get to the place where you can actually download it.

If you want to use the free trial, which is what we’re going to be using, then you just click on download GameMaker right here. Otherwise, you can go to buy GameMaker as there are lots of different versions you can get, and we’re going to click on this.

It’ll take you to this page now where you can download the IDE for Windows or Mac, click on the download button and get it going. Then you go through the entire installation process.

I’m not going to show you that. I’m sure you’ve installed many programs in your days, but go through that and then it will be installed and you’ll be ready to go.

Once you have it installed, it should bring up something just like this, so you’re going to be able to create new projects, open up a previous one, import or explore with marketplace tutorials or demos. You don’t need any of those. That’s what we are going to be doing.

So I’m just going to show you a couple of things. I’m just going to load up the last game we’re going to make. Don’t worry about anything you see inside of here right now. All I want to do is I’m going to close everything, so I don’t want to show you how GameMaker works yet. We’re going to have an overview,

(02:59)
But there is one important thing I want to show you, and that is file preferences, Sprite, editor, this default Sprite origin, the very first option, I have mine set to middle center.

Now the default is top left, so I encourage you to right now go ahead and change middle center so that you are following along with me exactly. You’ll be able to understand what this is when we get to it.

I’m going to explain what the origin is and how to manipulate it and why you might want it to be different for different sprites, but I just want to make sure that we’re on the same page for when we get started. That way you don’t have any confusion over where your sprites are being placed and so forth.

So mine is middle center. You should change yours there as well. But with that, we now have GameMaker Studio 2 downloaded, installed, and are ready to go.

In the next video, I want to give you some encouragement for going along with this course and how to make everything we do your own so you’re not just copying me, but the games you create will have your own unique flare inside of them.

GameMaker Studio 2 Course – Module 1: Course Snapshot

Gaming Pros and Cons – Deep Dive

0

Are video games good or bad for you?
Video games are one of the world’s most beloved leisure activities, with over three billion active gamers globally as of 2023.

The popularity and prevalence of gaming have reached unprecedented levels and are only expected to grow with each passing year.

But video games have their fair share of controversy. Many claim that the cons outweigh the benefits while avid gamers say the opposite.

Objectively speaking, gaming offers many benefits when done in moderation, however, too much gaming can be harmful.

Examine the pros and cons of video games with us so you can decide for yourself.

Pros of Video Games

What are the advantages of video games? Gaming helps build essential skills that allow gamers to perform daily tasks efficiently. Many of these skills also benefit careers and relationships, making video games a multifaceted tool for self-improvement.

Here are the top advantages of video games:

Friends having fun while playing video games

Improved Cognitive Function

Studies have shown that video games enhance cognitive abilities among gamers. Some of the most impressive benefits of gaming on cognitive function include:

  • Faster processing speed
  • Improved deductive reasoning
  • Improved visuospatial (recognizing nearby objects and estimating distances between them) ability
  • Better mathematical intelligence

Sharper Problem-Solving Skills and Logic

Playing video games requires various skills and abilities such as problem-solving, critical thinking, and logic. Gamers must use these skills to work through levels, challenges, and missions. Extensive playtime involving these skills helps players develop more gray matter while increasing brain connectivity.

Classic games can build the same mental muscles. Classic solitaire, for example, keeps you sharp because you are constantly evaluating the board, spotting patterns, testing different move sequences, and thinking a few steps ahead to avoid trapping yourself later. That ongoing cycle of planning, adjusting, and learning from mistakes reinforces logical thinking in a low-pressure way that still feels rewarding.

Developing these skills may also improve performance at work or in school.

Better Hand-to-Eye Coordination

Gaming enhances hand-to-eye coordination, helping you perform tasks or chores that need them more quickly. These activities may include regular tasks like performing manual duties with your hands, typing, and driving, or professional responsibilities like performing surgeries.

A 2007 study confirmed these benefits by studying laparoscopic surgery trainees who played video games. Researchers found that training surgeons who regularly played games enjoyed increased accuracy and could finish tasks faster than their peers who didn’t play.

Quicker and More Accurate Decision-Making

Another crucial benefit of video games is they help gamers make more precise and faster decisions. Many video games push players to make quick judgment calls using cues or other information they receive within the game. Fast-paced games are especially great for improving players’ decision-making abilities.

A few games with fast-paced action, particularly competitive ones that involve playing against other gamers, punish players for making wrong decisions. They require players to make the right choices at the right time to win.

This skill is essential in many fields of work, especially in emergency services. These jobs require accurate decisions in a limited amount of time using the facts and details available.

Enhanced Ability To See More Details

The topic of gaming and vision is still hotly contested. A few studies have proven that too much screen time leads to eye fatigue and may damage your vision.

Its potential harmful effects are:

  • Eye strain
  • Watery or dry eyes
  • Achy, itchy, or burning eyes
  • Nearsightedness
  • Blurred vision
  • Loss of focus flexibility
  • Increased light sensitivity
  • Headaches
  • Retinal damage

Meanwhile, other studies tell us that gaming improves one’s ability to clearly see details, particularly within their periphery. Hence, it may aid the performance of tasks that require clear vision such as driving, flying planes, web development, surgeries, photography, and more.

Having said that, not going beyond the recommended screen time will help players enjoy the benefits while reducing their risk of eye damage.

Collaboration and Socialization

Video games encourage teamwork and social engagement. Several of them require players to work with others in order to succeed. This makes them a modern way to mingle with others regardless of age and geography. For instance, games can be used for team-building and fostering relationships with other players.

However, playing for too long and too often can lead to feelings of loneliness and isolation. This, in turn, can cause mental health issues like depression and anxiety.

So, while video games provide a social outlet for many people, balancing in-game contacts with real-world social activity is essential.

Cons of Video Games

The many advantages of video games may seem appealing on the surface. But it’s still crucial to note that these benefits come with a catch: their cons can outweigh them if gaming turns from a hobby into a compulsion. Gaming may negatively impact the quality of your life, health, relationships, and work.

What are the cons of video games?

Here are the most common disadvantages of video games:

A man playing video games

Addiction

The biggest drawback of video games is they can cause addiction. Video game addiction is a mounting global issue and may become more prevalent in later years.

The World Health Organization (WHO) has already categorized gaming disorder as a mental health disorder. Moreover, in 2017, the global prevalence of internet gaming disorder was approximately 4.7%. Given that there are over three billion gamers worldwide, these stats are shocking and underscore a serious problem.

A big factor influencing internet gaming disorder is the fact that games are designed to be addictive. They offer people instant gratification and egg them on to play constantly. Gamers who play daily may also earn special rewards and bonuses that encourage them to play even more.

However, the consequences of gaming addiction are more complex than they might seem at first. Here are some ways addictive games inadvertently end up controlling various facets of our psyche:

  • In-game character progression begins to replace real-world self-improvement and personal development
  • Virtually connections with other gamers substitute real-life socialization
  • In-game mechanics may lead to gambling
  • In-app purchases, loot boxes, and microtransactions may lead to exorbitant purchases that one cannot afford

Once gaming becomes an addiction, it can hold back one’s personal development, professional life, and interpersonal relations.

If you have a gaming addiction, you can seek help from a video game addiction therapist near you.

Heightened Aggression

Another problem with video games is they elevate the risk of aggression among players. Many studies tell us about this phenomenon.

However, these studies have also reported that gaming is not the sole factor behind aggression. Gaming may increase the risk of aggressive thoughts and feelings in a person along with other risk factors.

The media also promotes a stigma around gaming by saying that video games are violent and thus encourage violence in society. But pinning this issue exclusively on video games is far too easy even if they are a potential contributing factor.

Although the relationship between gaming and violence is still hotly debated, many parents report heightened aggression among kids who play excessively. These children may even damage property. So, parents must pay attention to their children’s gaming behavior and ensure that they play age-appropriate games. Parents must also seek professional help if their kids engage in increasingly aggressive behavior.

Avoidance of Real-world Problems

A common issue with excessive gaming is players end up neglecting other areas of their lives. Games offer solace, comfort, and a safe place to fail. They present a convenient way to get away from real problems.

Escaping from stress and entering virtual worlds isn’t essentially bad for you. But the fun ends and the problem begins when players ignore their chores, careers, relationships, and other aspects of their lives. In such situations, game addicts must cut down on playtime, manage their lives better, and purposefully engage in other hobbies and activities.

Increased Risk of Gambling

Modern video games encourage players to gamble and engage in unhealthy and compulsive spending via microtransactions and loot boxes.

Players suffering from a gaming disorder are also prone to developing a gambling addiction. The accessibility to gambling-like mechanics within video games exacerbates this issue.

Also, children often play these games which means that they can access gambling mechanics using real-life money. Too many parents reported discovering thousands of dollars charged to their credit cards from in-game purchases without their knowledge.

Physical or Mental Health Problems

Video game players can experience physical or mental health problems if they don’t play in moderation. Too much playtime can cause or aggravate various conditions like:

  • Exhaustion
  • Lack of motivation
  • Poor emotional regulation
  • Depression and social anxiety
  • Poor sleep hygiene
  • Muscle loss and fat gain
  • Dehydration

It’s essential to be mindful of your gaming behavior and check if you’ve developed these symptoms. If you have any, cut down on your gaming hours. If you’re unable to do so on your own, consider video game addiction therapy.

Poor Concentration

Playing excessively can negatively affect your ability to pay attention to other areas of your life such as school, college, work, family, and friends. Spending long hours in front of your screen may lead to a lack of concentration and focus.

This is because gaming demands a lot of focus and attention to detail. Unfortunately, our daily bandwidth for remaining “in the zone” is limited. So, the more time you spend playing video games, the less concentration you will have on other activities.

Will Video Games Harm or Help You?

The pros and cons of video games are two sides of the same coin. The extent of their effects ultimately depends on the gamer. Gaming has amazing advantages for players. It helps improve life skills and reflexes but too much playing defeats the purpose and leads to ill effects.

If you suspect that you’re addicted to gaming, learning about its various drawbacks through articles like this will help. At the same time, you should look for ways to limit your gaming time whether it’s by adopting a stricter schedule or seeking professional help.

Sources:

  • https://www.reuters.com/article/us-video-games-idUSTRE6640MQ20100705
  • https://eyeandlasercentre.com.au/blog/11-occupations-require-excellent-vision
  • https://www.nih.gov/news-events/news-releases/video-gaming-may-be-associated-better-cognitive-performance-children
  • https://www.sciencealert.com/gamers-have-more-grey-matter-and-better-brain-connectivity-study-suggests
  • https://pubmed.ncbi.nlm.nih.gov/17309970/

Are Video Games A Hobby?

0

Whether you’re a gamer or not, you may have wondered, “Are video games a hobby?” Yes, gaming is a fun and harmless hobby that benefits many. But for some, it may become an unhealthy vice. So, should video games as a hobby be encouraged or discouraged? This blog post delves into gaming as a casual hobby versus gaming as an addiction.

Video Games a Hobby or a Senseless Pursuit?

A group of friends playing video games and having fun
Are video games a worthwhile and entertaining hobby or a fruitless quest?

Playing video games is one of the most popular hobbies in the world. While we are on this topic, you may wonder, “How popular is gaming as a hobby? What percent of people play video games?”

In 2023, there are over 3.09 billion active video gamers worldwide, with the number set to rise to 3.32 billion by 2024. Additionally, 52% of video game players have at least one gaming service subscription.

Most gamers consider this a relaxing and social hobby that helps them unwind and de-stress. Video games are only one of the many leisure pursuits in life. People who enjoy video games still attend school or work, spend time with family and friends, and do daily chores.

So, is video gaming good or bad?

Advantages of Video Games

Besides being a fun pastime, video games offer many benefits. They provide a safe space to overcome challenges and quests, fail, and learn about resilience. Games can be an escape from mundane lives and allow them to explore alternative identities through immersive worlds and characters.

Even simple puzzle games can deliver similar benefits in a calmer format. For example, Sudoku is a great way to strengthen focus and patience because you have to slow down, scan for patterns, and work logically through mistakes without getting overwhelmed. Each solved section feels like a small win, which reinforces persistence and helps you return to other tasks with a clearer mind.

You can also use gaming to connect with friends and family or make new friends online and offline. Playing video games helps you socialize and stay calm and happy.

Moreover, video games can be excellent learning aids that promote the development of skills like multi-tasking, decision-making, problem-solving, communication, and teamwork. You can use these skills in your career, relationship, and social life to become a well-rounded person. You can also turn your hobby into a career by getting into esports and livestreaming.

Despite the many benefits of video games, people still criticize gaming and gamers.

Criticism Surrounding Gaming

There have been many debates on whether gaming has positive or negative repercussions on players. A 2000 article by the American Psychological Association (APA) stated that their research found that violent video games heightened aggression among gamers. But CNN reported that more recent studies have debunked these claims.

The rising popularity of video games and gaming platforms such as Steam has allowed many small companies and independent creators to carve out niches in the gaming community. Their games usually lie on the opposite end of the spectrum from the “violent video games” that some experts and parents believe harm young players.

That said, enthusiasm for gaming follows a scale that ranges from hobby to addiction, healthy to harmful. Where a gamer is placed on the scale is all about balance.

Gaming: Hobby vs. Addiction

A man and a woman playing video games
Is gaming a hobby or an addiction? The answer to this question depends on the gamer. Millions of people can easily engage in gameplay without any adverse effects, while some may lose themselves in the darker side of video games.

Games are generally designed to be addictive, which can harm a gamer’s brain, mood, sleep, vision, and physical health. They may also cause seizures and other health conditions.

Instead of being a fun hobby, games can easily become a destructive compulsion if the scale tips, and they consume all your waking hours. If you start prioritizing gaming over other aspects of your life, your addiction may spiral out of control and damage your well-being.

The Negative Effects of Gaming Addiction

Too much gaming may negatively affect your education, career, relationships, and other favorite activities and interests. Your physical and mental health may deteriorate if you skip meals, neglect exercise, miss sleep, and forgo your personal hygiene routine because you want to keep playing a game.

Many people who suffer from gaming addiction also have poor mental health and experience stress, anxiety, and depression.

Internet gaming disorder also has social implications. Those who once loved playing games with loved ones may try to cover up their addiction and withdraw from social situations, becoming isolated and lonely. It may lead to lost confidence, low self-esteem, and difficulty talking to people in real-life situations.

So, it is crucial to pay attention to your gaming behavior and see if it has transformed from a fun, relaxing hobby to an all-consuming addiction.

Here, we discuss the three-step process of cultivating new habits to help you understand how habits and addictions develop. It will help you understand how gaming leads to addictive behaviors and tackle them effectively.

Three-Step Process of Building New Habits

Developing habits and addictions involves these three steps:

1. Trigger

A trigger is the underlying factor of a person’s action. It prompts you to do something like sitting on the couch and watching TV after a long day at school or work or playing a video game whenever you have free time.

2. Action

An action is an activity or task that leads to a reward.

3. Reward

Rewards are achievements that may take any form. It could be feeling fresh after showering or the satisfaction of reaching the next level in a video game.

Tackling Addictions

Combating addictions involves substituting actions to get a reward with another, more favorable action while leaving the trigger and reward intact. This may be challenging, but there are many ways to ease the process of changing behaviors.

Killing an addiction is a Sisyphean task, so taking it slow and being kind to yourself is essential.

It is best to find a new hobby that can replace gaming. It could be dancing, running, hiking, reading, cooking, etc. Something that will take your focus for extended periods and lead to satisfaction.

Remember that gaming is not a fundamentally bad thing. But when it becomes an all-consuming activity that takes over everything in life, it becomes an addiction. Gaming in moderation is the key to enjoying it fully—and it will not turn into a vice.

Limiting the hours in front of screens and doing healthier activities like meeting people in the real world, exercising, and getting timely sleep and nutrition can help keep your gaming hobby in control.

Wrapping Up

Video games are a legit hobby and a source of happiness for countless people worldwide. They offer a place to escape life’s challenges and daily stress, boost our mood, and enhance relaxation.

But as with every hobby, practicing moderation when playing games is important to stay healthy and productive.

Sources:

  • https://mediamilwaukee.com/culture/gaming-legitimate-hobby/
  • https://www.sciencedirect.com/science/article/pii/S2666956022000368
  • https://www.nature.com/articles/s41415-019-1106-9

Lesson 7: Types of Games Supported by Unity

0

Summary

Unity supports all kinds of games.

In this video, we’ll show you the games which were built using Unity engine:

  • CupHead – cartoon-style action game.
  • Monument Valley 2 – 3d mobile game.
  • Rick and Morty VR – Virtual Reality game.
  • Pupperazzi – pokemon like game.
  • Unity Supports split-screen games, multiplayer, co-ops, etc.

Downloadable PDF: Unity Lesson-7

Lesson 7 Video Transcript

Hey there everyone. Welcome to a bonus lesson of sorts.

I decided that the lessons that we had before just didn’t do enough to show you the variety of what Unity has to offer and the amount of games that have been made in it.

We covered some of the basics and hopefully, you can kind of imagine how things are made, but I wanted to show you guys some of the games that were made before, both by people that you’ve probably heard of as well as a Game Jam that I made myself.

So it should only take a couple of minutes, but hopefully, this gets you excited about what this engine has to offer. So here we are.

This is on Unity’s official website. I’m just showcasing some of the games that it is showcasing itself. So we have Cuphead, which obviously has an incredibly distinct style.

(00:44)
I think a lot of you have probably heard of it and played it before Monument Valley Two, which is a mobile game, I believe.

And so it’s like Unity can do crazy stylized 2D, it can do 3D Mobile, it can do a lot. There is VR of course. You have some pretty famous IP right here. You have Inside you have Ori and The Blind Forest. I believe the SQL is also being planted, and be made in Unity.

I’m not a hundred percent sure about Hearthstone, this is the one that I love to bring up. It’s something a lot of people don’t realize is made in Unity and this has everything you’d really want. It’s got really cool art and some really awesome advanced art techniques with shaders and things like that to make cards look animated when they aren’t.

It has networking, it has a connection to the Battlenet client, and all of that.

(01:38)
And it’s just a really great example of how powerful this engine is and how flexible it is. And then I think the last thing that they have here is city Skylines. So again, another very different game from say like Cuphead, but it can all be made in Unity.

Another game I wanted to share really quickly is one that has been recently, not to date the video, but it has recently been getting a lot of traction.

And that is Paparazzi, which is kind of like a Pokemon Snap game, but with cute little dogs. And that is being made by Sunday month. As you can see here. It’s being released later in 2019. And again, it’s just a very different game from some of the ones we just looked at, but it was made in Unity and it has something a little bit different, which is like this split screen mode here.

Again, split screen, multi-player, couch, co-op, networked, all of that is available and can be done in Unity if you know how to make it work. And Unity does make it pretty simple overall. Now, out of the ones that were mentioned, none of them are quite like this, which is a weird little game jam I did over the course of basically a weekend.

And I’m just going to enter a name here. It doesn’t really matter. Let’s just name it the tutorial. And we can customize our character a little bit.

(02:58)
Don’t think I’m going to spend too much time doing that. I’ve done it a hundred times before and press play and there we go. It’s kind of a styled-after game like RuneScape, but it’s just a basic networked project.

There’s not too much to do. You can walk around, you can see I could fish here so I can go fishing. It won’t take too long. I should catch some fish pretty quickly. Of course, I have level zero fishing or whatever because I just made the guy, but there you go. So we caught a guppy. It’s cool, I guess.

Got a crab and you can sit in this game as well. Just very basic animations and all of these objects. There’s no actual art in this game. It was all done in unity. Every shape that you see here was made in unity, colored in unity.

(03:49)
And then I’m using a very basic shader that’s free online, and you could investigate that. It’s called Ute. And there we go.

So I’m sitting and I can sit while I’m fishing. I could go sit by the fire, et cetera. But again, this is just a basic project made in Unity. And if I had some friends playing right now, you could see that we could all walk around, see each other, use the chat to talk.

And yeah, it only took about a weekend to make this much, and it’s a very different project from the stuff I normally make. So I also learned a ton while making it.

But yeah, hopefully, this gives you an idea of how varied the engine is overall, and how varied the games that have come out of it are. And hopefully, it gives you some inspiration that the project you have in your head could be made in this engine if you just take the time to learn how to do it.

Lesson 6: Game Mode, Play Mode, and Scenes

0

Summary

We’ll show you how to switch scenes by code in this Unity Scene Tutorial. You’ll learn how to manage Scene Visibility and multi-scene editing.

What we’ll cover:

  • Setting Scene visibility for GameObjects and their children
  • Turning Scene visibility on and off
  • Isolating selected GameObjects

We’ll explore the Scene divider menu for loaded and unloaded Scenes.

And we’ll do lots of baking:

  • Lightmaps with multiple Scenes
  • Navmesh data with multiple Scenes
  • Occlusion Culling data with multiple Scenes

Lesson 6 Video Transcript

Hey there everyone. Welcome back to another Unity tutorial. In the previous lesson, we added some UI to our game for the first time while creating this main menu of sorts.

In this lesson, I’m going to explain how to switch scenes via code so we can get off this main menu and press the play button, and enter a scene called level one.

Now, we’re not actually going to create much of a level here, but we will create the scene called level one. So let’s go ahead and do that.

Now, I’m going to actually try creating a scene in a different way this time because there are quite a few different ways. I’m going to press Ctrl N. As you can see, we now have an untitled scene. I’m going to add a cube to it just so that we know where we are. Put that at 0, 0, 0.

(00:45)
I’m going to double-click it to zoom in on it. And there we go. There’s the cube. I’m going to press control S. Go to the scenes folder and name this level one, one. So there we go. We have level one.

Now let’s switch back to the main menu. And here we’re going to find our button, the play button, and we want to make it so that when we press this, it will change scenes to level one.

Now there are two things that we need to know before we try to do this. The first one is about scenes. While we can double-click scenes to switch between them, the code actually has one extra step before it knows how to switch scenes. In unity.

If we press control shift B, we get this new menu called the build settings. Only scenes that are displayed here can be switched to by code, and what this does is it basically lets us build the game like an E X E if we were building this to send to a friend or to put on Steam or anything like that.

(01:49)
Of course, for PC, that’s what we have selected here. And when we do build it, it will only include scenes that are here. So for that same reason, we can only switch to scenes that are displayed in here. So why don’t we drag some in?

We can drag the main menu seen since that’s where we want to start. And as you can see, it’s index zero, meaning if we built it right now and sent the files to a friend, this is the scene that they would open up when they pressed play.

Now I’ll also drag level one in. So you can see level one is here and it’s index number one. Keeping that in mind, let’s finally create a script that will let us switch scenes over to level one.

So again, let’s select the button here and we’re going to add a component. So we have to scroll down since there are so many components on this. And we’re going to add a component. And I already have scene switcher type here. That’s exactly what I’m going to name it.

So I’m going to press enter and I’ll press enter one more time to create the script. And once it finishes compiling, it will add it to this object and we can double-click it to open in Visual Studio. So I’m

(02:58)
Going to that right now. Here we go.

The scene switcher is here. I’ll zoom in a little bit to make this easier to read. Now there are a few different things that go on here that can make this a bit complicated, so try your best to follow along and I’ll explain it bit by bit.

We only want this to happen when we press the button, so we don’t even need update anymore without start or update. We actually can create our own function.

So we’re going to create one, if you remember it was void. And let’s do play button pressed. You do open-close parentheses, and then open-close parentheses right here. And this will allow you to put any code that you’d like inside of these braces.

So with this function, if we also add the word public here, we’ll be able to attach it to our button and I’ll show you what that looks like in just a second.

(04:00)
So with this function here, public void, play button pressed, all we need is to switch scenes right here with some code. In order to do this, we first need to ask Unity for its scene management class. So we can do using Unity engine scene management.

Now that we have this at the top, we can type scene manager load scene, and we can either pass in one because that was the ID for level one, or we can pass in the name level one. Make sure you have a semicolon at the end of this line, press save so there’s no asterisk up here and switch back into Unity.

Now we’ve arrived at the final step.

Let’s take our button class here and click on the plus sign. Now you can see we can drag an object here and call a function. So let’s take our scene switcher, drag it right into this field, open the dropdown menu, go scene, switcher, and then play button pressed the function that we added. We can press save.

And now when we press play and we click on the button, once play mode is activated, we’ve switched scenes and it’s as simple as that. You could have multiple buttons to switch to multiple scenes for something like a level select, for example.

And that’s just the most basic example.

Lesson 5: How to Customize Your UI

0

Summary

In this Unity UI Tutorial, we’ll cover the most basic features of the interface. Unity provides the following UI toolkits for creating in either the Unity Editor or in a game or application:

1. UI Elements
2. Unity UI
3. Immediate Mode Graphical UI

Downloadable PDF: Unity Lesson-5

Lesson 5 Video Transcript

Hey there everyone. Welcome to another Unity tutorial. In this lesson, we’re going to be covering UI or the user interface of the game.

UI can be very complicated and Unity has a lot of features to help us. Way too many to cover in a single lesson. Honestly, way too many to cover in even a module or even a whole lecture series.

There’s a lot that goes on with UI, but we’re going to be covering it in its most basic form right now to create a button that’s just displayed on the screen. We can also add text or images to the screen, but for right now, we’re just going to stick with a single thing, that button.

In order to make this button work, we’re going to try to add some context here. So we’re going to be creating a button on our main menu.

So for our main menu, we should make a scene called Main Menu that will contain the button.

(00:56)
So I’m going to go into the scenes folder and create a scene and call it main menu. Pretty basic. I’m going to double-click it so it appears up here. And now we’re on the main menu.

In order to create UI in the hierarchy, we need to right-click, and instead of doing 3D Object, which is what we’ve done in previous lessons, we’re going to go down here to UI. And you can see there are a lot of options here at Unity.

If we just go into this space and add a button, you’ll notice it adds a few other things as well, and I won’t go into too many details right now, but for UI to exist, it needs to be in a canvas, and so you can see it automatically created the canvas.

If I drag the button out of here, it disappears because it doesn’t know how to draw unless it’s on the canvas.

(01:44)
There are a few settings here that are important, but you’ll note that if I change the resolution, you’ll see the button doesn’t fit exactly in the canvas.

As you might expect, if I switch from the free aspect to something like 16 by nine, which is pretty standard, you’ll see that it still falls outside of the screen, and that’s because the canvas is set up with a pixel size parameter right here in the scaler.

So the first thing that we’re going to do with our UI is we’re going to make it scale with screen size, and we’re going to enter 1920 by 10 80 a k, a, 16 by nine. And now that we’ve done that, no matter how I scale this, the button stays in its relative position.

So that’s the first thing that’s important to know. When you’re creating a menu or doing UI and Unity, you want to make sure that it scales properly.

On mobile, this can be more complex because of all the different resolutions, but for our purposes, this is a great first step.

Now let’s get back to the button. As you can see, it’s gotten pretty small since the screen size we made was quite a bit larger of a resolution. So why don’t we scale the button up? We could use its scale parameters as we’ve done,

(02:59)
But UI actually has some other parameters we can mess with. We can change its width and its height as opposed to just its scale. To do this a bit more easily, we can press T, which gives us these bounds right here that we can drag.

And so we can drag these, and now the button is much larger. We can also click and drag the button itself and using its pivot point right here. I’ve just aligned it in the center of the screen.

So far, so good.

Now, if you see the button actually has another child object, something that moves along with it, the text, it can be a bit hard to see. So why don’t we scale up the text as well by clicking on it and going to its text component.

Again, we could change its scale, but we could change the font size.

(03:52)
So I’m just going to drag this up. 120 actually sounds pretty good, and instead of it saying button, we’ll make it say play because we’re pretending this is the main menu. So there we go.

Now again, as you can see, the text is a child object of the button, just like the button is a child object of the canvas. So if I drag the button around, the text stays firmly in place with the button, and there you have it. This is the most basic form of the UI.

In Unity, we’ve successfully created a button, and in the next lesson, we’re going to add some code to our game that will make the button function as we want.

Lesson 4: Creating and Using Scripts

0

Summary

In this Unity Scripts tutorial, we explain the main concepts that apply to scripting in Unity. You’ll learn how to use Unity with C# and the tips and hacks to optimizing your scripts.

About Scripting

Scripting is an essential ingredient in all games. Even the simplest game needs scripts, to respond to input from the player and arrange for events in the gameplay to happen when they should.

Beyond that, scripts can be used to create graphical effects, control the physical behavior of objects, or even implement a custom AI system for characters in the game.

Learn more about scripting in Unity: Creating and Using Scripts

Lesson 4 Video Transcript

Hey there everyone. Welcome to another Unity tutorial. In the previous lesson we went over how the Unity Editor works and kind of rearranged it a little bit. We played around with scenes to show how scenes are treated in Unity and we were able to create our own game object.

I’m in the sample scene now where we created our cube. The cube is not very important, so I’m going to delete that and I’m also going to delete the other scene that we had created.

So our project is basically back to how it started before we did the previous lesson. So if you’ve just opened Unity with a new one, if you missed the last lesson for any reason, we’re basically in the exact same spot right now.

So I’m going into the project tab and I’m going to click on assets to get to the main assets folder of Unity, and I’m going to right-click in here and create a new folder called Scripts and we are going to create our first script.

(00:59)
So in the sample scene, I’m just going to create this time, I’ll create a sphere, and let’s just move that to the origin of the scene. We’re going to just put 0, 0, 0 for its position and we’re going to add a component for the first time to one of our game objects. So we have quite a few that come from the sphere.

By default, it needs to render, so it needs its mesh renderer as well as it comes with a collider by default. So if there was collision to happen in the scene, this would have a method to handle it.

We’re going to keep all those for now, they’re not important to what we’re doing, but we’re going to add our own when we add this component. There’s a ton of things you can add. Like for example, we have the mesh renderer that we have up here.

(01:55)
So you can search and find those and add them, but if you want to add your own script, you can add it directly here by typing a new name, like let’s just call it Sphere Script. And then I could press a new script and I could create it and add it right now.

However, there’s another way that you can add these scripts. So I’m going to go into the scripts folder, right-click in here and create a new C sharp script.

This one will be called Sphere Script and I’ll press enter so that it creates it. It’s going to have this wheel spinning down here for a moment, which means that Unity is compiling, it’s making sure that the code is valid. That way if you press play, it won’t have build errors, it won’t have compile errors.

So now that we have the sphere script in here and we have selected the sphere in our hierarchy, we can either search for it.

(02:50)
So as you can see, it now appears right here, or we can drag it from the project right here and now have the spear script. It’s just this tiny little component right here.

We’ve added a script now, but it’s basically empty. It’s the default script. So we could do a little bit more. If we double-click it, it will open our IDE of Choice by default.

Since Unity 2018, it’s Visual Studio and if you watch some of the previous lessons, you would know Visual Studio community is free. And so that’s what I’ve decided to use for these tutorials.

Alright, so it’s going to take just a little bit to open up. It looks like Visual Studio itself is launched. So let me go back into Unity and double-click on the script again. And there we go. Now we have the script itself opened.

I’ve zoomed in by holding control and zooming in on the mouse wheel. You don’t have to do that of course, and I’ll just break down the script really quickly. You have the name of the script and it inherits the mono behavior class.

What that means is it is a script that you can drag onto the object. As we saw in Unity, we can drag our script onto the object that becomes a component.

(04:15)
If you don’t have the mono behavior keyword here, if you don’t inherit from mono behavior in some way, you can’t drag the script onto your object. This comes by default. It’s no problem. All of this is every time you do a create a new C sharp script, it’ll generate this for you.

(04:33)
All we want to do is make our sphere do something interesting. So there are a couple of things we can do.

The first thing I’m going to do is use the start function that was provided when we generated the script, and I’m going to get our spheres scale to just increase a little bit just immediately when we start. It’s just instantly going to be a different size.

So if you remember, the scale is held in the transform component. So I can just type transform and then I need our scale. So if I type scale, you can see there’s no scale variable, but we have local scale that’s good enough. This variable is exactly what you see in the inspector in Unity.

So if we hover over local scale, you can see it’s a vector three. A vector three is three kind of like coordinate points put together. So we want to set this equal to a new vector three, and let’s make it a little bit uneven. Let’s do five for the X value. Let’s do three for the Y value and 10 for the Z value.

And then of course at the end of every line, we’ll save the script. You can watch the asterisk could disappear when I save and we’re going to alt-tab back into.

(05:57)
So in Unity, it takes a second to compile. Since our project’s new, it’s really fast, it’s already done and you can see the script itself hasn’t changed at all. But when we press play, the sphere will scale to this weird size.

So you can see its scale is 5, 3, 10, just like in the script. And because this was done in play mode, when we exit play mode, it will revert back to the size here.

If in the scene we change this to be a hundred for its X scale and pressed play, it would scale to 5 3, 10, and then when we exit play mode, it would revert back to a hundred that we put in. Obviously, that’s a bit ridiculous, but that’s generally the flow of how this works.

Now let’s say we wanted something with a little bit more motion on it. We would not want to use the start function.

(06:51)
Instead, we can use update. As you can see, update is called once per frame. That means it happens approximately 60 times a second. This is another function that Unity and C just support by default.

The mono behavior class lets us do a lot of things by default without needing to kind of, we don’t need to invent a frame rate. Unity already has that for us. So by this function, we can kind of use it.

So let’s take this line of code. I’m going to highlight it and I’m going to cut it. I’m going to paste it. So we’re going to just ignore start for now. We can even delete it.

Nothing wrong will happen if we delete it and we’re going to get rid of this part here. So we still want transform local scale and all we’re going to do is we’re going to multiply it.

(07:41)
So that’s the asterisk, and if you want to multiply it by a number immediately you do times equals. So we’re going to just make it get a little bit bigger.

Every frame, even this is probably a little extreme, let’s go real small. So it’s just going to get a tiny bit bigger. Every frame, 1.01 F, basically it means it’s a float value and a float is just a number with a decimal.

Basically, that’s all you need to know about floats. So if we do this every frame, it’s going to try to scale the sphere up a little bit while we’re in play mode. So as you can see, it’s going up and it’s scaling like crazy.

(08:24)
And there you go. That’s how you use the update loop. Again, start only happens once right when you press play or when a scene is loaded, but update will happen every frame. So this will just continuously happen so you can kind of start to picture how you might want to program movement or something like that.

The last thing that I want to show for this video, since this is our first script, it’s super basic stuff. Hopefully, it’s been pretty easy to follow along so far, is just make it so this won’t happen unless we press something on the keyboard. So first we’re going to make this go a little bit bigger.

We’re going to make it multiply by two and I’m going to write it the other way this time. So I’m going to say transform local scale is equal to transform local scale times two. You don’t need the 0.0 F, you could just use two, but I prefer to just write out all my numbers as floats.

(09:20)
Now this will happen every frame right now, but we can check to see if a condition is met and this condition will be if we are pressing the space bar.

So if we have the input get key down key code space, then we will do this. So if you see how this code’s written here, we have a condition here which is the if statement, and it needs to evaluate input, which is something unity can kind of look like for us.

That’s another thing that Unity provides is the input class. We can check if the key is down, which is once every time it’s pressed, and we’re looking for key code space.

So the space bar, you can see there’s a lot of different things here. You could just do five, which is alpha five. You can do the equal sign, which is equals, or of course, just sticking to space.

(10:21)
If this happens, then we will multiply our scale by two.

So let’s switch back into Unity, and I’m going to press play once it’s finished compiling and I’m going to press and hold space.

As you can see, it’s gone up once. I’ve now let go of space and every time I press it now it will multiply its scale by two. If you wanted it to go up whenever you were holding space, you could get rid of this part where it says down and this would check that it’s held at all.

So the first frame gets pressed as well as every frame after that that it’s being held. This will be true and it will call this part of the code. So if we leave it like this, you’ll see it’s going to get very large, very, very quickly. So let’s give that a shot.

(11:15)
I’m going to press it pretty fast, but as you can see, even though I press it pretty quick, it’s still got quite a few frames of multiplying its scale by two, and if I hold it, it just explodes in size.

But yeah, that’s basically everything that I wanted to show for this video. Again, it’s still pretty basic stuff, but it’s the really important stuff and this is the kind of thing that you’re going to see in every tutorial.

Basically from now on, creating scripts, adding components to your game objects, and then actually writing some code into your scripts is extremely important stuff. And this is the most beginner-level version of it right now.

But in the coming lessons, we’ll be looking to do some more interesting things with input and movement, maybe having a character move around a little bit, or at the very least, having an object move around in the scene and I’ll show you how to switch scenes as well.

So look forward to that. That should be coming pretty soon.

Lesson 3: Exploring Unity Interface

0

Summary

Take a tour of the Unity Interface in this Unity Editor Tutorial. The program allows you to totally rearrange its layout and save it as the default option.

In this video, you’ll learn:

  • how to customize the look of your editor;
  • how to browse locate thousands of Assets using Unity’s powerful search facility;
  • how to create objects and duplicate scenes;
  • The keyboard shortcuts for easy browsing;
  • Multi-scene editing;
  • and so much more!

Download PDF: Unity Lesson-3

For further reading: Unity Manual

Lesson 3 Video Transcript

Hey there everyone. Welcome to another Unity tutorial. In this lesson, we’re going to be setting the scene and exploring the editor.

Now that we have Unity Open, this is the default view, so we’re just going to go through and kind of look at the most important windows and features that we need to familiarize ourselves with by kind of learning the terms, and the names for these windows. It’ll make all of the other tutorials make a lot of sense.

First things first, all of these tabs that you see around are windows in Unity and they can be dragged around. Resized is necessary and you can pull them out and have them standalone like this is its own window now, or you can mix ’em in other places.

I’m going to set up Unity just a little bit and I recommend you do it as well if you ever want to revert the layout back to normal.

(00:53)
For instance, I’ll just move this over here. If you wanted to revert it back to normal, you can click any of these layouts and you can save the layout yourself once you have found that you like your arrangement. So I’ll put it back to default really quickly and now I will just rearrange it a little bit.

So I’m going to put the hierarchy over here. The hierarchy tab basically contains all of the objects in your scene and what that means is right now it’s a whole lot of nothing because the scene is brand new, but you start with a camera and a directional light, and we did the three D preset, which means that having lighting and a perspective camera is really important for now.

That’s the hierarchy tab, and that’s basically just everything that is currently going to appear when you press play in Unity.

(01:48)
Down here we have the project and the console tabs. The console is where messages, warnings, and errors get logged. So if something’s not quite working, you can check it out in this tab while you’re testing.

And the project is where all your files are and this structure is emulated directly from your actual Windows Explorer folder structure. Something I like to do is actually zoom out of this view.

So if we had a couple of other items, let’s add another folder now so you can right-click to create, and then you have a lot of options. We’re just going to add a folder. We’ll call this one art for now.

We’re not going to put anything in it. You can zoom out right here or control the mouse wheel. So I’m going to do that version and you end up getting them in a list of you, which I prefer personally.

(02:42)
Now that we have this kind of project thing out of the way, we’re not going to set up anything else in it right now. Instead, I want to just move a couple more windows around.

So we have the game window, which as you can see when I press play, we’re going to move from the scene to the game automatically. The scene view is something where we can fly around and we could take an object like this camera and we can move it around, but the game view is what a player basically would see.

They don’t have the option to just move our objects around like a developer. They would just get this view and I think it’s valuable personally to have both at the same time.

So I like to put the game view right here. Now before we exit play mode, one other thing I want to show is that since we have the camera selected, which could be done as I clicked on it here, or by clicking on the object in the hierarchy, the inspector, this window over here will show us information about the camera.

(03:49)
It would also show us information about the directional light. And if you’re completely new to Unity, this can be an overwhelming amount of information, but basically, all you need to know is that every object, they’re called game objects. Each one has a transform component which has its position, rotation, and scale, as well as any other components you want to add.

So the camera has a camera component as well as an audio listener. So that sound effects that are playing around the camera will work. We’re going to minimize this camera view for right now. We’re going to collapse it and we’re going to just mess with the position.

So if I use these arrows here, you can see the position changes up on the top right, or I can directly manipulate it right here. So I’m going to bring it to negative, I dunno, 300 something, and now I’m going to exit play mode.

(04:43)
And as you can see, it returns to where it started before we entered play mode. And that’s just a nice thing about Unity.

So when you’re actually editing and testing at the same time when you’re in play mode, any change that you make in the scene itself will revert back to the exact state it was in before you pressed play. That’s for the transform component, and that’s for the camera component.

If we change something like this, it would revert back. So we can directly edit things in the transform component, like the position, we can just write in 10 or we can click and drag over on the side of it.

If you start here, you can drag it as much as you want. If you hit the edge of your monitor, it will automatically loop to the other end. If you do control Z, of course, you can undo your changes.

(05:30)
So I’ll put it back there.

And the other way that you can edit the data for the transform component is with Unity like tools up here. So you have the move tool, rotate tool, scale tool, and quite a few more for things like UI and even more than that.

For right now we’re just looking at the position rotation and scale. So if we wanted to change the position, that’s what it’s on by default.

So I click on the camera. I could also press W to bring these arrows up and I can move it around. I could press E, which gives me this arc ball, which lets me rotate.

So I can click on an axis and rotate it, and you can kind of see the camera is rotating in this view over here, and you can rotate it in other directions as well, or even click anywhere on this arc ball and rotate it like you were rotating the ball, which can be very disorienting, but it is possible.

(06:26)
And then you have the scale tool, which is accessible up here or with R on the keyboard, and you can scale it along an axis or the entire object itself. Since it’s a camera, the scale doesn’t do much.

So let’s add an object to the scene that we can see the scale of. We can create it through a number of methods, but we’re going to just right click in the hierarchy and create a 3D object.

We’re going to make a cube, so with the cube, we can press W to bring up the arrows, and we’re just going to move it so it kind of appears in the camera’s view.

You can see it down here. So we have the cube. I’m going to press E to bring up the arc ball again and just kind of rotate it randomly. That looks good.

Now I’m going to press R, and I can do it on this axis with the red line here. I can do it on this Y axis or I can do it on the blue axis. I think that’s z, and I could do all of them at once to just scale up the end entire shape.

(07:31)
For now. That’s basically everything that I wanted to cover for just looking at Unity and kind of seeing how we can edit data, and add objects. The only thing left is to press control S just to save the scene.

As you see, if I change something in the scene, it will get this little asterisk and then I can press control S to save it. If I go to the scene itself, the sample scene, I can press control D to duplicate it, let’s just rename it.

You can right-click and do a rename, which is up here, or you can just press F two and I’ll just call it other scene.

If I double-click it, it’ll appear up here. So if I double click, now we’re in the other scene, I’ll delete the cube by clicking on it and then pressing the delete key.

(08:23)
So in the other scene, the cube is not there, so you can kind of see switching between the scenes. They’re just two different rooms where the objects that we’ve set up are arranged differently and they don’t necessarily have the same objects.

You can kind of picture this being level one or level two where you have different levels arranged in the scenes, and then you can just switch between them. That’s basically everything for right now. You can feel free to explore things like in file, how you can save and open projects, edit.

There are a lot of options in here like project settings and preferences, and if you’re ever missing any of these windows, you can usually find them somewhere in the window tab with general.

And another pretty important one would be things like animation. It’s good to know that all the windows can be reopened through here, or again, by resetting your layout up here.

(09:18)
But yeah, that’s everything for this episode. It can be kind of a lot, but I just wanted to kind of introduce these ideas to you, and as we go through the rest of the tutorials, this kind of stuff will just come supernaturally.

I’ll always try to remind you guys what the keyboard shortcuts are as well, because I’m super used to them, but I know not everyone will be used to them if they’re new to the editor.

But yeah, thank you, guys, for watching this one. In the next one, we’re going to actually create our first script on a game object and see our code work in play mode.

Lesson 2: How to Correctly Install Unity Hub

0

Summary

This is an easy step-by-step tutorial on how to install Unity Hub and Unity Editor.

The Unity Hub is a management tool that allows you to manage all of your Unity Projects and multiple installations of the Unity Editor.

To install the Unity Hub, visit ‘Download Unity Personal’ on the Unity website.

To install and use the Unity Editor, you must have a Unity Developer Network (UDN) account.

Watch the video and learn how to install the Unity Hub and Unity Editor.

Lesson 2 Video Transcript

Hey there everyone. Welcome to lesson two of our Unity tutorial series. In the previous lesson, we went over why Unity is the right engine for us.

In this lesson, we’re going to be going over the actual software that we need to download and I’ll be leading you through the actual process of downloading and installing it.

The software that we need is Unity Hub. Instead of downloading a single version of Unity, we’re going to download the hub because it lets us have multiple versions at once.

This is really helpful for our purposes since the version I download might be different from the one that you will need to download when you watch the tutorial since we just want to use the most up-to-date version of Unity

(00:45)
Visual Studio Community. The next bullet point here is an IDE, which means it’s something that lets us edit code. We need to download this since Unity doesn’t natively have an IDE built in like it can’t edit code by itself, so we’ll be getting Visual Studio alongside it. That’s what I’ll be using for the tutorials moving forward.

There are other IDEs which are appropriate if you’ve downloaded them before and you’re comfortable with them, but just know that this is the one that I’ll be using and it’s included in the Unity installation, which is a very big reason why we’re using it for this purpose. I’m also going to recommend a few art software programs here.

We have Paint.net, Gimp and MagicaVoxel, all of which I’ve used before and I think are valuable as a developer. You don’t need to download all three and I’m not going to lead you through downloading any of them right now.

Just know that they’re all free and it’s very helpful to have the ability to create your own art assets when you need to. With that out of the way, let’s download Unity Hub. So I’m going to open another tab here.

(01:52)
I’m just going to type something like Unity Hub Download, and basically you just want to get to unity’s official website, unity3d.com.

(02:04)
It should look something like this once you’re there, so you could choose a specific version of Unity and download it if you’d like, but I highly recommend downloading the Hub. When you click this, you’re going to get an executable installed, which you can just run agree to its license agreement and then choose a place to download it.

Once you’ve done that, you can open the Unity Hub, which should look something like this. Once you have a Unity Hub Open, you can see mine is version 2.0 0.1, so if yours is different, it may appear a bit different, but you should open it up to a tab called Projects, which basically stores every Unity project that’s been opened through the hub basically ever.

I have mine filtered out right now because it’s a long list and it’s just very cluttered and we’re going to be making a new project anyway, so we don’t want to worry about the older projects for now.

(03:01)
Yours should look pretty similar to this. What we actually need though is a version of Unity because we have the hub, but we actually need the editor and engine itself.

If you go to the installs tab, you can locate a version if you’ve downloaded it somewhere else on your computer before, or what we’re going to do is just add when you do add, you can click on a version of Unity.

I already have the most up-to-date versions that I would like to use, but you should probably click the option closest to the top. Generally, that would be some version of 2019. Assuming that you’re still watching this tutorial in 2019, you could install maybe this version here.

It seems like this is the most up-to-date version of 20 19 1, so that’s what I’ll do right now and you get to choose what you’d like to download with it.

(03:50)
This one happens to include language packs as well as a ton of things that let you build to other devices and platforms. So we could install Android build Support, iOS, T V O, SS. There’s a ton.

I’m not going to go through all of them and we’re not going to include any for the tutorial right now, but just know that if you install one of these and you realize that you wanted to go back, the hub allows you to do that without uninstalling and reinstalling the whole thing.

For now, we’re going to get our documentation, which I think is a crucial thing to download, and that’s all that we’re going to download with it. So that’s the only module and once we’ve started that the hub will begin to install it. You can see it’s installing here.

Since this download’s taking a little while. I’m going to skip ahead and just wait until it’s fully installed and then I’ll show you how to actually create a new project with Unity.

Alright, unity, finished installing the latest version for me. So I’ve gone back to the projects tab and now I’m going to click on new.

(04:57)
From here, it’s going to select a version for me. It selected the most up-to-date version, which is the 29.3 alpha. It doesn’t matter for now. This is just simply the screen that’ll come up no matter which version you’d like to use.

You can choose a preset. This really does not matter, it’s just going to customize a few things, but no matter which one you pick, you have access to everything I recommend sticking with either two D or three D. Again, like I said, it doesn’t really matter, so I’m going to stick with three D for this one.

You can give it a project name. This is not the name of your game when you [00:05:30] build it or anything. It’s simply for your own use so that you know which project it is. So we’re going to call this Tutorial Project Zero.

So I’ve selected to put it in this project slash tutorials folder on my computer, and once I’ve given it a name and a location, you can press create and there we go. It took about 30 seconds or so, and it’s opened a brand new Unity project, and so a screen that looks kind of like this is where the next module and next lesson is going to start.

Related to Unity: Beginners Guide to Unity

Introduction: Unity Lesson 1

0

This is the welcome video and first lesson from our mini-course on the Unity Game Engine.

We’re adding a bunch of free course content to the site. This post includes the welcome video and lesson 1 (scroll down).

Included in each lesson

  • Instructional videos
  • PDF Manual for Unity troubleshooting and tips
  • Transcript of the videos in case you want to print them out

Unity Introduction and Setup

Summary

An introduction to Unity Game Engine mini-course for aspiring video game developers.

Learn what the Unity game engine is, how to create an account, set up the software, and start making your first scene. All for free.

Unity Website: https://unity.com/
Download Unity: https://store.unity.com/download
Unity User Manual: https://docs.unity3d.com/Manual/index.html

Introduction Video Transcript

Hey there everyone. Welcome to our introduction to Unity mini course. In this course, you’ll learn what unity is, why it’s great, what you can do with it, and how to make your first scene.

Before we start, I wanted to explain a bit about how this platform works though. Once you’ve started the course by jumping into your first lecture, you’ll see the curriculum broken down on the left in an easy to navigate fashion.

We’ve designed this course to be completed in order one lesson at a time.

However, having these individual lessons makes it easier for you to revisit any specific parts of the course if you need.

You’ll also notice that within each lesson we’ve included a short quiz as well as some supplemental learning material just to help you out.

At the top left of your screen, you’ll see a way to navigate back as well as this nice little gear icon.

This lets you control your playback settings while you’re going through all of the lessons towards the bottom right in the video player itself.

We have another gear icon, which lets you change your resolution and the speed the video plays at all of the videos are shot in hd, so we recommend using the highest settings your computer can handle.

I just wanted to say thank you all for your interest in this course and for enrolling.

This one just covers the basics of unity from installation and account creation to the very basics of setting up a project.

But the next lessons that we already have planned cover even more. Really cool game development stuff and I’m excited to share all of it with you. Thank you so much.

Lesson 1: Why Unity Game Engine?

Summary

This video breaks down what’s special about the Unity engine. You’ll learn:

  1. The key features of Unity
  2. Platforms supported by the engine
  3. The pros and cons of using Unity. Watch side by side comparison with two other game engines.

Downloadable PDF: Unity Lesson-1

For further reading, check out these articles here:

Watch the video and find out why Unity is for everyone!

Lesson 1 Video Transcript

Hey there everyone. Welcome to the first installment of our new tutorial series for game developers.

This series is specifically focused on unity development, and for this episode we’ll be explaining why we chose Unity and why we think you’ll get a lot out of that engine.

I’m Rob Mitchell, a technical game designer from Burlington, Vermont. I’ve been doing Unity game development for around five years now, and I’m really excited to share what I’ve learned so far with all of you.

In preparation for this series, I’ve made this small slideshow here outlining a few key things about Unity that make it special, so let’s get into it. If you’ve used Unity before, I still implore you to join me for this presentation since you might learn something new.

Anyway. So first things first, what is Unity? Well, unity is a game engine, meaning it’s a tool that’s built specifically to help us with every aspect of game development.

(00:54)
We as developers can provide assets like art code, music and more, and Unity acts as a central place where we can take all of that and turn it into a full video game.

Additionally, it helps us edit and test the game in many, many different ways. We’ll explore some of those features in a later lesson for now, know that it’s really flexible and it’s very helpful for us developers.

Also, unity includes many tools to make our lives much easier. This includes visual popups that display information like little Windows, as well as some libraries that make the lives of programmers much easier.

So there’s a lot of little helpful features for every kind of developer. Now, I know a question a lot of people are wondering is what kinds of games can be made with Unity? The answer in my opinion, is literally every kind of game.

(01:48)
If you quickly look up games made in Unity, you can find a ton of different games across different genres, most of which you’ve probably even heard of.

For now, I’ve just listed every genre I could think of in one minute where there’s a game that I have specifically played before that was made in Unity. So now moving on, I’ve decided to compare three engines I’ve used quite a bit before. That would be Unity, unreal, and GameMaker.

I came up with a few things on the left, a couple features that I think are important to me as a game developer as well as I think are important to some other developers. Just to summarize, because I don’t want to go through every single point on this table, these top two rows are basically how important it is to me to have every kind of game be possible.

We kind of went over that on the last slide, but here I’ve just summarized it as two D and three D. I also think it’s really important for new developers as well as even experienced developers because there’s always something new to learn.

I think it’s important to have good documentation online and good tutorials online. Now, the

(02:58):
Flexible Editor is kind of like those cool tools that we were talking about before, and that’s something that we can cover in a later lesson as well.

Kind of like visual scripting, which Unity doesn’t support by default or the others do, but you can download something from the Unity Asset Store in order to bypass the need to program things on your own.

I’ve also included these last two rows, the Steam and Epic game store Row, just to show that all of these engines can have their games be made and built out, and then you can put them on all of the common stores you’ve heard of Steam, epic Itch io and more.

Now, I know there’s a few people who will still feel nervous about starting off with Unity, but I want to assure you that Unity is for everyone.

Tutorials like this are specifically designed with complete beginners in mind, including those who don’t know any code at all, but we still can offer some important tidbits of advice valuable to those who have used other engines or other programming languages in the past.

(04:04)
Unity is really good for people who do know a little bit of code already and are looking for something new.

But again, even if you don’t know any code, unity is still a great fit. Now, this is kind of just a fun fact, I guess, but you can use Unity for non-game development purposes.

I’m assuming if you’re watching this, it’s because you want to do game development, but it is important to know that there are people like scientists and researchers who use this engine to perform tests and simulate certain behaviors.

Unity is just extremely flexible, and it can do more than you probably thought of when you were going into this tutorial.

Now, I think that just about covers everything for the intro.

In the next lesson, we’re going to actually get started with Unity by going over the software that we need, and I’ll lead you through the actual process of downloading and installing it.

By the end of the next episode, we’re going to have the latest version of Unity running and ready to go.

The Top VFX, CGI & Special Effects Schools

special effects schools
Filmmaking has changed dramatically in recent years.

Today, the most successful films and series leverage special effects to engage audiences and enhance their entertainment quotient.

What Are Special Effects Schools?


Going to special effects school is one of the best ways to get a foot in the industry.

These institutions impart valuable knowledge, skills, and experience in filmmaking and special effects (SFX).

What You Should Know About Special Effects Schools

Most people who work in special effects have bachelor’s degrees in computer graphics, visual effects, or art, depending on which SFX branch they are interested in.

VFX Schools will provide them with the practical knowledge and skills to work in a professional setting.

Outstanding special effects colleges help students develop a technical portfolio they can use to gain employment after graduation.

In a professional setting, there are two main branches of special effects: digital and practical.

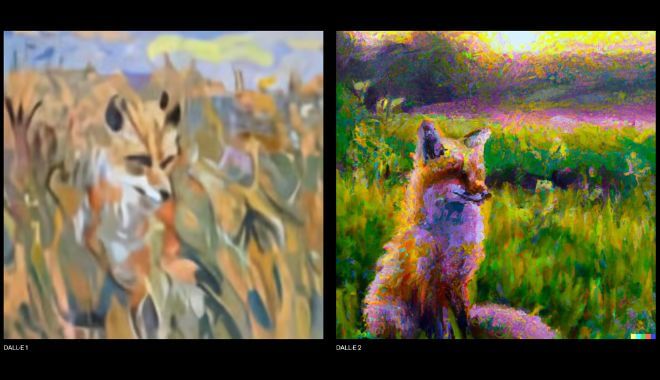
Digital Special Effects

Digital special effects rely on computers to create amazing, entertaining visuals that support realism or showcase fantastical characters and environments. Some classes in digital SFX schools are computer-generated imagery (CGI), motion capture technology, digital composting, and navigating green screens.

Those who want to learn about digital special effects can go to VFX schools or CGI schools.

Practical Special Effects

Practical special effects have been the original film techniques for creating entertaining visuals. In the early years of cinema, filmmakers had to be very creative and use practical methods for such effects. This niche includes makeup, prosthetics, pyrotechnics, miniatures, and animatronics.

Courses for practical special effects are offered separately as they are within the purview of the art department of special effects schools.

Where To Find Special Effects Colleges?

Hollywood is the world’s oldest and largest film industry, so you can expect California to have many filmmaking schools with outstanding special effects departments.

However, many countries have their own robust film industries, and they also have excellent filmmaking and special effects schools.

Furthermore, SFX and VFX are not limited to filmmaking—they are also leveraged in marketing, gaming, theme parks, entertainment centers, and more such applications.

Digital special effects can be learned through online classes. However, it’s a vastly different experience when you go through the course in person with an expert instructor, especially within a professional studio environment.

Learning practical effects online is not the same either. Cinema makeup school, for example, provides the right makeup products and models for practical lessons.

You can check your city, state, or province for nearby special effects schools or sign up online if there aren’t any.

Getting a special effects degree could provide plenty of work opportunities in the following industries:

  • Film
  • CGI
  • VFX
  • SFX
  • Motion design
  • Motion graphics
  • Animation
  • Makeup
  • Creature design
  • Compositing
  • Gaming
  • Virtual reality

The possibilities are endless.

What To Look For in SFX and VFX Schools?

A student at the DAVE school
When looking for a school where you can learn SFX and VFX, you always go for the best ones. But what is considered the best school?

It can be quite subjective, but we have pulled out the following criteria to evaluate the top special effects schools around the globe:

Curriculum

The course curriculum must provide practical teaching of cutting-edge techniques that can be applied to an ever-evolving industry. It must encourage collaboration among students. It should also have a perfect balance of academic activities to enrich knowledge and earn practical skills for future employment.

Facilities

Facilities are critical in VFX schools as modern special effects depend entirely on high-end technology. Most SFX institutions fetch high tuition fees because of the hardware, software, and other facilities needed to create specialists for years to come.

The institution must have an updated studio-like environment with high-tech equipment and modern tools for practical teaching.

Teachers and Instructors

Before enrolling, one must check the credentials of the teachers and instructors. The best teachers are those with firsthand experience in special effects. Official credits on special effects projects are an advantage.

Some schools have special effects professionals working as part-time instructors, and they add prestige to the institution.

Our Ranking Criteria

In addition to feedback from schools and alumni, we rely on public data sources to determine our school rankings (read more). Some of these data sources include:

Top 25 Special Effects Schools

A student in one of the special effects schools in the US, filming a movie
Using the criteria mentioned above, we have collated a list of the best special effects schools around the globe for digital and practical effects:

1. Academy of Art University

San Francisco, California, U.S.A.

Formerly the Academy of Art College and Richard Stephens Academy of Art, this private institution has offered various art and design courses since 1929. It has over 40 art and design degrees and some 120 courses, including online programs.

Average annual tuition ranges from $33,000 to $50,000. Many of its graduates have gone on to work for prestigious organizations. Notable alumni include actress Raven-Symone and Indonesian short film director and producer Putri Indahsari Tanjung Jatikusumo.

Selection of programs offered include:

  • Advertising
  • Animation and Visual Effects
  • Game Development
  • Graphic Design
  • Motion Pictures and Television

2. SF Film School

Gangnam-gu, Seoul, South Korea

Many exciting SFX-heavy projects have come from Korea, so it is no surprise that the country is also home to one of the best VFX schools in the world. SF stands for Science Fiction, as the institution aims to provide the entertainment industry with the most skilled professionals providing CGI and SFX for projects in this niche.

Some of SF Film School’s students have won awards even before they graduated. It also has a campus in Busan.

Selection of programs offered:

  • VFX
  • 3D Animation
  • Game Cinematic
  • Motion Graphic
  • Content Production and Character Design

3. Gnomon – School of VFX, Games & Animation

Los Angeles, California, U.S.A.

Emmy-winning visual effects supervisor Alex Alvarez founded Gnomon in 1997. The school is often referred to as the MIT of visual effects because of its advanced curriculum and specialized courses. Hundreds of students have since been employed in the visual effects industry.

Gnomon boasts a 98% placement rate for its Certificate in Digital Production program. It offers undergraduate programs, two-year certificate programs, and short-term individual courses. Tuition ranges from $28,000 to $48,000 per year.

Selection of programs offered:

  • 3D Generalist
  • Modeling and Texturing
  • VFX Animation
  • Virtual Production
  • Foundation Art

4. ARTFX School of Digital Arts

Montpellier, France

The French special effects school notably offers a five-year Master’s degree program in various fields of visual effects. ARTFX was founded in 2004 and has over 900 graduates. It has campuses in Lille and Paris. Tuition averages €9,000 per year.

The institution boasts a 95% employment rate and has close connections with major studios. Many ARTFX graduates now work in the SFX industry outside France. They have joined over 1,000 festivals, with some receiving awards.

It offers the following programs:

  • 3D and VX
  • Game Design and Development
  • Film/Video Game Programming
  • 24 – Cinema School
  • 2D Film Animation

5. Filmakademie Baden-Württemberg (Film Academy Baden-Württemberg)

Ludwigsburg, Germany

The public institution, founded in 1991, covers different aspects of filmmaking. It has become one of the most renowned film academies in the world. In 2001, the institution produced Das Rad, an animated short film made by its students. The film went on to receive an Academy Award nomination. Many other film projects have received various recognitions.

Selection of programs offered:

  • Animation
  • Interactive Media
  • Motion Design
  • Production Design
  • Advertising Film

6. University of Southern California

Los Angeles, California, U.S.A.

The University of Southern California (USC) is among the Top 25 schools in the United States. It offers a lot of programs in the liberal arts and science departments. USC, founded in 1880, also houses one of the best filmmaking colleges in the world.

The USC School of Cinematic Arts was founded in 1927 as a training school for the Academy of Motion Picture Arts and Sciences. Some of the most well-known filmmakers who graduated from USC-SCA are Judd Apatow, Ron Howard, and Ryan Coogler. Annual tuition is from $25,000 to $82,000.

Selection of programs offered:

  • Film and Television Production
  • Cinema & Media Studies
  • John H. Hench Division of Animation + Digital Arts
  • Interactive Media & Games Division
  • Peter Stark Producing Program

7. Lost Boys School of Visual Effects

Vancouver, Canada

This studio has over two decades of providing visual effects in the entertainment industry. It opened its doors to students who want to learn visual effects but with limited and SFX-focused programs. It also has a Montreal studio. Tuition ranges between CAD 2,500 and 17,000.

Several graduates have worked behind the scenes for some of the biggest films in Hollywood, such as Beauty and the Beast (live-action), Deadpool, Pikachu, Hobbit, Birds of Prey, and so many more.

Selection of programs offered:

  • Advanced VFX Compositing
  • Effects Technical Director
  • Digital Lighting Artist

8. The Digital Animation & Visual Effects School

Orlando, Florida, U.S.A.

Better known as DAVE School, it was established in 2000 to provide specialized training in the field of VFX with extensive practical skills gained through industry-level supervision. Some of its modern facilities include a virtual and real-time production stage, a Vicon motion capture system, and virtual reality and augmented reality labs.

DAVE graduates have become nominees in the prestigious Visual Effects Society Awards.

Selection of programs offered:

  • Visual Effects Production
  • Game Production
  • Virtual Production

9. Sheridan College

Ontario, Canada

A public polytechnic institute with three campuses in the Greater Toronto Area, Sheridan College offers over 140 undergraduate, graduate, diplomas, certificates, and continuing education programs. The field of Animation, Arts & Design includes 36 courses.

Some of its notable alums are Oscar winners Alan Barillaro, who directed Piper, and Domee Shi, who wrote and directed Bao and Turning Red.

Selection of programs offered:

  • Advanced Special Effects, Makeup, Prosthetics, and Props
  • Computer Animation
  • Digital Creature Animation
  • Game Design
  • Visual Effects

10. PIXL VISN Media Arts Academy

Cologne, Germany

Since 2012, PIXL VISN has been the leading institution offering 3D animation and visual effects in Germany. It offers an intensive 18-month training program that marries theories learned in classrooms and practical skills learned in a professional setting.

Some of its alumni have worked in multi-awarded projects like Game of Thrones, Avengers: Endgame, and The Walking Dead. One of its most successful VFX graduates is James Schauf, a modeler at Disney Animation Studios.

11. New York University

New York, U.S.A.

New York University is one of the most popular schools in the world. The Tisch School of the Arts was founded in 1965 to cater to students interested in performing, cinematic, and emerging media arts. It has developed a stellar special effects program.

The average annual tuition at NYU is $58,000.

Selection of programs offered:

  • Cinema Studies
  • Interactive Telecommunications Program / Interactive Media Arts
  • NYU Game Center

12. Ringling College of Art and Design

Sarasota, Florida, U.S.A.

Ringling is a private art and design school that was founded in 1931. It is a noted filmmaking school in America, and its computer animation, motion design, and game art programs are getting the attention of visual effects professionals around the globe. This evolution has made Ringling one of the best special effects colleges. Two notable alumni are Oscar-winning short film directors Brand Oldenburg and Patrick Osborne.

Undergraduate tuition is at least $51,000 annually.

Selection of programs offered:

  • Computer Animation
  • Game Art
  • Graphic Design
  • Motion Design
  • Virtual Reality Development

13. Nederlandse Filmacademie (The Netherlands Film Academy)

Amsterdam, Netherlands

This is the only specialist school in the Netherlands that offers a complete program in filmmaking. Students from different departments are encouraged to collaborate to create unique projects.

It offers orientation courses, bachelor programs, and Master of Film degrees.

Selection of programs offered:

  • Visual Effects
  • Immersive Media
  • Directing Fiction
  • Production Design
  • Edit

14. Think Tank Training Centre

North Vancouver, Canada

One of the best online CGI schools in the world, Think Tank Training Centre offers 32 weeks of extensive lessons in special effects. On-site training has a professional studio environment and modern equipment. The center also offers a hybrid program.

Every student gets one-on-one mentoring, which culminates in a portfolio to prepare for employment in CGI and SFX. Tuition is a minimum of $16,000.

Selection of programs offered:

  • CG Fundamentals
  • CG Asset Creation for Film and Games
  • 3D Animation Visual Effects and Game Art
  • 3D Portfolio Pre-Production and Production
  • CG + 3D Asset Creation for Film and Games

Students at a VFX, CGI & Special Effects School

15. Carnegie Mellon University

Pittsburgh, Pennsylvania, U.S.A.

It was established as a technical school in 1900 and turned into the Carnegie Institute of Technology, offering bachelor programs in 1912. It is one of the best research institutions in the U.S. and now offers stellar special effects programs.

CMU’s modern facilities have the potential to make the institution a major source of professionals in the field. The special effects programs under Carnegie’s School of Art fetch an annual tuition of nearly $60,000.

Selection of programs offered:

  • Experimental Game Design
  • Animation, Art, and Technology
  • Experimental Capture
  • Digital Storytelling and Resistance

16. CGFIVE Academy

Seoul, Korea

CGFIVE or CG5 offers lectures that are critical to succeed in the SFX industry. Students gain their certificates in a short amount of time, and they can join the industry ASAP. The school regularly invites professionals who have worked in some of the biggest entertainment projects as lecturers.

Selection of programs offered:

  • Modeling and Asset
  • Animation
  • VFX Composite
  • Render and Lighting

17. Vancouver Film School

Vancouver, Canada

Vancouver Film School is a private art school founded in 1987. It started with a single class with just six students but now boasts of alums like filmmaker Kevin Smith and Oscar-winning Lord of the Rings animator Chad Moffitt.

It offers six-month animation programs and one-year hands-on production programs. Tuition ranges from $24,000 to $43,000.

Selection of programs offered:

  • 3D Animation and Visual Effects
  • Digital Design
  • Game Design
  • Makeup Design for Film and Television
  • Programming for Games, Web, and Mobile

18. New York Film Academy

New York, U.S.A.

New York Film Academy is one of the most notable film schools in the U.S., with campuses in New York City, Los Angeles, and Miami. It was established in 1992 by John Sherlock, the famed producer for The Hunt for Red October. With the evolution of filmmaking, so did the school, which offers online, bachelor’s, and master’s degrees in different fields of filmmaking.

Annual tuition for an undergraduate program at New York Film Academy is around $34,000.

Selection of programs offered:

  • Digital Editing
  • 3D Animation and Visual Effects
  • Game Design
  • Entertainment Media
  • Virtual Reality

19. FX Barcelona 3D and Film School

Barcelona, Spain

One of the top VFX schools in Spain, FX Barcelona 3D and Film School has been preparing students to conquer the world of filmmaking. It has top-notch facilities, including the largest chroma set in the area.

The school is also a production company and many of its outputs have been recognized by various international organizations.

Selection of programs offered:

  • Visual Effects
  • Concept Art
  • Video Games
  • Post-production and Compositing
  • Animation 3D

20. Howest University of Applied Sciences

Kortrijk, Belgium

The top school in Belgium for digital arts and entertainment, Howest prioritizes hands-on learning for its students. Students are exposed to an hour or two of lectures for every four to six hours of practical training. The school regularly updates its programs and curricula to reflect changes and improvements in special effects.

Tuition is around €1,400 for Belgians and €7,400 for international students.

Selection of programs offered:

  • Game Development
  • 3D Animation
  • Game Graphics Production
  • VFX

21. 3Dsense Media School

Singapore

3Dsense is an award-winning art school in Singapore. It maintains a healthy relationship with studios in the country and worldwide. This means students will have a chance to work with the best when they graduate.

Some of the school’s alumni have worked on several Hollywood projects, including Top Gun: Maverick, Godzilla: King of the Monsters, The Mandalorian, and many more. Tuition ranges from SGD 26,000 to 34,000.

Selection of programs offered:

  • Visual Effects and Animation
  • Motion and Graphics Design
  • Game Art
  • Digital Film Production

22. Flinders University

Adelaide, Australia

Flinders University is a public research institution that offers undergraduate and graduate programs in various disciplines. It has partnered with CDW Studios to provide Australians with a VFX passion with quality programs for special effects. The goal is to arm students with a strong portfolio that will open doors for them in the entertainment industry.

Tuition ranges between AUD 30,000 and 60,000.

Selection of programs offered:

  • Game Production
  • Visual Effects and Entertainment Design
  • Digital Media
  • Virtual Production

23. Bournemouth University

Poole, England, United Kingdom

A top public institution in England, Bournemouth University offers undergraduate and graduate programs in different fields. Its Computer Animation, Games, and Visual Effects programs are highly competitive. Tuition is around £9,000 for UK students and £13,500 for international students.

Graduates have gone on to become Oscar and BAFTA winners and nominees. For example, Academy Award-nominee Mike Mulholland worked on Star Wars: The Force Awakens and The Last Jedi.

Selection of programs offered:

  • Computer Animation Art and Design
  • Computer Animation Technical Arts
  • Games Design
  • Visual Effects

24. University of California, Los Angeles

Los Angeles, California, U.S.A.

UCLA is one of the most famous universities in the world, with its many programs offering over 3,900 courses. Its Visual Arts and Design program is notable, given its close ties with Hollywood.

UCLA’s School of Theater, Film, and Television has a wide variety of courses, so students can specialize in different special effects niches. UCLA tuition is around $13,000 for Californians and $43,000 for out-of-state students.

Selection of programs offered:

  • Animation
  • Digital Media

25. Lightbox Academy

Madrid, Spain

Lightbox Academy is the first special effects school in Spain that was established by an existing studio (Lightbox Animation Studios). Students enjoy hands-on experience with modern filmmaking, and after graduation, they can leverage direct ties with a well-known studio.

Since its inception in 2015, Lightbox has produced over 150 projects submitted to international film festivals.

Selection of programs offered:

  • Illustration Concept Art
  • 3D
  • VFX
  • Motion Graphics
  • Animation

Next Steps

The special effects industry is incredibly competitive. If you want to work in the VFX industry, the first step is to obtain a certificate, diploma, or degree from a prestigious special effects school.

This list of the top 25 special effects colleges will help kickstart your professional career within the VFX and CGI realm. Best of luck!

Sources


Deguzman, K. (2023, March 12). What are Special Effects in Movies — History & Types Explained. Studio Binder. https://www.studiobinder.com/blog/what-are-special-effects-in-movies/#. Accessed 10 July 2023.

https://www.bls.gov/ooh/arts-and-design/multimedia-artists-and-animators.htm?

https://www.academiccourses.com/special-effects

McDonald, A. (2019, August 14). Best Visual Effects Schools & Colleges in the World 2022. The Rookies.

https://discover.therookies.co/school-rankings/best-visual-effects-schools-in-the-world/. Accessed 10 July 2023.

Giardina, C. (2019, August 6). The Top 10 Visual Effects School. The Hollywood Reporter. https://www.hollywoodreporter.com/lists/top-10-visual-effects-schools-2019-revealed-1227656/. Accessed 11 July 2023.

Dos and Dont’s of an Animation Portfolio Website

0

animation portfolio tips
Animation is not just about quirky or cartoonish images; it’s also about conveying a message, story, or narrative.

Animation is a creative and effective way to tell a story, so much so that the global animation industry was worth $395 billion in 2022 according to a Yahoo! Finance report.

While there’s certainly a market for animators out there, competition is stiff. You need to create an amazing animation portfolio to stay ahead of the curve.

What Is an Animation Portfolio?

The entertainment industry is expanding quickly. Traditionally, it consisted of network television and cable channels.

Today, there are streaming services, YouTube, and social media where animation can be showcased.

But for animators to get a gig, they first need to demonstrate how good they are at the job. This is exactly where a portfolio of your animated work can help you.

An animation portfolio is a compilation of clips that demonstrate your knowledge, skills, and animation style. Also known as a demo reel, it must showcase your strengths and capabilities as an animation artist.

Potential employers will review your animation portfolio to determine if you are right for the job. It is an essential tool for animators, especially freelancers and those looking for new jobs.

What Are the Benefits of an Animation Portfolio?

The main benefit of having an animation portfolio website is its ability to unlock future employment or projects. So, it has to be a demonstration of your best work.

Let’s take a closer look at 7 of its benefits:

Creates Credibility

The animation portfolio is proof that your talent isn’t just lip service. It tells potential employers what you can do and where your strengths lie. Companies can then determine if you are a good fit for them or not.

Showcases Your Style or Versatility

You either have a specialization in animation or you can do various styles. Either way, your professional portfolio will showcase that and establish whether your abilities match the requirements of a company.

Demonstrates Experience

For some organizations, experience is key in the hiring process. If you have extensive experience, the animation portfolio will display your know-how and years of work. It can showcase projects you’ve done and help set expectations of what you can do.

Students or fresh graduates may not have a wealth of professional experience, but work isn’t the only way to get valuable experience. Young professionals can still demonstrate their expertise by displaying amateur work they’ve taken on in college, during internships, and through personal projects.

Having a few years of experience isn’t always a bad thing. After all, there are companies who are looking for fresh talent who show a lot of potential.

Flaunts Professional Achievements

Some professionals have received awards for their work. Instead of just mentioning the awards, it’s best to present the award-winning work through a demo reel.

Achievements aren’t limited to awards. Projects that have gone viral because of their ingenuity and creativity or for sheer entertainment value are also considered achievements, especially since not everyone can pull them off.

Allows Potential Employers To Envision Working With You

Different projects require different types of animation. Your animation portfolio website will help employers determine if you’re the right person for the job. You can curate your portfolio to fit what a prospective employer needs or you can diversify it as much as you can to showcase your flexibility. It’s a matter of understanding what you can offer potential employers and highlighting those strengths.

Gives You Higher Chances of Gaining More Customers

An animation portfolio website is your own online platform that exhibits your best animation. It’s not just curated for job applications but can target anyone who comes across your site. You can put the address on your social media platforms so anyone interested can immediately access it. By putting your work out there, you have a chance to win contracts even if you aren’t actively applying for new jobs.

Shows Your Ability To Convey a Message or Narrate a Story

Animation projects may be different but they all have one goal: to relay a message, tell a story, or create a narrative. It’s a form of communication that’s exceptionally engaging and imaginative. A portfolio gives your visitors an opportunity to understand your distinct persona and style.

Who Needs an Animation Portfolio Website?

A student working on his animation portfolio
Anyone who does animation should have a professional portfolio. This type of portfolio is especially useful for:

Animation Students

Undergraduates aiming for an animation degree should start building their portfolio early, even while they’re attending school. It can be as simple as a website where they display their college projects. This will be very helpful later on when they look for internships or work.

Interns

Interns learn valuable insights on the job. Many times, they are asked to contribute to animation projects which can be included in their portfolios. However, interns must mention their contributions to the project so as not to mislead the audience.

Professional Animators

Polished and impressive portfolios are an immense help to professional animators. Since most animation is digital nowadays, a website is a natural extension of their craft. Animators must make it a point to upload their best clips on their websites.

Professionals with certain styles and aesthetics can also use their portfolio websites to highlight what makes them outstanding and different. This can allow animators to target companies that are looking for animation styles that closely match the kind of output they’re good at.

Here are some industries that rely on animators a lot:

Film and Television

Animators for films and television are what most people think of when it comes to career opportunities. But this huge and profitable industry is made up of different sub-sectors and specializations:

  • Traditional animation
  • 2D animation
  • 3D animation
  • Motion capture
  • Motion graphics
  • Stop motion

Marketing

The goal of marketing is to convince the audience to buy a company’s products or services. But to ensure that the marketing team conveys the message, it has to capture the audience’s attention first. Animation is an easy way to create engaged audiences and get people to sit up and notice a brand. Hence, animation is important in marketing.

Web Design

Decades ago, it may have been acceptable to have websites that only have text and a few images. But in today’s world, websites rely on animation to stand out. It thus makes sense that many website owners or developers rely on animators to make their online presence more dynamic and interesting.

Video Games

Globally, revenues from video games amounted to almost $347 billion in 2022. New gaming systems and computer hardware are enabling video games to be more immersive, realistic, and advanced than before. Video game animators are crucial to game development since these virtual environments are mostly visual.

Freelance Animators

Finally, there are animators who prefer to be their own bosses and do freelance work. An animation portfolio is particularly important for freelance professionals because they constantly have to look for new projects to work on.

Having an impressive website allows them to set their own rates and gain clients even if they don’t market themselves in other ways. There are generalist freelance animators who are good at different animation sub-specialties and there are also those who are highly specialized in certain animation work.

Tips for Building Your Animation Portfolio


The animation portfolio website works like a dynamic resume so it’s important to have a solid portfolio. Here are six tips that will help you develop a compelling online portfolio:

Highlight Your Best and Most Recent Work

Put your best foot forward. Highlight your best work by giving it a more prominent space on your site. If you have multiple animation reels to include, showcase the latest ones first. Your most recent animated work is usually the best because it is a product of everything you learned about animation over the years. It’s also more likely to employ the latest trends and technology in animation.

Be selective about what you showcase because it could mean getting more jobs and more interesting projects.

Those looking for a specific type of job must prominently feature projects that demonstrate their animation style.

Organize Your Work

Freelancers who dabble in different industries must organize their work according to project types. This way, potential employers can click on the type of animation they’re looking for. A well-organized and functional website encourages visitors to explore more of your work while making you seem more professionally credible.

In addition, categorizing your work allows you to post old projects and even illustrations to give potential clients a better understanding of what you can do. It can also showcase your growth and versatility.

Add New Work Regularly

Continue adding new work even if you aren’t currently employed. It shows that you are passionate about animation and are capable of professional development even if you don’t have ongoing professional engagements.

To make your portfolio even more impressive, try to showcase work that highlights your ability to adapt to new animation trends and technology.

Avoid Fanart in Your Portfolio

Fanart is fun to do and can be an amazing creative outlet. But it doesn’t belong in a professional portfolio. For one, you don’t own rights to the original characters and some employers may look at it as a misrepresentation of your talent.

Pick a Reliable Host

Prospective employers or clients shouldn’t experience problems accessing your website. If they can’t access the website, they will just move on to the next candidate on the list. Research the best web hosting company that specializes in animation and the like — it must be fast and able to accommodate heavier files.

In most cases, paid web hosting services are the best option. Since you stand to gain more clients with an animation portfolio, it can be considered a form of professional investment. Web hosting services are generally not that expensive anyway. Plus, the benefits are worth it.

Keep Text To a Minimum

Your animation or demo reels showcase your knowledge and skills, but they don’t tell potential employers who you are. Remember to include text that introduces yourself and summarizes your experience. Keep it limited to important information like your name, contact details, social media accounts, and previous work experience.

Animation projects need labels too. Every reel must include the name of the project, date of creation or publication, and other necessary details. If projects are a product of a collaboration, you must specify your contributions. Projects that have received awards must be labeled accordingly as well.

One thing you should keep out of your portfolio is advertisements. Though obvious, it needs to be stated anyway. Ads don’t help your case. They look unprofessional and don’t support the credible image you’re trying to establish.

Promoting Your Animation Portfolio Website


Once you have your website up and running — you’re ready to receive some visitors.

When job hunting for animation work, don’t make it hard for potential employers to find your portfolio. Make sure to put the link to the website on your online application. If you’re sending a hard copy of your application letter and resume, include a QR code so potential employers don’t have to type the website on their devices.

Part of being a successful animator is maintaining the right social networks. With social media, this is easier than it’s ever been. LinkedIn, for example, is a great way to network with people in the same industry. Make sure you put your website on your LinkedIn and other social media profiles.

Instagram and TikTok also work well for showcasing animated work and getting people to visit your portfolio. Post some of your work on these sites and include the link to your website under the post and on your account information. Other social networks to consider are Twitter and Facebook.

Finally, insert the link to your animation portfolio in your email signature for maximum mileage.

Building Your Animation Portfolio Website

You need the right tools and platforms to create a professional animation portfolio. The right animation software will help you create the best reels that could generate interest from potential employers.

The following are some of the best animation software you could use:

Animation Software


Adobe Creative Cloud

Adobe Creative Cloud is a group of applications that animators can use for graphic design and video editing. It’s comprised of software like Photoshop, Illustrator, Animate, After Effects, and Premiere. Several studios use Adobe Creative Cloud which speaks highly of its reputation and capabilities in the industry.

Toon Boom Animation

Toon Boom Animation was developed by Storyboard Pro. The program is geared toward helping professionals create animated storyboards and animatics. It also includes Harmony which makes 2D animation easier and helps create impressive visuals. Many commercials and films use this solution.

DragonFrame

DragonFrame is ideal for stop-motion animation. It allows animators to capture high-quality images or videos and work with those files directly to create compelling images.

AutoDesk

AutoDesk is a versatile design software that’s used in many industries. In terms of animation, AutoDesk provides feature-rich functionalities like the ability to create renders and work with 3D modeling.

Blender

Blender features a toolset that allows animators to work with its character animation pose editor, forward/inverse kinematics for fast poses, non-linear animation for independent movements, and sound synchronization.

Equally important as the tools used in preparing animation reels for the website is the website platform. The following are the top hosting services for your animation portfolio:

Hosting Services


Adobe Portfolio

If you have Adobe Creative Cloud, the Adobe Portfolio is a free add-on. It allows you to create a responsive multi-page site that showcases your various animation projects. You can easily edit and update the site too. An important advantage of this hosting service is its compatibility with many Adobe products and apps.

WordPress

Many websites use WordPress because it is free. For animators, the free hosting service has up to 3 GB of storage space. But there are also paid options if you go beyond the free allocation.

Behance

Behance is technically a social media platform that hosts people’s creative projects. Adobe owns the platform but Behance is very different from its mother company. The layout is similar to Pinterest but it has a section where people can hire creatives and animators can look for creative jobs.

ArtStation

ArtStation hosts different types of showreels but gaming animation is the most prominent. It features different channels to make it easier for animators and potential employers to find what they are looking for. Some of the channels include game art, visual development, storyboards, motion graphics, horror, and much more. There is also a section where animators can find a job or a studio to work with. Companies can also post jobs or find an artist.

Outstanding Animation Portfolio Websites

To give you an idea of what excellent professional portfolios look like, here are some top animation portfolio examples and why they stand out. Use them as inspiration when building your own.

Rafael Varona

Animator Rafael Varona's Portfolio
From the moment the page loads, there’s no mistaking that Rafael Varona is an animator. Peruvian by birth with homes in Berlin and Rotterdam, Rafael is clearly passionate about animation and has created his own iteration of the King Kong vs. Godzilla showdown. Interestingly, instead of butting heads, Rafael has the two giants competing in a dance-off. His animation loops are unmistakably dynamic and colorful.

Rafael has worked with these world-renowned companies:

  • Disney
  • Google
  • Pepsi
  • Washington Post
  • World Health Organization

Yukai Du

Animator Yukai Du's Animation Portfolio
Yukai Du has a vibrant webpage with fantastic animations and colors. She is a Chinese illustrator and animator based in London. Du injects her personal style into all her projects, giving her work diversity while maintaining a distinct Yukai Du vibe.

She is active on various social media platforms: Instagram, LinkedIn, Twitter, Behance, and Vimeo. Du is a recipient of multiple awards such as the 3×3 Illustration Best of Show, Adobe Design Award Honorable Mention, and D&AD New Blood Wood Pencil.

Her most notable clients include:

  • Adobe
  • Apple
  • LUSH
  • The New Yorker
  • WeTransfer

Hannah Jacobs

Animator Hannah Jacobs' Portfolio
Hannah Jacobs is an award-winning illustrator, animator, and filmmaker from London. Her 2021 animated short, Your Mountain Is Waiting, was nominated for a British Academy of Film and Television Arts award. Her animation portfolio website showcases her versatility and creativity. Hannah’s projects are neatly arranged in a grid, making it easy for potential clients to browse through her work.

Hannah Jacobs’ past clients are:

  • Apple
  • BBC
  • Headspace
  • Netflix
  • The New York Times

Marco Mori

Marco Mori's Animation Portfolio
The homepage of German 3D and motion design animator Marco Mori is like a short film in itself. He earned a degree in interactive media but spent most of his career combining real footage with 3D animations, motion graphics, and photo manipulation. He has done some music videos with 3D animation for artists that include YNW featuring Kanye West (Mixed Personalities), Young Thug (Chanel), and Gorillaz (Tranz).

Marco Mori’s list of clients includes the likes of:

  • Puma
  • Starfish and Coffee
  • Universal Music Group

Georgie Lord

Georgie Lord's Animation Portfolio
Georgie Lord is a UK-based photographer and stop-motion animator who specializes in product photography. Georgie is also a stop-motion animator who showcases many of her stop-motion projects on the homepage of her website. Neatly organized and easy to navigate, her portfolio invites potential clients to gauge her capabilities and watch her previous creations. According to her website, Georgie enjoys working on marketing projects.

Some of Georgie’s past clients are:

  • Nestle
  • The Landmark Hotel
  • Twitter
  • Urban Outfitters
  • WaterAid

Conclusion

Animation is engaging, delightful, and timelessly interesting, however, it’s a very specialized field that takes significant creativity and technical skill. While you only need a bachelor’s degree to enter the field, honing your capabilities and amassing an impressive portfolio takes time and dedication.

Once you have some projects that you can be proud of, you can put together a functional, organized, and aesthetically pleasing animation portfolio website that allows you to show off your ability to create moving visual art.

Sources:


Markets N Research (2023, February 28). Global Animation Market Size/Share Worth USD 528.8 Billion by 2030 at an 5.00% CAGR: Markets N Research (Analysis, Trends, Share, Segmentation, Background, Forecast, Growth, Growth Rate, Value). Yahoo! Finance.

https://finance.yahoo.com/news/latest-global-animation-market-size-160000173.html#. Accessed 17 July 2023.

Forbes Coaches Council (2017, October 19). Nine Advantages Of Developing Your Own Professional Portfolio. Forbes. https://www.forbes.com/sites/forbescoachescouncil/2017/10/19/nine-advantages-of-developing-your-own-professional-portfolio/?sh=1e0b1fd52519. Accessed 17 July 2023.

NobleDesktop.com. Which Industries & Professions Use Animation? NobleDesktop.com. https://www.nobledesktop.com/learn/animation/industries-and-professions. Accessed 17 July 2023.

https://www.statista.com/topics/868/video-games/

ScreenSkills. Build Your Animation Portfolio. Screenskills.com. https://www.screenskills.com/starting-your-career/building-your-portfolio/build-your-animation-portfolio/. Accessed 17 July 2023.

What Is AI Art and How is it Created?

0

ai art info
Artificial intelligence (AI) has been making its presence felt in a wide range of industries, including art and design.

AI art — meaning art created with AI — is now a popular art form that offers many benefits and applications.

But what is AI art? In this article, we answer this question and share examples to help you understand it better.

We also discuss its uses, advantages, and drawbacks as well as share a list of tools and resources you can use to create breathtaking AI art.

What Is AI Art?

Also called generative art or computation art, AI art refers to the creation or enhancement of artwork using AI tools.

It includes various art forms, including visual art and audio compositions such as photography, video, and music. However, in this post, we will focus on 2D and 3D illustrative art.

AI art is different from digital art, which refers to artwork created with digital software. Digital art requires the artist or designer to use their artistic skills and techniques by employing tools like Adobe Illustrator.

Meanwhile, AI art often involves typing in text prompts. Generative AI algorithms respond by creating a finished artwork without needing further inputs.

AI art disrupts the paradigm of human creativity and handheld tools like paintbrushes and musical instruments that have driven art’s history since the discovery of the earliest pictures on cave walls.

Instead, computer technology and machine learning algorithms apply different artistic techniques to alter or enhance existing human-created artwork or to create new artwork altogether.

AI art moves away from the status quo where humans are the exclusive creators of art. Its advent puts forth questions about creativity’s origin while carrying legal and ethical concerns.

But it is also an opportunity to push the boundaries of creativity and art.

Examples of AI Art

AI art gallery
AI art comes in many forms, one of which is generative art. This form of AI-generated imagery uses algorithms to produce unpredictable and unique visual outputs. The results can be random or rely on certain rules or parameters set by the artist.

Another example of AI art includes style transfer, which uses AI algorithms to apply one image’s style to another. It helps an artist produce novel combinations of images and styles.

Below, we share examples of new AI-generated art types that are becoming increasingly popular with the emergence of AI art:

AI Face

AI-generated face art refers to computer-generated images of human faces. AI portraits help protect privacy by creating digital representations of people’s faces. Using an AI face generator also allows artists to create game characters, realistic portraits, and more.

AI Landscape

AI-generated landscapes refer to computer-generated imagery of natural or urban landscapes. Creating imaginary yet realistic landscapes using text prompts is a popular AI art form. Even novices can use online background generators to create stunning digital scenery.

Random Art Image

Random art images are a type of AI art that uses algorithms to generate striking visual representations of random objects. A random AI image generator amalgamates different objects to produce random image content from a textual description.

Photo to AI Art

This popular style of AI art uses algorithms to automatically recognize the content in an uploaded image. The algorithms then translate the image content and apply it to an AI-generated image.

This technique allows an AI program to create new artistic expressions and ideas while retaining the original image’s elements. Photo to AI art is usually used to create cartoons and avatars.

Who Can Use AI Art?

A photo collage of professionals who can use AI Art
Here is a list of industries and jobs that can use AI art:

Industries That Use AI Art

Here are the top industries that leverage AI art in their operations:

Gaming

The gaming industry is increasingly using AI software and tools to create images and videos featuring photorealistic yet imaginary characters, settings, and themes. It improves the visuals and the performance of game simulations and provides more realistic, interactive, and immersive gaming experiences.

AI art makes games look and feel more natural and life-like while recreating new digital gaming environments and worlds with real-time lighting. Game developers and artists can also use AI upscaling to enhance a game’s graphics and image quality.

Art

Many new artists are experimenting with AI art. A few of them use AI to create new patterns, styles, and color palettes for their artwork. Meanwhile, others use AI to analyze data and derive new artistic ideas for their creations.

Graphic Design

Many graphic designers use software programs like Adobe Illustrator CC and Adobe XD to leverage AI and incorporate it into their creative workflows.

They use AI to automate mundane tasks like resizing and aligning objects as well as getting suggestions and inspiration for design elements and layouts. It ultimately improves the efficiency of the design process and allows designers to focus on more complicated tasks.

Although humans still produce the finished design, AI art speeds up design stages like brainstorming, idea generation, conceptualization, prototyping, and client pitches.

Video Editing

AI art also finds uses in video editing and post-production workflows. Adobe Premiere Pro and other software programs use AI for automatic color correction and footage stabilization. It makes the video editing process faster and more efficient.

Video editors can also use AI to go through the footage and suggest edits like cutting between various shots.

Music Composition

AI music composition software programs like Jukedeck and Amper Music can analyze songs and suggest harmonies, melodies, and rhythms. They allow musicians to compose music more quickly and efficiently.

Jobs That Can Use AI Art

While we covered most creative industries that use AI art in their workflows, other jobs also use AI art. They include the following:

Therapists

Therapists can use AI art in art therapy. They can help patients leverage occupational AI art for personal enjoyment and relaxation.

Educators

Educators and teachers can use AI art tools to teach a digitally connected generation of artists and help them learn better.

Pros and Cons of AI Art

Let’s take a look at the pros and cons of AI art below:

Benefits of AI art

  • Automates and streamlines repetitive tasks in the creative industry
  • Allows creators to focus on more nuanced and complex tasks
  • Makes the creative process quicker and more efficient
  • Increases productivity for creators
  • Offers cost savings for businesses
  • Opens up fresh opportunities and possibilities for creators
  • Provides new perspectives on art and creativity
  • Allows creators to produce artwork or art collections in less time
  • Creates complex and challenging visual and audio art quickly and easily

Drawbacks of AI art

  • It may lead to a loss of jobs and creativity according to some.
  • It can lack the personal touch and emotional depth of human-generated content.
  • It is still in its early stages, so capabilities and quality may differ.
  • It is not yet widely accepted as a legitimate art form.

How Does AI Art Help Artists and Designers?


Contemporary artists and designers use AI in many ways to create art.

Though artists previously had limited artistic tools like brushes, paints, chisels, cameras, and musical instruments, AI’s introduction has significantly expanded them.

The impact of AI on modern art allows artists and designers to experiment with AI art in myriad ways such as:

Augmenting Existing Artwork

AI programs and tools allow artists and designers to enhance existing artwork. For example, AI can help reinvent and reimagine existing creations in different artistic styles.

Creating Fully AI-Generated Art

AI programs enable artists and designers to generate new pieces of visual art, music, and videos using text-to-image tools and other features.

Deriving Inspiration for New Creations

AI art can provide artists and designers with visual inputs and starting points as they attempt to create new pieces of art.

Collaborating With AI Art To Generate New Pieces

Nowadays, many multidisciplinary artists combine hand-drawn creations with AI-generated images as novel forms of artistic collaboration. They are exploring various possibilities for human-machine collaborations.

These projects may involve an AI program copying an artist’s gestures in real-time to produce unique artwork. This helps AI tools learn from and use an artist’s existing creations to generate new pieces.

AI can also go beyond human-machine interactions to enhance human-to-human collaborative projects. It allows two or more artists and designers to put their images and other art forms together in interesting ways.

AI also allows artists to list their creations for prospective buyers from which they can create and mint non-fungible tokens (NFTs). This type of layered collaboration produces an array of compelling outcomes.

Receiving Feedback and Learning

Artists and designers can work with AI and get a computer to review their work. Seeing a particular artwork in an AI program’s output allows users to identify signature colors and gestures and enhance them as necessary.

AI offers unbiased feedback and tells you what it sees. This perspective that goes beyond human perceptions offers artists and designers a new, surrealist, and uncanny way of looking at their creations.

Increasing Volume of Production Thereby Increasing Scales

AI also helps artists and designers produce huge creations quickly. Creative professionals can use AI to create larger collections of their artwork by modeling their original work.

Media artists can turn large quantities of information into nodes of color, filling rooms and covering buildings with their artwork. AI also allows inanimate objects like buildings to express their history and existence through art.

Leveraging Market Potential

Another way AI helps artists and designers in their work is by opening doors to emerging art markets. It expands the avenues where people can buy and appreciate artwork, helping artists and designers showcase and sell their creations on different platforms.

Traditional auction houses and NFT marketplaces are now experiencing growing interest in abstract artworks created by AI models.

AI also helps produce new art collections with blockchain technology. It can generate a model from an artist’s creation and go on to create hundreds and thousands of new artworks. The artist can then curate these vast collections to make an NFT collection.

Enabling Democratization

An impressive benefit of AI art is it helps more people create unique artwork and supports a new generation of would-be artists. AI tools are more accessible than ever before, which has unlocked a larger pool of artists.

Today, even people who cannot draw or physically paint due to a disability, illness, or other reasons can generate beautiful art.

How Do You Start Creating AI Art?

Sample OpenAI Dall-E AI art of a fox
How is AI art created? AI art generators do not require any art skills. You can simply type a text prompt, and the generator will create a finished artwork according to the prompt.

That said, the more you improve your knowledge about art, the more you will understand which text prompts will give you the best outcomes.

It will help refine the AI-generated artwork by adding more details to your prompt. For example, you can add the specific art style, colors, lighting, and textures you wish to see in the artwork.

Tools and Resources

AI art is produced in different ways. Artists and designers can create images in the style of others or produce beautiful graphics with text descriptions. They can also learn creative coding and generate AI art using only code.

If you need an AI art generator to get started, we share the 12 best AI art-generating tools and software for creating stunning virtual imagery:

Google DeepDream

Launched by Google in 2015, DeepDream is a popular AI art tool that was initially created for scientists and engineers. This computer vision platform helped them visualize and understand patterns learned by neural networks, which are a type of machine learning algorithm.

The deliberately over-processed images created by DeepDream had a surreal psychedelic appearance. It later resulted in the algorithm becoming a new abstract art form.

The art generator enables users to add photos and videos to it and transforms them using an AI algorithmic filter. The program uses convolutional neural networks to augment existing photo patterns with dream-like effects. These networks are forward-fed artificial neural networks in which a neuron connectivity pattern responds to overlaying areas in a visual field.

WOMBO Dream

WOMBO Dream is another easy-to-use art generator that helps you create AI art with your mobile and browser app. It produces generative art from text descriptions in different pre-determined art styles.

WOMBO Dream uses two machine learning tools to combine an image-generating neural network and an algorithm that interprets descriptive texts. These algorithms learn from every iteration, so each request creates a different result.

GauGAN2

NVIDIA Research’s new AI model, GauGAN2, derives its name from post-Impressionist painter Paul Gauguin. This AI program generates photorealistic images from basic design elements that artists can create with simple graphic tools such as paint buckets and paintbrushes. They can also combine sketches with short texts to create unique and eye-catching scenery.

This widely used AI software helps users visualize concepts and create simulated photos using any kind of creative input.

Midjourney

Midjourney AI Digital Art System uses a mix of generative art techniques and machine learning to produce content with user inputs. Artists can also use an initial uploaded image as their starting point. This software creates more painterly and artistic art, which sets it apart from the rest.

To create art using this AI program, artists must first submit their instructions through a Discord channel. Through it, various art style specifications like color palette, stroke patterns, medium, and brush size can be configured.

DALL·E 2

Deep Artificial Language Learning Engine (DALL-E — stylized as DALL·E) creates unique and photorealistic art using descriptive texts and interprets natural language, including written descriptions and commands.

This AI tool is similar to Midjourney, but DALL·E operates on a website and allows users to add or remove elements to edit existing images while Midjourney does not.

Craiyon

Craiyon is a text-to-image art generator that uses the technology behind DALL·E, OpenAI’s larger model. Unlike DALL·E, Craiyon is open-access and free for users. You only need to type in a clear text description and it will create nine variations of its results.

This program became especially popular in 2022 when users began producing different kinds of cool art and memes.

Playform

Playform is an AI tool made with AICAN technology. Developed by Dr. Ahmed Elgammal, AICAN is a patented AI artist that uses a complex algorithm to autonomously create new artwork using knowledge about art history.

Playform allows you to train your generative adversarial network (GAN) models using your artwork and designs. This no-code collaborative platform allows you to feed it over 30 images. Its algorithm will identify color, depth of field, composition, and other details to produce unique images.

You can also list your work on the Art Mine, a section of Playform’s platform that allows users to list their models for buyers to mint NFTs from. It enables artists to leverage the power of layered collaboration for diverse and interesting outcomes.

Playform improves AI’s accessibility for creative professionals and invests in them via its studio program, which offers artist development services, exhibition opportunities, and community support.

ml5.js

This open-source coding library was developed to make machine learning accessible and easy to use for a large audience, including artists, designers, creative coders, and other creative professionals. It offers access to pre-trained machine learning models and algorithms with limited lines of Javascript code.

AIArtists.org

Curated by independent contemporary art curator Marnie Benney, AIArtists.org is the world’s biggest artist community devoted to exploring AI. It curates historically significant AI art, offers AI art tools, and serves as an international clearinghouse for the effects of AI on art and culture.

You can explore artists, AI art history, ethical issues in AI art, and other topics on the platform. You can also access 41 tools for creating visual art, music, and more.

Artbreeder

Formerly called Ganbreeder, Artbreeder is an innovative and collaborative AI art website that relies on machine learning algorithms. It uses the StyleGAN and BigGAN models while allowing artists and designers to create and alter images of paintings, faces, landscapes, and other categories.

You can use it to craft unique art using shapes, images, and other design elements. It also includes tools like a Collage Maker and Splicer, which allow creative professionals to combine various elements to produce AI art.

The Splicer tool also helps users edit their images’ genetic information for unlimited possibilities.

You can also use sliders to combine images and add features from one image to another. Artbreeder boasts a vibrant community where users can share their work and follow other artists for creative inspiration.

The best part is that the platform is free to use, and every user can access unlimited images. You can also sign up for one of three memberships that offer extra features like custom genes and faster renderings.

Overall, Artbreeder is a fantastic AI art tool that helps users explore creative possibilities and collaborate with fellow creative professionals.

Machine Learning for Art (ml4a)

Machine Learning for Art (ml4a) offers an authoritative collection of free educational resources covering machine learning in art. This leading platform for artists provides a handy book on code and AI’s underlying mechanisms. It also offers other tools that apply machine-learning techniques to art and creativity.

You can also access over 40 collaborator-maintained instructional guides, video lectures, interactive demos, figures, and more.

Fotor AI Art Generator

Fotor AI Art Generator is another popular AI art platform that anyone can easily use, including those without any experience in AI art. This tool offers a simple and intuitive user interface that allows you to generate gorgeous AI art in mere minutes.

You can produce AI art from text or images while accessing various styles and customization options to suit different artistic needs.

Final Thoughts

AI’s use in art and creativity is still at a nascent stage, so AI art’s capabilities and quality can vary with different programs and applications. Also, AI art is still not widely recognized as a legitimate art form, and public perception of it must improve for it to enjoy greater acceptance.

Nonetheless, AI art has the power to stir up creative industries by opening up new possibilities, increasing efficiency, and streamlining processes.

This makes it a promising tool for art and creativity in the long term.

What Is Virtual Production?

0

virtual production 101
Virtual production is one of the hottest new developments in film production and is now being used by many studios across the world.

Virtual production is the practice of combining virtual worlds with the real world to create exciting and beautiful film productions.

Virtual production covers a number of different techniques and uses many tools and methods.

We’ll go over some of the aspects of virtual production, some examples of ways it has been used, where the future lies for the technique, and how you can get involved.

Techniques of Virtual Production

The most popular style of virtual production involves using virtual game worlds as part of film production. The way this is done is by combining the virtual world and the real world, usually in real-time, in order to speed up production and create realistic visuals.

Using many different sets in a movie can be expensive, especially if the production needs to travel to reach them. With virtual production, these sets can be created in virtual space much more easily.

Plus, virtual sets can be quickly modified for layout, lighting, and more. The many different sets of a film can then be filmed in just one studio outfitted with a video screen that brings virtual spaces into the real world.

The video screens used in video production are large – much much larger than your average TV. They often span entire walls or multiple, and some studios even use one on the virtual ‘sky’.

These virtual sets are rendered in real-time with tools like Unreal Engine and Unity. These tools allow the studio to track the camera’s movement, and change the view in real-time, making the screens appear in perfect perspective.

By combining real and virtual worlds, directors can create a wide range of scenes, even fantastical worlds for sci-fi and fantasy productions. These shots are designed to be ready to use without needing to use techniques like a blue screen, which often produces less natural-looking shots.

With a well-thought-out virtual set, the background blends seamlessly into the real world, making for extremely convincing locations without having to even leave the studio.

This also has the benefit of making the world more realistic for actors. Even the best of actors are challenged when forced to act in empty blue rooms.

With virtual production, the actors are able to feel much more immersed in the world they are acting within, helping them give their best performance.

Similar techniques have actually been used in films for a long time, though with a simpler setup. In older movies, the background was projected on a screen behind the actors.

This was a common technique for things like driving scenes, where the background is not as important.

This older technique came with some limitations that virtual production helps to eliminate, such as the need for actors to avoid blocking the projected backdrop.

Other techniques that may also fall under virtual production include facial capture, motion capture (mocap) augmented reality, and more. In addition, the industry is constantly finding new ways to adapt film productions to new technology.

Why Is Virtual Production Becoming So Popular?

Virtual production has become increasingly popular in recent years, and will only continue to see more and more use. Just what makes virtual production such a popular tool?

One of the biggest reasons for this popularity is simply how advanced the technology involved has become. Real-time rendering technology has become increasingly realistic looking, and screens have become larger, sharper, and cheaper.

The simple fact is that virtual production on the large scale was simply not possible only a few years ago!

Another reason is the large number of productions being made every year. Hundreds of shows and movies are being made every year, and the standards of quality remain high.

Studios are always trying to push the visuals of their films while also keeping a reasonable budget. Virtual production helps to save time and money making it much easier for studios to reach their targets.

For these reasons and more, virtual production is a win-win for everyone. It makes films more affordable for studios, it makes production more versatile for creators, and it makes beautiful final products for fans to enjoy.

What Are The Downsides of Virtual Production?

We’ve covered the benefits of virtual production, but there are some downsides as well.

Firstly, virtual production is not going to work for every shot in every movie. For example, this technique is not ideal for shots requiring a lot of movement, as the camera can’t move beyond the video screens.

It is also not as viable for smaller spaces like interiors, though it can be used.

Another area where virtual production presents problems is post-production. While it can cut down on the visual effects workload, it also lacks flexibility once the footage has been shot. The design of CG elements will not be able to be as easily changed later on as they would be with a blue screen.

Another downside to virtual production is it can be very expensive for smaller productions. While there are some DIY ways to use virtual production, these don’t offer the same versatility as industry-level equipment.

Smaller movie studios can’t always justify the costs of the equipment required.

The Future of Virtual Production

Virtual production has proved to be a very useful tool in recent years, and things are only going to get better.

Live rendering technology is only getting better, as seen in many recent video games.

Techniques like ray tracing are now becoming quicker and easier to be rendered in real-time, allowing for even more convincing virtual worlds, and thus more convincing virtual productions.

Another future potential is the growing availability of virtual production tools. Just think that 40 years ago, digital cameras were restricted only to the most high-tech science labs, and now we all carry high-def digital cameras in our pockets.

Things like LED walls may become even less expensive, allowing smaller productions and even hobbyists to get involved.

Finally, there are many more potential uses for new technology in virtual production. For example, the process could be extended into audio, with entire soundscapes being played out in real time.

Maybe in the future, films will be fully virtual affairs, in which little or no post-production is required.

Another future could see AI technology being used to quickly generate realistic sets in no time at all. It may seem far-fetched, but we may even one day see the rise of convincing robotic actors in Hollywood!

Getting Involved in Virtual Production

Virtual production is a pretty multifaceted process, and there are numerous different roles involved. Virtual environment artists must first create the world of the film. This will usually be done with the direction of the art department.

If you know anything about video game development you know that building a virtual world is no small task, and can require many artists including modelers, animators, and even programmers.

Roles

On the film set itself nearly everyone can be involved in a virtual production. However, the most involved would be people like the cinematographer and director of photography. There is also a need for technicians on set who set up the virtual production equipment and ensure it’s working properly.

Education

If you’re interested in working with virtual production, you could attempt to get an industry position, which may require an education in the field.

If you choose to pursue an education you should first decide which area you are interested in working on, be it set design, filmography, or something else. From there, you will need to apply for roles at film studios that are looking to use virtual productions on their films.

Though there are many roles available now, jobs involving virtual production will only become more common as the years go on.

Tutorials

If you aren’t interested in taking the “professional” route, it’s easier than ever to use virtual assets in DIY productions. For example, with a toolbox of free-to-use software like Blender, Unreal Engine, and Davinci Resolve you could begin experimenting with virtual production on your own projects.

There are hundreds of tutorials online to get you started with these tools, and the skills you learn may even help you to get a job in the industry after all.

Be it on the big screen or just your own projects, there is a lot of potential in the future of virtual production, and it is a very exciting and powerful new tool for all kinds of productions!

Video Game Engineers: Job Description and Salary

0

game engineers hero image
Video game engineers are an important part of a game development team who takes care of a range of advanced technical tasks.

Due to the skills required, becoming a game engineer can take some time and education, but it can also be a very well-paying job.

In this article, we will go over what exactly a game engineer does, what kind of education you will need to become one, and how much money you can expect to make.

Game Engineer vs Developer or Designer?

It is not uncommon for the titles game designer, developer, and engineer to be used interchangeably. While there are some overlaps between these roles, they do also have their differences.

The differences between these roles and the tasks that each handles will vary depending on the team they are part of, but there are some general differences.

The title ‘game developer’ is a relatively general term basically meaning anyone who works on a game. Game developers may handle a number of different duties including programming, level design, beta testing, and more.

A game engineer will handle many of the same tasks as a regular developer, and more. An engineer may be tasked with more highly technical jobs that require advanced knowledge.

For example, if your company wants to work with a custom game engine, a game engineer may be responsible for designing this engine in order to ensure the best performance.

An engineer may also be responsible for things like building and maintaining network code, as well as developing internal tools to help with development.

A game designer is different from the previous two as he or she tends to lean more heavily into the creative and abstract side of game development. They may for example come up with new gameplay concepts, level ideas, or visual concepts.

Designers may also help to come up with the overall mood and direction for the project. Designers may also handle technical tasks but to a lesser extent.

All of these roles play an important part in game development, and will usually work closely together to complete projects.

For example, a game engineer may build a custom-level creation tool, a designer will come up with the visual concepts and objectives, and a developer will code and construct the actual gameplay. In this way, each member of the team can focus on their own specialties to make a great final product.

Why Are Game Engineers Important?

Games are getting more and more advanced and so the need for highly skilled engineers is growing. In fact, game engineers may be responsible for much of the amazing progress we have seen in video games over the years, using their advanced knowledge to push the technology even further.

In addition to becoming more technically demanding, games have also become increasingly complex projects. Having highly experienced and knowledgeable engineers is crucial to producing high-quality games on time and on budget.

Finally, game studios rarely just release a game and move on to the next project. Games are now live services requiring years of support so players can keep enjoying the experience.

An engineer will be crucial to creating stable and well-documented game systems, as well as maintaining those systems for years to come. When something does break, it’s important to have a knowledgeable expert to fix it.

What Education Is Required To Become A Game Engineer?

A game engineer is a very important role that requires knowledge of a lot of technical subjects. If you are hoping to get a job as a game engineer, your best bet will be to pursue post-secondary education in a related topic.

Despite the name, you shouldn’t feel the need to get an engineering degree to be a game engineer. Instead, good choices for education may include computer science, game development, software engineering, and more.

Beyond a bachelor’s degree, you can do more to help you stand out and land a job as a game engineer. You could for example continue beyond your bachelor’s degree and pursue a master’s degree in a relevant field. This will obviously expand your knowledge, but also help you to land better jobs with higher pay.

Outside of academics, your work experience will be an important aspect. This can begin as early as you are in school, looking for courses and internship opportunities involving game development.

Once you start looking for a job, consider that you may not land the role of an engineer immediately. Instead, it may take a few years of experience to prove and develop your skills before these higher-level roles will be more accessible to you.

Skills Required From A Game Engineer

A game engineer may be expected to possess the following skills among others

  • Advanced programming skills in a variety of languages such as C++, C#, and Python
  • Experience working with libraries and APIs
  • Ability to understand and break down complex technical problems
  • Ability to manage projects and teams
  • In-depth knowledge of video games, the game industry, and the game development process
  • Knowledge of the hardware. Functions, and limitations of common video game platforms including consoles and mobile.

How Much Does A Game Engineer Make?

Video game engineers are generally well paid, though your compensation is going to depend on your capabilities, level of experience, and who you work for.

A new game developer or game engineer may start out making around $70,000 a year, but as they continue their work this can grow to above $200,000.

There are many companies that hire game engineers, so it should be fairly easy for an established engineer to find work and negotiate a competitive salary. This makes a game engineer an appealing career choice as there is great potential for growth and advancement.

What Tools Does A Game Engineer Use?

As a game engineer, you will probably do a large majority of your job on the computer, though there will not be any one piece of software you will use. Many studios take advantage of industry toolkits such as Unity or Unreal Engine. You may also use custom in-house tools, or perhaps write your own.

On a more advanced level, some engineers may also be involved with video game hardware. This could include minor things like determining hardware specs for games, too much larger tasks like helping to design entirely new video game hardware.

How To Find Game Engineer Jobs

There are countless studios these days, big and small, in need of game engineers. One way to find jobs is to simply keep an eye on job boards for companies in your area and apply the old-fashioned way.

Another way to land a job may be to leverage connections you may have made in the industry on your way to becoming an engineer. For higher-level roles like this, a good recommendation from another person can go a long way.

If you make enough of a name for yourself in the industry, eventually companies may even try to recruit you for your skills.

It may also be worthwhile to consider relocating to where many game developers are based. In the US, many developers are located along the east coast in cities such as San Francisco, Los Angeles, Seattle, and others.

Other US cities include Austin, Chicago, and New York. Outside of the US, Canada and England are also major locations for game developers, in cities such as Montreal, Vancouver, and London.

When it comes to the actual hiring process, you are going to need to prove your skills match up with what studios are looking for. As well as having a strong resume, it will be a good idea to build a portfolio of past projects and accomplishments.

If you really want to show off your skills, consider creating a few case studies, demonstrating the problem at hand, how you approached it, and the results of your work. This will be a great way to show developers you know your stuff.

Once you do land a job as a game engineer, your work doesn’t end there. Your role will likely present you with constant new challenges you will need to overcome, and you will always be learning and growing your skills as new technologies are developed.

If you choose this path, we hope your career as a game engineer is an exciting and fruitful one!

How to Create Video Game Atmosphere

0

video game atmosphere
Video games today are far more immersive than ever, and that isn’t simply because consoles and PCs have gotten more powerful.

A lot of the beauty and appeal in modern games comes down to a less quantifiable factor: Atmosphere.

Atmosphere, when done right, can turn the bundle of programming, art, and sound that we call a video game into something so much more than the sum of its parts.

Though it is easily overlooked, especially for newer devs focused more on the nitty-gritty of game development, the atmosphere is a crucial component for any successful release.

In this article, we will cover the basics of game atmosphere, so you can better appreciate it in the games you play, and improve the atmosphere of the games you create.

What Is Game Atmosphere?

When we talk about a game’s ‘atmosphere’, we don’t mean things like virtual clouds. In fact, ‘atmosphere’ is no single thing in itself.

Rather, the ‘atmosphere’ of any game is a combination of many things: art, sound, post-processing effects, story, dialogue, and more.

The best way to understand the atmosphere may be through an example. Compare two games Breath of the Wild and Elden Ring. Both are open-world action-adventure games with fantasy elements and similar mechanics.

Yet both give off very different feelings, owing in large part to their unique atmospheres.

Breath of the Wild features picturesque natural environments, whimsical characters, vibrant colors, and perky sound effects. All of this creates a more lighthearted fantasy world.

We feel the desire to protect this beautiful world and the characters we meet, playing nicely with the game’s story.

Elden Ring on the other hand has a darker atmosphere. The game features edgier imagery, corrupted natural environments, hostile characters, and realistic sound effects.

Overall, it is a more moody atmosphere that lends a sense of dread, and this goes along nicely with the hostile game mechanics players will be up against.

In this example, neither game has a better atmosphere than the other. Rather, each game is made great by a purposeful use of atmosphere that helps to communicate the developers’ vision for the world and how the player should feel about it. This is the power of the game atmosphere.

‘Atmosphere’ vs ‘Game-Feel’

In game development, there is also another closely related concept of ‘game-feel’.

While both ‘game-feel’ and atmosphere are important and affect how the player feels about a game, ‘game-feel’ tends to be more about the moment-to-moment experience of playing a game and the way a player interacts with the world.

Atmosphere on the other hand is more all-encompassing and abstract.

Why Is It Important For Games To Have An Atmosphere?

Game atmosphere can do a lot to improve the overall impression of your game, so it’s important to make it a part of your game.

On the other hand, a lack of atmosphere, or an atmosphere that is at odds with the game’s mechanical and narrative design can be off-putting to players and lead to poor reception.

It’s also important to consider that the bar for video games is being set ever higher, even for indies. That means players have come to expect a certain level of polish in games. If you release a game with no atmosphere, players will notice something ‘off’, even if they aren’t sure what.

A game with a good atmosphere feels alive, making it much easier for the player to feel immersed. This has many positive benefits. It makes the player invested in the world, making them more likely to continue playing and to make great memories of the game.

It makes the game into more than just a game, but into an emotional experience.

A game with a bad atmosphere can be distracting and take the player out of the game. In the worst case, a poor atmosphere can even end up diminishing work you’ve done in other areas, sabotaging your player’s impression of other aspects like the story or gameplay.

How To Design Your Game Atmosphere

Atmosphere in game design is the sum of many parts. For this reason, it can actually be a complex task to really nail the atmosphere you are going for, even if you have a good idea of what that is. If you don’t have a clear game atmosphere in mind – good luck!

For these reasons, you should consider your game’s atmosphere from the very start. Having a clear idea of the atmosphere will help guide your decisions through the entire project, and help you to tie your atmosphere more closely to the other elements of your game.

Here are some things to consider when deciding your game’s atmosphere, sorted into the different categories that go into game development.

Graphics

Visuals are obviously a major part of games, and these may be the biggest area where your atmosphere will be developed. Things like color palettes, textures, and lighting all help to build a mood, as well as animation and how things in your world move and interact.

Another big part of the atmosphere in games is the weather and particle effects. Is your world stormy and moody, or bright and sunny? Is there a fog obscuring hidden threats, or is the level in clear view for easy puzzle-solving?

Finally, post-processing is a small thing that can make a big difference. Effects like bloom, motion blur, and lens artifacts can add that extra bit of polish to your project.

Sound

Game sound will probably be the second most important factor in the atmosphere of your game. Ideally, your player should be able to close their eyes and hear what kind of world they are in.

Imagine how a realistic shooter like Battlefield would feel with cartoon sound effects. While it may be humorous for a moment, after long enough it would get grating. On the other hand, a game like Super Mario Odyssey benefits a lot from more cartoonish sounds and might feel empty with more realistic sounds.

Music (or the lack of music) can be another big factor. A good score can raise tension, create a sense of security, or even play a narrative role through the use of recurring motifs.

Finally, ambient sound can be a great way to make your world feel alive. Adding this detail to your game will make the world come alive even in quiet moments.

Story, Dialogue, and Characters

Atmosphere and story have a very important relationship, often helping to accentuate one another. The types of things that happen in your game world, as well as the beings that live, should feel in line with the overall vibe of the world itself

Characterization can be a big aspect here as well. A great example of this is the FPS-puzzler Portal. The game features very few characters who are mostly heard through voiceover and whom we can’t interact with.

Despite this, the main antagonist GLaDOS has become one of the most beloved and memorable characters in gaming, and really helped to set the mysterious and brooding mood of Aperture Science, all thanks to expert voice acting and writing.

Gameplay

Finally, gameplay should not be seen as a separate element from the atmosphere. The way the player interacts with the world is going to shape their impression of it.

If your world is easy to navigate and motion feels fluid, the game will feel very different from a world where even simple tasks present much resistance. Is the game simplistic and easy to understand, or are mechanics obscure and complicated?

All of this can add to the atmosphere.

A great example of this is the game Death Stranding. Though often humorously described as a ‘walking simulator’ this is actually a major element in driving the game’s atmosphere.

The player has to always be paying attention to the world rather than just breezing through, and this helps them to really feel the severity and danger of the game’s setting.

Examples of Games With Good Atmospheres

Many of the games mentioned in this article so far present great examples of masterful game atmosphere, but here are some more for you to take inspiration from, or just to enjoy playing.

  • Silent Hill – One of the most famous early examples of atmosphere in 3D gaming, the all-consuming fog turned technical limitations into a genius atmospheric choice.
  • The Last of Us – In an era of arcade zombie games, Naughty Dog went for a slower more character-driven game, giving it a very impactful atmosphere.
  • The Legend of Zelda: Majora’s Mask – the younger brother of Ocarina of Time keeps players on edge and makes for a much gloomier and darker feeling entry to this usually-colorful series.
  • Bioshock Series – The worlds of Rapture and Columbia ooze atmosphere. Though the settings couldn’t be more different, they both set the mood of the games perfectly through visuals, sound, story, and more.

These are only a few of the games that stand out most to me, and there are dozens of others that fit the bill. If you’re interested in learning more about adding atmosphere to a game one of the best places to start would be with the games you love.

Play them with a careful eye on what choices they make and why, and make notes on how you feel at certain moments, and how this feeling is achieved. With some careful planning and smart execution, your game may be ranked among these greats as well!

How to Make an Artist Portfolio Website

0

artist portfolio websites
For artists today, there are many options for creating, maintaining, and sharing your portfolio.

This article will cover everything you need to know about building your digital portfolio, the tools to use, and why you should start making a portfolio now.

What Are Portfolio Websites?

There are two different types of ‘portfolio websites’. First is a personal website that houses your art portfolio, and the other are tools designed to help create online portfolios, also called ‘portfolio builders’ or ‘website builders.

First, we’ll look at your personal portfolio and why you may want to build one online.

Why Are They Important?

In the old days, your portfolio was physical: basically a folder with various examples of your work. When applying for a job, you were expected to submit your portfolio or bring it along to any interviews.

Nowadays when artists build a portfolio, most do so digitally. This offers many benefits to artists.

For one, a digital portfolio is very easy to compile, especially if you work in a digital medium. Another reason is that you can include a wider range of media in a digital portfolio, such as audio, video, 3D models, and more.

Finally, a digital portfolio is easy to share with employers, collaborators, and fans with just a simple link.

While there are limitless ways you could present your work in a digital form, the most popular is through a portfolio website. A portfolio website is going to be more accessible than just a folder on your computer and can include a nice design and layout to make your work really stand out.

In addition, your portfolio may be part of a larger personal site that can also contain things like a blog, contact info, or shop.

How To Create An Online Portfolio

You could build your own site from scratch if you’re savvy (and this may be a good idea if you are a web designer for example) this isn’t a good option for most. That brings us to ‘portfolio builders’, which help users to create professional-looking websites without technical knowledge.

Some popular examples of portfolio websites include Wix, Squarespace, and Dribbble.

The harder question than if you should use a website builder is which website builder you should use. There are many different choices in this field, and often with very similar features.

The best website builder for you is going to depend on your needs, and there is no single best option. In the next section, we will compare a few popular options you may want to look into.

Top Portfolio Websites For Artists

Before we look at the many different options for website builders, let’s go over some of the criteria that you could use to evaluate your choices. These may include:

  • Ease of use: while you can expect it to take some effort to create your portfolio site, a good option should make it easy for non-technically inclined artists to build and maintain their portfolio.
  • Customization options: the point of a portfolio is to stand out, so it is important that the service lets you tailor your portfolio to your own needs. This can make a big difference in the overall feel of your portfolio. This includes visual aspects of your page, but also more technical aspects like media embedding and responsive design.
  • Pricing: Obviously this will be a major factor in your decision of which service to use. While there are many free options, these usually come with limitations that would make you want to consider a more premium offering. The good news is, there are many different services at price points for any budget.

Squarespace

Squarespace is one of the most well-known website builders, thanks largely to their massive advertising budget, often sponsoring content creators, podcasts, and more. However, Squarespace isn’t all advertising, and they have a robust platform to back up their popularity.

Squarespace has many built-in templates that can make setting up a professional-looking portfolio a breeze. The site also offers additional features for things like SEO, eCommerce, marketing, and more, which can make it a one-stop shop for website building.

Squarespace is free to start, but plans with a custom domain starting at $16 a month, with higher tiers unlocking additional features. For a digital portfolio, the basic plan would be a great start.

Wix

Wix is another major name when it comes to website-building services, and is very similar to Squarespace in terms of functionality. This means that it will have everything you need, and many things you won’t need if all you want to do is make a portfolio.

The primary difference between Squarespace and Wix is that Wix provides a bit more freedom over your site design, though this can also mean a bit more effort required to get things just right.

Wix offers a free service but plans with a custom domain starting at $16 per month. You can pay for higher account tiers that will provide additional services, but the basic plan will suffice for a standard portfolio.

Dribbble

Dribbble is another well-known service for building a digital portfolio. Unlike the previous mentions, Dribbble is specifically focused on building a portfolio for artists and designers.

This means that Dribble will be very user-friendly for that purpose, but maybe a bit more limited if you plan on building a full site. The platform also offers career tools and a job board to help you find work, making it a great choice for freelancers.

A pro account on Dribbble will cost you as low as $5 per month, though it won’t include a custom domain, which you will need to purchase separately to connect to your page.

WordPress

WordPress is one of the oldest and most widely used website applications on the internet, and for good reasons. WordPress has thousands of users across all sorts of industries so there is a lot of info and resources to help you get started.

The downside of WordPress is it may require some more technical knowledge to make the most of its features, though this will depend on how complex you want your page to be.

And WordPress is free…technically. The application itself can be downloaded for no cost, but unless you have your own web server you will need to pay for hosting. WordPress itself offers hosting, with a free option and a $ 10-a-month premium plan that is best for artists and freelancers.

Adobe Portfolio

If you’re a creative type, you’re probably familiar with Adobe. As part of its wide suite of creative applications, Adobe has created its own portfolio-building site, aptly named Adobe Portfolio.

The best reason to choose Adobe portfolio is if you already use their other products.

Not only is Portfolio well integrated with their other apps such as Photoshop and InDesign, but it is also included in their Adobe Creative Cloud subscription. This means you may already have access to Adobe portfolio without any extra cash required.

The downside is that you can’t pay for Adobe Portfolio separately, and will need to sign up for a CC subscription, which can range from $10 a month to over $50.

Some Options Beyond Site Builders

Bespoke

If you really want to stand out (and have a bit of extra cash to spend) you could consider working with a web designer to create a bespoke website for your portfolio. This will be one of the most expensive options, but will also allow you the ultimate control over your portfolio.

This option is a bit more involved and would be suited for larger artists or companies rather than a beginner.

Google Drive

If you need to share your work fast and want to keep it simple, your easiest option may be to simply load your files into a service like Google Drive or another cloud storage platform. In addition to being quick and easy, this option is free to get started.

On the other hand, there are nearly no customization options, and you won’t even be able to use a custom URL.

Portfolio Communities

Finally, there are numerous online communities that allow you to share your portfolio of work such as Behance, Artstation, and Deviantart. Even social networks like Instagram can serve as a de-facto portfolio.

These options are a great way to connect with fans, other artists, and potential clients, but also tend to be a bit restrictive and should ideally be used alongside a dedicated personal website.

Four Inspiring Examples of Artist Portfolio

What follows are some examples of live portfolio sites from real working artists. These can serve as a good starting point for inspiration on laying out your own portfolio and what to include. Special thanks to the artists featured here, and if you like what you see be sure to visit their sites for more!

Concept Art – Gerrin Tramis

spikeadillo portfolio website

3D Character Art – Brendon Isaiah Bengtson

bentsondesigns portfolio website

Animator / Character Artist – Mathias Takacs

squashandstretch portfolio website

Game Designer – Manuel Correia

gamesbymanuel portfolio website

Do I Need A Portfolio?

Every artist should consider keeping a portfolio. If you are looking for creative work, this is one of the most common things that an employer will want to see from you.

Once you put in the work to get your portfolio started, it will be easy to update it with your latest work. While it’s most commonly seen as a way to help you find jobs, it can also be nice to simply look back and take pride in what you have made, and to inspire your future progress.

In terms of what can go in your portfolio: anything you’ve made! This could be work you’ve done for previous jobs, projects you made for your school, or even pieces made specifically for your portfolio. The most important thing is that it shows off your style and what you’re capable of.

Just remember, this is your portfolio. You should not include anyone else’s work in your portfolio, especially to try to pass it off as your own.

How To Get Started

If you’re just starting out, you should try and include your best works, as well as works that showcase a variety of different skills.

If you’re a painter, for example, you might want to include paintings of different subjects, different mediums, and sizes. If you only include one type of work in your portfolio, it may be hard for potential employers to understand your skills.

On the other hand, don’t go too broad. If you practice a few different types of art for example, consider making a portfolio for each. This way, you could send your 3D modeling portfolio to a potential employer without them having to sift through your landscape paintings.

If you are looking to start as an artist but don’t have much yet for your portfolio, you may want to take some time to create one. Think about what your potential clients will be looking for, and also take a look at what other artists in your field include in their own portfolios.

Create a list of three to five ideas for portfolio pieces and work on creating those.

Final Thoughts

If you’re just getting started and looking for work, remember that your portfolio is just a tool and won’t get you to work on its own.

Portfolios are made to be shared! Don’t be shy about sharing your portfolio with anyone who may be interested. You never know where your next job may be found!

Hopefully, you now have a great idea of why you should build a portfolio, what to put in it, and how to get it made. Now you get to do the fun part: Actually building your perfect custom portfolio. Best of luck!

The Impact of Hideo Kojima on Video Games

0

Video game director - Hideo Kojima
In the world of video games, few people have played as large of a role in progressing video games as an art form as Hideo Kojima.

For over three decades the Japanese game director has continued to release classic and critically acclaimed video games, most famously the Metal Gear series. His unique and idiosyncratic style has gained him many die-hard fans who eagerly anticipate his new projects to his day.

Just how did Hideo Kojima become the industry giant he is today? What inspires him to create his visionary projects? And what will his next venture be? Read on to find out!

Hideo Kojima: A Short Biography

Hideo Kojima was born in Tokyo in 1963. As a child, he gained a deep appreciation for film and developed a refined taste in the medium that would inspire his work for years to come. Kojima always had a knack for creating and worked on film and writing projects before deciding to enter the video game industry in the mid-1980s after securing a job at game developer Konami.

Early Career

After working as a director for a few games at Konami, Kojima was given control of his own project that would go on to become Metal Gear for the MSX2 computer. Widely considered a pioneer in the stealth and action genres, with Metal Gear Kojima established himself as an up-and-coming visionary in the world of video games.

Kojima would go on to direct further well-received games in his early years such as Snatcher and Policenauts.

Metal Gear Solid Series

In 1998, Kojima and his team released Metal Gear Solid for the Playstation, a game that would set a new high bar for quality in video games and solidify Kojima as a gaming legend.

The game combined never before seen realism with an intricate plot rife with political commentary, as well as Kojima’s signature stealth gameplay.

The game ended up being a hit and spawned numerous sequels and spin-offs. To this day, the games in the Metal Gear Solid series are considered some of the finest ever made, though fans naturally argue which in particular is the best of the best.

Independent Work

Over 15 years after the first game, Kojima released Metal Gear Solid V and announced he would be leaving the Metal Gear Solid series behind and departing from Konami. Though the end of a beloved series was saddening to some fans, the prospect of just what a newly-independent Kojima Productions would do next was equally as exciting.

The first product of this independence was 2019s Death Stranding, which departed heavily from the conventions of the Metal Gear Solid series and explored innovative new gameplay concepts in a new setting. Despite the bold new direction, the game was generally well-received by critics and gamers.

After an already impressive career, Kojima isn’t slowing down yet. Rumors abound of just what his studio is working on now, and he’s even expressed an interest to try his hand at film at long last. It seems Kojima fans definitely still have a lot to look forward to!

Game Development Style & Philosophy

One of the things that make Kojima stand out as a director is his unique approach to game development.

More than anything Kojima treats video games as a storytelling medium. Combined with his love for film, this leads to deep story-driven games with lengthy and cinematic cutscenes (Metal Gear Solid 4 once held the world record for the longest cutscene in any game).

Kojima is also known for filling his games with philosophical themes and deep political commentary. This is most notable in Metal Gear Solid, which explores themes of anti-war, nuclear disarmament, and misinformation, as well as more personal themes such as identity, revenge, and pain.

Despite their serious themes, Kojima games are also known for some bizarre and supernatural elements, such as the psychokinetic Psycho Mantis, who reads players’ minds in Metal Gear Solid.

Beyond pushing video games artistically, Kojima has also worked to push video games mechanically. He often tries to pioneer new gameplay ideas and ways for players to interact with the game world.

This is well on display in his most recent title, Death Stranding, which has affectionately been called a “walking simulator”. His games have also been some of the most graphically advanced of any on their respective consoles.

Industry Impact and Legacy

Kojima as video game developer
Hideo Kojima’s games have sold almost 60 million copies up to the present day and have generated many billions of dollars in sales. As well as commercial success, his games have often received very high acclaim and feature prominently on ‘Greatest Game of All Time’ lists. Kojima himself has been recognized for numerous achievement awards pertaining to his achievements.

The huge popularity of Kojima’s Metal Gear series has left a big influence on the industry. The series helped to pioneer many fundamental aspects of the popular stealth genre used in series like Splinter Cell and Hitman. His games’ cinematic qualities and high technical standards also laid the early groundwork for our modern big-budget AAA games.

Finally, Kojima’s works have had huge cultural impacts. The games continue to attract fans today, as well as generate tributes, memes, and parodies online.

Games Credited

Hideo Kojima has worked on many games in various roles, though his most notable are those for which he served as director and writer. These include:

  • Metal Gear (MSX2, 1987)
  • Snatcher (MSX2, 1988)
  • Metal Gear 2: Solid Snake (MSX2, 1990)
  • Policenauts (PC-9821, 1994)
  • Metal Gear Solid (PS1, 1998)
  • Metal Gear Solid 2: Sons of Liberty (PS2, 2001)
  • Metal Gear Solid 3: Snake Eater (PS2, 2004)
  • Metal Gear Solid 4: Guns of the Patriots (PS3, 2008)
  • Metal Gear Solid: Peace Walker (PSP, 2010)
  • Metal Gear Solid V: The Phantom Pain (PC, PS4, Xbox One, 2015)
  • Death Stranding (PC, PS4, Xbox One, 2019)

Conclusion

If you have ever played a Kojima game we certainly don’t need to tell you about his unique and high-quality works. If you haven’t, now you may understand the weight that the name ‘Kojima’ carries in the video game industry.

But why just read about it? If you haven’t already, I highly recommend you try any one of Hideo Kojima’s games – You won’t be disappointed!

The Beginners Guide to Animation Rigging

0

3D rigger job profile
A 3D animation rigger is a member of a visual effects team who helps to prepare 3D assets for animation.

The role combines both artistic and technical skills into a single job that is crucial for productions in film, television, video game development, and more.

If you are looking to start a career in the field of digital media or 3D animation, becoming a 3D animation rigger may be a good choice for you. This job is in high demand at a number of different companies and can be a well-paying career with great growth potential.

In this article, we will explain some of the basics of what a 3D animation rigger does, and the role they play in larger animation projects. And, we will provide you with some tips you need to begin your journey getting started in 3D animation rigging.

What is a 3D Animation Rigger?

When it comes to 3D animation, there are many different steps in turning an idea into a finished project. In order to understand what a 3D rigger does, it’s important to know a bit about the overall process.

Once concept art has been created for a 3D character or asset, it will be the job of a 3D modeler to make the actual object that will be used by animators. But, a 3D model is really only a static object, and before the animators can begin to pose and animate the model it needs to be rigged.

Rigging is best thought of as building the skeleton of a 3D model that will dictate how it can move when animated. In addition to simpler movements such as limbs, a character rigger may also work on things like facial rigging for expressions, rigging clothing, and more.

Rigging is also important not just for animated characters, but for any 3D object that needs to move in a more complex way.

Just like a human skeleton, a 3D rig can become very complex, with many different interacting elements that work together to make movements natural.

For very detailed models, such as those used in an animated feature or AAA video game, there may be hundreds or even thousands of virtual bones and muscles that combine to create natural-looking movements.

Rigging is a very important job because it breathes life into simple static models and allows animators to make use of them. Rigging can be a delicate art to get models to move just right without looking wrong and a rigger needs to have an understanding of both the technical aspects of 3D modeling as well as the process of 3D animation in order to optimize their rigs.

What Skills Do Character Riggers Need?

When you read a rigger job description, you will find that there is a lot that goes into being a successful 3D animation rigger.

On the technical side, a rigger needs a good understanding of how 3D models are made and the many ways that they can be rigged to move as intended. Though rigging is often compared to setting up a puppet it is a much more complex task and knowing what bone to put where as well as how it connects to the underlying model is a very important part of the job.

Riggers also need to be familiar with the software aspects of 3D animation. This includes working with different file types, editing model properties, navigating and working in 3D space, and exporting files properly for use in animation.

More advanced riggers may draw on their technical skills even further and work to develop new software tools to make rigging more efficient or to automate tasks.

There is also a wide range of artistic skills a rigger will be expected to possess. For one, a good rigger needs to know a bit about animation so they understand how their model will be used in the final project.

This goes beyond the surface level as well – animated characters each have their own personalities, often expressed through movement, and a good rig is a foundation for creating these distinctive personalities.

Especially for human characters, a rigger needs a solid grasp of real human anatomy to make sure their characters move like humans, while also having a grasp on the artistic ways that animation can modify or exaggerate real human movements for an intended effect.

As a rigger, you will also need a range of soft skills that will help you thrive in the role. Problem-solving is a big one, as you will rarely get a rig perfect on the first try. It may take many attempts and different approaches to get a character set up just right. Communication also is a very important skill.

The modelers and animators on either side of the rigging process have highly technical jobs of their own, and a rigger will often need to communicate with both to create a solid final product. Collaboration is also a big part of this role, as most animation projects these days involve large teams with many different members all working together.

What Tools Do 3D Animation Riggers Use?

3D animation rigger's digital tools
Animation riggers do most of their work on computers using specialized 3D software. There are a few common programs that are used across the industry, including Maya, 3DS Max, and Blender among others.

These programs often combine elements of sculpting, modeling, rigging, animation, and more into a single package, and as a result, can require a lot of practice to become familiar with Usually, a studio will use a specific software ecosystem in their workflow, and as a rigger, you will often be expected to adopt the program of choice of your employer.

When it comes to 3D software there are a lot of common elements and transferable skills, but a rigger may need to take time to learn multiple different programs to be flexible and versatile to employers. Each of these industry-level programs is generally as capable as the next, but the way that individual tasks are completed may vary greatly.

Animation Rigger Salaries

Because animation rigging is an in-demand job that draws on many refined skills, there is good money to be made if you choose to go into this career. According to the Bureau of Labor Statistics, the median wage in 2021 for special effects artists and animators was $78,790 a year, or about $37 an hour.

Though a rigger’s salary may vary based on where you work, you will also have a lot of room to grow your skills and in turn your salary. Riggers may also be able to move up in their field, becoming managers of a larger team of riggers or overseeing an entire animation department.

In terms of job prospects riggers are already in high demand. In the future, the Bureau of Labor Statistics reports that the field of special effects artists and animators is expected to grow by up to 16% from 2020 to 2030, much faster than other industries. This means there will be a lot of work for talented riggers for a long time to come.

How to Become a 3D Animation Rigger

In the world of digital art, education and tools have become more accessible than ever. This means almost anyone can teach themselves a skill like rigging and potentially get a job doing it.

However, most professionals in the visual effects industry choose to get a formal education in the topic. There are many benefits to going this route.

Rigging Formal Education

For one, you will get to learn at a much more elevated pace from highly qualified instructors at your school. You can also learn a lot about the industry as a whole from these courses, and you can develop important relationships that can help when networking later in your career. Finally, studios will be much more likely to consider you for employment if you have a degree in a relevant field.

Many colleges offer courses in areas like digital art, digital media, and animation that would be applicable to a job as a rigger. Some may even offer courses or specialization in rigging. If you plan on getting into a more technical visual effects job like rigging, it may also help to take some courses related to computer science, physics, and mathematics.

Programs in visual effects and rigging can range from a year up to a full 4-year program. Beyond formal education, you may also choose to look for an internship or apprenticeship to gain more real-world experience working in the industry which will help a lot in finding a job down the line.

One important tool for any artist when it comes to finding a job is your portfolio. Your degree might get your foot in the door, but nothing proves your skills better than a solid demonstration of your skills. Most jobs won’t even let you apply without a portfolio. Keeping an up-to-date portfolio of your strongest work will be one of the best ways to stand out among your peers.

Rigging Job Hunt

When it comes time to find a job, there are many different companies you can apply to.

Most obvious would be animation studios or game developers, but many media and production companies will have their own VFX team that may be in need of a rigger. You don’t need to move to California to work in visual effects: opportunities exist nearly all over, not to mention studios that may offer remote job opportunities.

With your degree and a strong portfolio, it’s only a matter of time before you find a job that’s suitable for you.

Continue to hone your skills as a rigger and you can go very far in the industry. Good luck!

Use GDevelop to Make Your Own Games

0

GDevelop: game development made easy
With GDevelop, anyone can easily get started making and even selling their own games – and you won’t need to write a line of code!

GDevelop is designed to be easy to use, but you may still have some questions, and that’s why we’re here. In this article, we’ll tell you everything you need to know about GDevelop to take you from beginner to game developer.

What is GDevelop?

In short, GDevelop is a full-featured game development tool. It includes everything you need to create real video games in one package, including tools for scripting, animation, visual effects, sound design, and more. GDevelop is compatible with Windows macOS, and Linux, and can even run in a web browser.

The program is lightweight enough to run on nearly any computer but powerful enough to create almost anything you can imagine. Once your game is done, GDevelop lets users publish their games to PC, Web, and Mobile platforms.

GDevelop is designed for ease of use with a particular focus on beginner game designers and education. Because GDevelop is designed with beginners in mind there are a lot of tutorials online that can help you learn game development without getting too technical like other programs. There is also an active online community of GDevelop users who can help newcomers with tips and ideas.

Despite its accessible nature, GDevelop is capable of producing full games in a range of styles. Rather than requiring a high level of technical knowledge, your only limit in GDevelop is your imagination.

GDevelop is a great choice for anyone interested in getting started in game development. There’s a range of included tools designed to make the process as easy as possible, but the program also provides options to dig a little deeper with things like custom javascript.

Once you’ve outgrown GDevelop and want to move on to other software, many of the skills and concepts you’ve learned will carry over into other game development environments.

GDevelop can be downloaded free on the official project website, or you can begin trying it out directly in your web browser.

GDevelop is also an open-source project, meaning the code is freely available for anyone to view, modify, and contribute to. Though it may not mean much to a beginner, open-source software is loved by software developers for its freedom, customizability, and for the committed devs who often provide their hard work for little or no cost.

Open source projects are a community effort, and If you love GDevelop you can help the project by reporting bugs, writing a tutorial, contributing your own code, and more!

Create A Game Without Programming Skills

There are a lot of ways to develop a game nowadays, but many require programming skills. After all, games are made of code aren’t they?

The problem is that learning code can be complex and can take a long time to master. This technical requirement can often stifle creativity and discourage newcomers to game development

Luckily, GDevelop offers an option for making a game without needing to know how to code at all. But how is that possible?
Every Gdevelop game is made up of objects. These objects represent the different characters, items, and everything else in your game.

Users create games with objects, and special code pieces called events and behaviors. Behaviors tell an object how to act, while events decide how objects interact with each other as well as the rules and logic of your game. Events and behaviors are premade and don’t require any coding, though users still have options to customize these events and behaviors.

Though you aren’t coding when you use events and behaviors, these building blocks also teach some important concepts used in game development, such as variables, game loops, and logic flow.

To make it easy for users to create, GDevelop comes with a whole suite of pre-made behaviors that are useful for different game types. You can also easily import community-made behaviors you can find online. In addition to the included behaviors, GDevelop allows you to create your own behaviors using the same kinds of events you use to create your game logic.

If you’re looking for more control, GDevelop lets users who have skills in programming insert blocks of custom code into their games. Going even deeper you can customize your games and even GDevelop itself down to the finest detail thanks to GDevelop’s open-source code.

This means that highly advanced users can modify almost anything in the program, and even contribute to GDevelop’s development by submitting their code.

The result of all these interconnected features is a system that is perfect for learners. Beginners can make games using premade components, and as they get more advanced they can scale the complexity of their games along with their growing skills.

That means you can get started developing games now without the intimidating technical skills needed for other programs, and have room to grow your games along with your skills over time.

Games Made with GDevelop

There are hundreds of games created by GDevelop users that should help you get an idea of what the program can do. Because Gdevelop games can be seamlessly published online, new users can easily explore the creations of others.

The official repository of user-made Gdevelop games can be found at https://liluo.io/. Some of the highlights include Spell Unka by Spexxy, a classic arcade-style game in the vein of Dig-Dug, and //TO:DO a game that simulates GDevelop’s own interface, challenging users to complete the game themselves using their knowledge of GDevelop events.

GDevelop Beginner Tutorials

A quick search online can help you find hundreds of GDevelop tutorials on any topic or mechanic you want to learn about. However, before you can use the more advanced tutorials, you should probably start with something basic to help you learn the ropes.

Luckily, the developers of Gdevelop provide plenty of high-quality tutorials that will help guide you right from the start. Check out Gdevelop’s ‘How to Get Started’ tutorial series before anything, and once you’re done you’ll have the skills to create your very first game! If you’re more inclined to read a tutorial, check out the GDevelop wiki for many more great resources.

GDevelop FAQ

What you need to know about making games in GDevelop

Can you make 3D games with GDevelop?

GDevelop is primarily intended to be used for creating 2D games. Technically the program can handle very basic 3D objects, but this will be more suited to advanced users. If you are looking to do more in 3D, you should perhaps try a more advanced 3D capable program like Unity or Godot.

Is there a GDevelop forum?

There is an official Gdevelop forum that you can find here. On the forum, you will find various discussions on GDevelop topics, and you can create your own thread to pose questions to the community. There is also an active GDevelop subreddit where users can also share ideas and look for help.

Can I sell my GDevelop game?

Many game development tools are offered for free but have strict rules when it comes to making money from your creations.

Luckily when you use GDevelop to make a game, you are free to distribute it in any way you like without needing to worry about royalties. For example, you could sell your GDevelop games on Steam, or on the Google Play store for android.

If you are interested in other ways to monetize your games, you could also implement microtransactions or ads into your GDevelop games, both of which the program is capable of.

How does Gdevelop compare to Construct 3?

GDevelop is not the only game development tool on the market, and its closest competitor is Construct 3.

In terms of features, these two programs are closely matched. Both are primarily 2D game engines, and both offer visual scripting engines with optional javascript coding.

Both GDevelop and Construct include options to extend their functionality with extensions and addons. Both programs work on a number of systems and within browsers, and can publish games to PC, web, and mobile.

So what makes GDevelop different?

For one, GDevelop is completely free while Construct will cost you a license fee, though a limited free edition exists. However, you can’t monetize your Construct games unless you have a license. Another big difference is that GDevelop is an open-source program, which means more freedom for advanced users, but may also result in slower development and less stability.

Overall, the two programs are very similar and both are good options for making your first game. Both are free to try so if you are interested you could always try each and see which one you like best.

What is Cel Animation and How to Use It?

0

Cel animation tools and resources
If you’re of a certain age, there’s a good chance you grew up with a lot of classic cartoons, but you may have noticed that animated films these days just don’t look the same as they used to.

You could chalk this up to nostalgia, but it also comes down to the classic techniques in animation that simply aren’t used anymore in commercial films.

The most famous of these classic techniques is known as cel animation.

Despite being the mainstay of the animation industry for decades, cel animation has fallen out of favor for a number of reasons, though many still hold a soft spot for this classic style.

Just what exactly is cel animation and how does it differ from how films are made today? Is it possible to make your own? And, will there ever be a cel animation resurgence? Read on to find out.

How Does Cel Animation Work?

Despite what it may sound like, cel animation is not something you might watch in a science class. Rather, cel animation is a classic animation technique that is known for its distinctive colorful and hand-drawn look, as well as its painstaking and patient testing process.

The foundation of cel animation is the cel itself. Short for celluloid, these clear sheets are where an animator paints, frame by frame, the characters and objects that comprise an animation.

The great benefit of using clear cels is the ability to layer multiple animated elements with a static background, saving drawing time and increasing consistency in animation.

These efficiencies are part of why cel animation was so prominent in the early animation industry.

Once a scene is completed, animation cels are layered on top of each other and photographed in succession using a special top-down rig.

These photos would then be transferred to a film strip where the animated scene can come to life. A feature-length film created using cel animation can easily have hundreds of thousands of individual animation cels, making the whole process extremely time-consuming.

In essence, the process of cel animation is very similar to modern techniques used in 2D animation but done with analog tools rather than digital inking and painting.

The History and Evolution of Cel Animation

Evolution of cel animation
The invention of cel animation is commonly attributed to Earl Hurd and John Bray, who patented the process in 1914. Though prior animation techniques existed, they were less consistent and unsuited to longer more complex films.

The invention of cel animation would go on to revolutionize the animated film industry and became the standard process in what became known as the Golden Age of animation and beyond. In this period, animation reached never before seen heights, both in short films and features – nearly all of which were made using cel animation.

Despite its popularity, cel animation wasn’t without its issues. For one, it still required thousands of frames to be hand-drawn, necessitating dozens of talented animators per film. There was also the need to store and keep organized these thousands of frames.

And, most critically, the initial material used in creating cels also happened to be highly flammable, which could be a problem under the hot lights of a film studio. Though these issues were manageable, there was a lot of room for improvement.

Like so many industries, animation was forever changed by the advent of modern computers. Not only did computers make 2D animation easier and more efficient, but they also opened up a whole new world of 3d animation. With clear benefits over cel animation and computers becoming more accessible, the old technique’s days were numbered.

By the early 1990s, the first 2D feature films created entirely with computers were released, and in 1995 Pixar’s hugely popular Toy Story cemented 3D animation as a major contender to traditional animation.

Cel animation existed alongside 3d animation for a number of years, but over time it has all but disappeared from commercial film productions.

That being said, cel animation isn’t entirely forgotten today. For one, the era of cel animation created some of the most beloved and endearing animated characters of all time that continue to delight audiences today. In addition, it cemented the fundamentals of 2D animation that are still being used, albeit with digital tools.

The classic look of cel animation is still being emulated as well, with 3D techniques like cel-shaded animation, as well as throwback animation as seen in works like Cuphead. Finally, the thousands of cels produced for animated films have become hot collector’s items.

Fans of classic films today can literally own a piece of their favorite films in the form of a cel, and cels from famous films have fetched tens of thousands at auction, showing the clear affection that many still hold for this style.

Though some hobbyist animators continue to try their hand at cel animation, it is unlikely that major studios will revive the style, mostly due to high costs. But who knows? In a world where vinyl record sales are up and retro-style video games are all the rage, there may still be hope for a cel animation renaissance!

Specialty Tools Used in Cel Animation

There are a number of specialty tools used in cel animation, and each is crucial to the final product.

Firstly, there are the cels themselves. These sheets are clear so animation assets can easily be stacked on a background. Animation cels also have punched holes along some edges to help line them up when painting and photographing.

Next, you have the paint used to actually create the animation. In the traditional method, a specific type of vinyl paint was used because it would bond well with the cels and prevent flaking, however, even basic paint will work in a DIY approach.

One of the most important tools in cel animation is the one you don’t actually see in the final product: the camera. A cel animation camera rig, also known as a multiplane camera, is generally mounted looking down upon the frame.

Underneath is a single surface or a series of transparent surfaces where multiple cels can be layered. This entire rig helps to keep the camera in place and all the frames lined up to create a consistent product.

Another useful tool in cel animation is the dope sheet. This sheet help animators keep track of the many different elements in a scene so they can keep their thousands of cels organized and make photographing more efficient.

What It Takes To Become A Cel Animator

Strong animation skills required for cel animation
Just like today, animators in the cel era were highly skilled artists who often had to undergo much training in order to create the best possible work. The first and most important thing you need to be a cel animator is obviously strong animation skills.

You also need to be a competent painter who is able to recreate characters accurately hundreds of times. A cel animator should also have an in-depth understanding of the abilities and limitations of the medium in order to make the most of it. For example, scenes and even individual characters in a cel animation may be made up of multiple layers.

Animators need to understand how to draw in a way that makes everything line up right in the end.

How to Start Making Cel Animations

Cel animation is a bit of a lost art and the traditional tools can be hard to come by these days. However, with a DIY spirit, you can certainly still make cel animations today.

If you can’t find true animation cells, transparency sheets like the ones used for presentations will do the trick, and these can be found at most office supply stores. Paint too is easy enough to find. Almost any camera will do, as long as it can be securely mounted above your frame. Alternatively, some animators choose to scan their cels and composite them digitally.

The traditional process can be a very long and intensive process., so you may want to attempt it only if you are very confident in your animation skills.

If you love the cel animation look but don’t care for the classic process, you could also fake it digitally. Any 2D animation software can come close to the cel animation look, but you can even take it a step further. Consider using hand-painted backgrounds, frame-by-frame animation, limited layers, and maybe a film grain effect if you really want to replicate the classic look.

Films Created Using Cel Animation

Almost all 2D animation produced from the 1920s to the 1990s used cel animation. In fact, a large number of the great films you may study as an aspiring animator were probably made using this technique.

The most famous examples of cel animation are probably the works of Walt Disney, who worked to push the medium to new levels in the early years. Films such as Cinderella, Fantasia, and Alice in Wonderland are still high water marks for the style.

Other prolific American studios included Warner Bros (of Looney Tunes fame), Hanna-Barbera (The Flintstones, Spiderman), Paramount (Popeye, Felix the Cat), and countless others.

Japanese studios also have produced many famous works using cel animation, such as Astro Boy, Akira, the early works of Studio Ghibli, and more.

Online Resources, Tutorials, and Videos

All About Epic Games

0

Working at Epic Games: A Dream Job?
People ‘in the know’ when it comes to modern video game technology understand precisely who Epic Games is.

Operating one of the largest games in the world (as far as popularity and number of accounts are concerned) in Fortnite, this company records over 350 million accounts and an impressive total of 2.5 billion friend connections.

Epic Games Company Overview

The company was established in 1991 and founded by Tim Sweeney, its current CEO. They are located in Cary, North Carolina, and boast more than 40 offices located around the world.

Epic Games is also responsible for developing Unreal Engine, which has become responsible for many of the world’s best games as well as numerous projects in film and television.

Yet, that’s not where Epic Games’ story ends, because the technology they have developed is also used in manufacturing, architecture, the automotive industry, and numerous simulation technologies.

It may be oversimple to equate Epic Games today with Fortnite, but that misses out on a significant value in the technology they bring to the world, including the world beyond gaming.

Current Location

Currently, Epic Games is breaking ground on a brand new world headquarters in its base hometown of Cary, NC. Having purchased the old Cary Towne Center (a mall that had been in decline for years) and torn down a significant portion of it, Epic Games will soon be heading to its new state-of-the-art facility in the heart of one of the hottest real estate and business markets in the world.

How Many People Are Employed at Epic Games?

Globally, Epic Games employs 6,356 people at 23 locations around the world. In 2020, annual revenue was $5.1 billion, with $4.3 billion in total funding for the company.

Working for Epic Games

The company attracts a high number of developers, designers, producers, artists, engineers, publishers, business managers, and operations specialists, among numerous other positions.

Work Environment

While it’s difficult to provide an overview of the climate and culture of a place to work that is relevant to everyone, the general consensus with regard to working at Epic Games is that the company offers a solid benefits package and seeks to be diverse in an age of diversity and inclusion.

However, one of the key components that many current and former Epic Games employees noted was that there was a lack of work and life balance. In other words, long hours and not much time to be able to devote to family, friends, and even recreation were one of the biggest issues people had with the company.

A few individuals complained about the management, arguing that even though they worked hard and provided value to the company, micromanaging was a problem, as was what may be perceived by some as an unfair promotional structure.

Indeed.com also noted that the main viewpoint or perspective from employees at Epic Games was that it still seemed to be operated like a startup company, rather than one with thousands of employees and billions in revenue.

Operating Like A Start-Up Company, A Major Concern?

A startup company often requires early team members (aka. Employees) to put in long hours and there’s generally a lot of pressure to meet hard and fast deadlines and achieve adequate funding levels to continue growth.

When a major company that’s been around for more than 30 years tends to operate like a startup, there is a serious risk of burning through valuable team members, which aligns well with the overall comments and reviews of past and current staff members.

Positions at Epic Games

There are numerous positions available at Epic Games, likely due to both expansion opportunities and turnover. Every time an employee steps into a role at a highly frenetic and demanding company, stress increases and that tends to lead to burnout, which causes men and women to seek employment elsewhere.

The experience as well as the overall benefits of having Epic Games on one’s resume can certainly provide the kind of balance a young, ambitious individual needs to dive into these opportunities.

The core disciplines at Epic Games include Art, Engineering, Production, Design, Publishing, and Business/Operations. While openings change as they are filled and others open up, currently, this is a list of some openings at Epic Games:

  • 3D Animator – Cinematics
  • 3D Marketing Artist
  • Account Manager
  • Account Transactional Specialist
  • Agency Development Manager
  • Analyst AW Senior – Animation
  • Analytics Producer
  • Animation Programmer (MetaHumans)
  • Apple Platform Programmer
  • Art Direction
  • Art Producer
  • Associate Producer – Creative Events
  • Audio Gameplay Programmer
  • Automation Software Development Engineer in Test
  • Backend Engineer
  • Business Affairs Associate
  • Cinema FX Manager
  • Insights Manager
  • Lead Animator
  • IT Engineer
  • HR Coordinator
  • Marketing Analyst
  • Music Supervisor
  • Online Programmer
  • Outsource Manager
  • Partner Marketing Manager
  • Physics Programmer
  • Platform Engineer
  • Product Designer
  • Product Director
  • Senior Data Analyst
  • Senior Environment Artist
  • Senior Financial Analyst
  • Senior Level Designer
  • Senior Mobile Engineer
  • Senior Technical Writer
  • Senior VFX Artist
  • Web Developer

There are literally hundreds of job openings along these lines. The core talents and skills that Epic Games seeks out involve passion. Their focus is on creating a positive, collaborative environment. They also hold high value in doing what’s right for their community and are constantly seeking to raise the bar, as they put it, on engine and game development.

How Much Do Epic Games Workers Make?

A common theme many currents and former employees of Epic Games have mentioned is solid compensation and benefits. Although it’s difficult to narrow the focus on how much money Epic Games workers make because there is a wide range of positions available within the company as well as its partners’ organizations.

It is clear that for a person seeking fair pay for the position they would be applying for, Epic Games stands at the upper echelon of companies paying their employees fair wages.

It’s not merely the hourly rate or salary a person is paid that encapsulates the entirety of compensation, but also the benefits, which may include medical coverage as well as other packages (including fitness, work environment, and more).

The average salary at Epic Games was $92,506 per year for an Associate Producer and up to $192,097 per year for a Senior Programmer.

How Hard Is It To Get A Job At Epic Games?

That all depends on the position one would be aspiring to obtain at a place like Epic Games. Because of their longevity, reputation, focus on development, and their Unreal Engine’s success and usage around the world, it stands to reason that getting hired at Epic Games will be relatively challenging.

More people tend to want to work at valued companies like Epic Games, so with more competition, it means more resumes the hiring managers will be exposed to, more interviews with prospective new hires, and then it’s the smallest details that ultimately become the biggest factors in hiring.

Pros and Cons of Working at Epic Games

For the most part, Epic Games is a great place to work, one that will give a personal experience and a boost to their career. Pay and benefits are strong, and while there has been frustration among former staff at some managerial issues, the main ‘con’ would have to be the workload.

To work at Epic Games means devoting a great deal of time and energy to whatever they demand. For someone who is ambitious and seeking to climb the ladder of success, this won’t be an issue, but for a family-focused person or someone for whom free time is still vital, this can be a challenge.

How to Get a Job at Epic Games

If you are looking to land a coveted job at Epic Games, it’s much like many other top-tier employers. Here are some of the steps you’ll want to follow:

Step 1: Put together a solid resume.

Even if you don’t have extensive experience just yet, that won’t necessarily disqualify you from working there. Make sure your resume highlights the skillset that Epic Games is seeking for the position you want.

It’s advisable to hire an experienced resume specialist to help yours stand out from among the hundreds and (often likely) thousands of resumes they will receive.

Step 2: Apply Online

Apply to Epic Games via their website. You can see a list of all currently available positions here.

Step 3: Practice, Practice, Practice

Practice your interview skills. Have a friend or family member practice an ‘interview’. While you won’t know the questions Epic Games might ask, the goal here is to help you relax for the real interview.

Step 4: Do Your Research

Find out everything you can about Epic Games. The more an applicant knows about the company, including its history, community outreach, etc., the more impressive they become during the interview process.

Step 5: Showcase Your Passion For Gaming

Have passion. If you don’t have passion for this type of work, they’ll know. What you want is to make sure your passion for gaming and development shines through on the phone (when they contact you for an interview) and during the coveted interview.

Step 6: Never Give Up

If you don’t get an interview, seek a smaller company to build your experience.

Working at Epic Games can be a career opportunity, and it’s a great place to work if you love video games.

How to Use Kaboom.js to Make Video Games

0

Video game development using Kaboom
Kaboom.js is one of the best Javascript platforms for beginners, allowing you to create fun and simple video games without requiring extensive coding knowledge.

This article will discuss Kaboom.js in greater detail, who might be interested in creating a Kaboom game, and how you can create your very own Kaboom video game.

What is Kaboom.js?

Kaboom.js is a JavaScript library that allows you to create games quickly. You can use the library to easily create scenes, add layers, build sprites, handle actions and collisions, add key events, and so much more.

One of the great benefits of Kaboom.js is that it lets you dip your toe in game development. You do not need to be an advanced coding expert to get started. It allows you to test your coding skills without becoming demotivated or disheartened if something doesn’t work.

Unfortunately, many game development processes require you to read pages and pages of documentation, but Kaboom.js is so simple in comparison.

Who Would Be Interested in Kaboom.js?

Kaboom.js is perfect for anyone interested in game development, but specifically those relatively new to the concept.

While other game developers might be able to tackle detailed coding requirements or easily debug code issues using their knowledge, Kaboom.js makes all of this much simpler and offers a platform that makes game development accessible for novices.

Say goodbye to hours and hours of trying to identify the right link of code for a small in-game movement, and instead, focus on fast-action game design, creating games quickly and easily.

The platform is set up to allow anyone to try their hand at building their first game, and the discussion forum allows game designers to ask their peers for help or assistance on their game if they get stuck.

This is an excellent choice for any novice or underconfident game developer to try.

How to Build Popular Games on Kaboom.js

How to build video games in Kaboom
If you are looking for some inspiration on how to build a Kaboom video game, check out some of these examples of video game classics:

Flappy Bird

Flappy bird rose to prominence on the iPhone, and Android phones in the late 2010s, with players hooked on its combination of competition and casual gameplay.

The game’s concept is simple, click the mouse or tap the phone screen to flap the bird’s wings, keeping it in the air and avoiding obstacles.

There are no levels on Flappy Bird. Instead, the round continues until you eventually fail, and you get given a score.
This game is highly addictive and helped shape the mobile and desktop gaming landscape for the future.

How to build Flappy Birds

Zelda

One of the most beloved franchises of all time, Zelda is a well-known name in the gaming community across the world.

But what if you could make your very own Zelda game? Follow the instructional video linked below, and you can become Link and create your quest to save Princess Zelda.

You might even want to reverse the roles and make it, so Link needs to be saved for once.

How to build Zelda

Snake

An absolute classic. You haven’t lived if you didn’t experience Snake on a Nokia32 back in the day. Relive the good old days by creating your very own snake game, coding an ever-growing snake, and items for him to eat along the way.

How to build Snake

Asteroids

Head to outer space with the 1970’s gaming classic Asteroids. Rollback the years to when people played this game at their local arcade and recreate this timeless classic.

How to build Asteroids

Mario

Everybody’s favorite Italian plumber is back. Only this time, you create the story! Instead of following Mario through premade worlds that you might find too easy or too challenging, create your own Mario platformer.

You might even want to go a step further and get some of the other characters added in.

How to build Mario

Doodle Jump

Like Flappy Bird, Doodle Jump rose to prominence as a continuous platformer on desktop and mobile devices.

On Doodle Jump, your character is constantly bouncing, and you move him across the screen from left to right to land on a new platform, higher up than the last.

Be careful, though. As your doodle jumper reaches new heights, the platforms below will disappear.

How to build Doodle Jump

Pros and Cons of Using Kaboom

Kaboom focuses its attention on a few basic gimmicks which allow users to create fast-paced games of building and destruction. Unfortunately, questionable construction limits the program somewhat, but there is certainly some fun and creative opportunity on Kaboom.

The Pros

  • Simple chaotic fun
  • Genuine tension on both sides of the table
  • Coloring makes blueprints easier to follow
  • An excellent choice for new game-builders who are keen to learn more

The Cons

  • Catapults don’t work as they should
  • Limited variation of tower types
  • If you use the wrong table, the game won’t be ruined

Who Would Benefit From Learning Kaboom?

Kaboomjs.com is a fantastic website for anyone trying their hand at creating a game from scratch for the first time. Perhaps you already have some coding experience in different fields, or maybe you have no experience, but you are looking for somewhere to start; Kaboom.js is an excellent option.

Beginners will benefit from a website that provides:

  • Easy-to-follow guidelines.
  • Handy tips and tricks.
  • A forum full of other game developers to ask questions and get advice while building your Kaboom game.

While it might be a little tricky for beginners to get the hang of it. You’ll quickly come to realize that this is one of the simplest and easiest game development platforms to grasp.

If you input some incorrect code, don’t worry! The game will not break like on other game development platforms. Instead, you will be able to go into your code, tweak it until you are happy with the result, and move on to the next aspect.

Kaboom.js is the perfect platform for beginners and anyone who wants to improve their Javascript skills.

How to Get Started With Kaboom

Woman developer building games in Kaboom

Create Your Scene

The first thing you need to do is create your scene. In Kaboom, every action and reaction occurs within a scene. Consider the scene as the aspect of the game that controls how it behaves and what it will look like.

Start by creating a “main” scene, one to which you can add other components as you go.

Finally, you need to call the scene at the end, using start.

Load your Sprites and Create a Player

Once the scene gets set, it’s time to begin drawing your sprites. In-game design, a sprite is a term used for a two-dimensional bitmap. This bitmap is integrated into a bigger scene, often within a 2D video game.

Don’t worry. You can pull premade sprites from sites like Imgur.

To allow you to load your sprites our build your players, you need to call the load sprite method, input our sprite image information, and create the player within the scene.

If all of your coding is done properly, you should see your chosen sprite appear on your screen.

Once this occurs, right-click on the index.html file, select copy the path, and open it within a new browser.

In the new browser, you should add basic behavior for your sprite. You can do this by getting your initialized sprint and adding the body component.

This method allows your sprite to begin behaving normally, such as getting impacted by gravity, for example.

Once you have called this method, you will know it has worked, as your sprite will begin falling off the screen.

Kaboom Key Events

Next, it’s time to focus on Kaboom key events. Using the body method, you can provide your sprite with abilities like <move> and <jump>. You can call each of these body methods in combination with chosen key events to ensure your sprite shows even more interesting behavior.

Giving your sprite movement skills also helps them move through your level.

Common Kaboom Questions


Is Kaboom JS good?

The main benefit of trying Kabook is that it is easy to use for beginners, which makes it ideal for anyone who wants to try their hand at designing games.

How Do You play Kaboom?

Simply head to kaboomjs.com to get started with your game.

Kaboom Key Takeaways

In summary, Kaboom.js certainly has some kinks that should be ironed out. But this platform is an excellent starting point for any game-development fanatics.

If you are relatively new to coding and you want to try a coding platform that has easy-to-follow guides, discussion forums, and plenty of possibilities, then Kaboom.js is the right choice for you.